Cloud Cookie Cutter Trio
Created 1 months ago
Description
A trio of classic cloud cookie cutters for dough, clay, or fondant. The base profiles use overlapping 2D circles to ensure the inner curves remain completely smooth without sharp internal vertices. The structural walls build outward from the exact outline, so the interior shape is perfectly preserved when cutting.
Design Parameters
- Blade: 15 mm tall and 0.4 mm thick (exactly one perimeter line on a standard 0.4 nozzle).
- Wall: 12 mm tall and 1.2 mm thick for rigidity.
- Brim: 1.5 mm tall with a generous 4 mm outward flange to spare your palms.
- Sizes: Roughly 60 mm, 90 mm, and 120 mm across. To scale them up or down, adjust the
scale(1.5)multiplier on the profiles—because the scaling happens on the 2D shape before the cutter is generated, the blade and wall thicknesses will safely remain fixed at 0.4 mm and 1.2 mm.
Images
More like this
Explore more in Kitchen & Bathroom →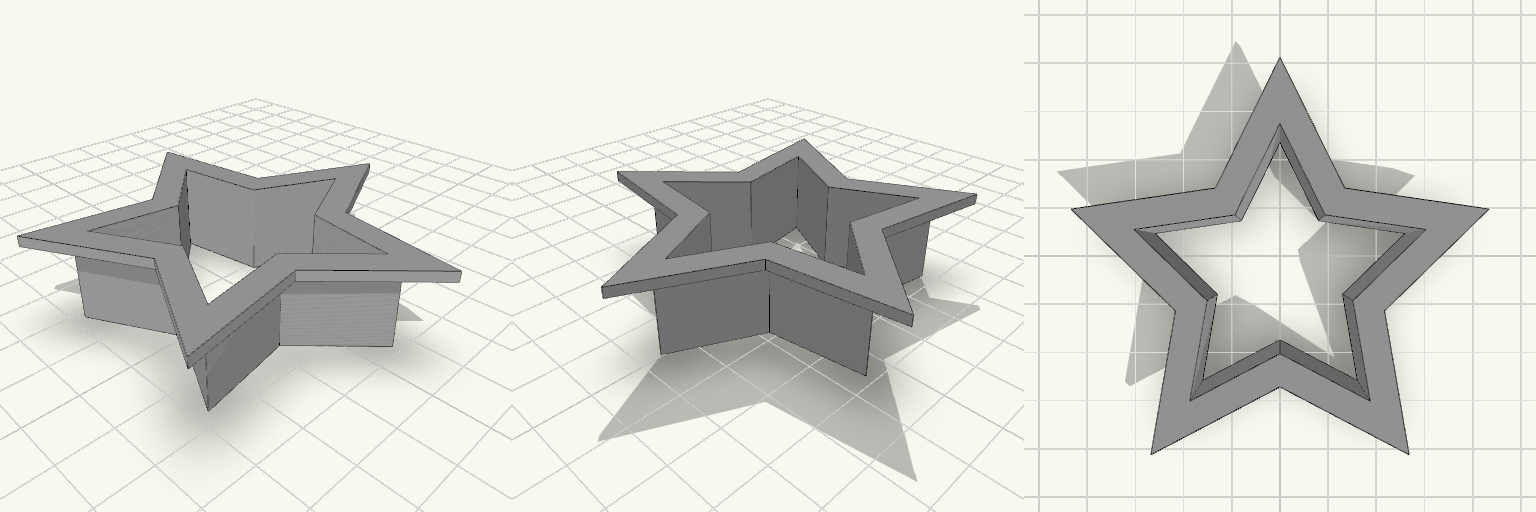
5-Point Star Cookie Cutter
A five-point star cookie cutter, 60 mm tip to tip, with 18 mm tall walls and a wide flat flange around the top edge. The flange gives a thumb a broad surface to press on, so pushing the cutter through dough doesn't put a thin edge against your skin. Remix hooks The values below are the ones worth changing. Everything else follows from them. Star size (R, 30 mm): This is the tip radius, so 60 mm across. Change it to scale the star. At about 40 mm across or less, check that the flange doesn't crowd the inner corners. Point sharpness (ratio, 0.5): This is the inner radius divided by the outer radius. Lower values like 0.4 give spikier points. Higher values like 0.6 give a chubbier, more rounded star. Very spiky points are harder to press out of dough. Flange (flangew 4 mm, flanget 2 mm): Widen it for a more comfortable press, or thicken it for more stiffness. Rounding the flange's outer corners is an easy variant if you want it softer on the thumb. Wall (wall, 1.2 mm): This is about three nozzle widths on a 0.4 mm nozzle. Thinner cuts more cleanly but is more fragile. Thicker is sturdier but pushes dough aside more. Height (H, 18 mm): Lower it for thin cookies, or raise it for thick dough or a deeper grip. Pairs well with A set of different sizes, made by changing R and nothing else. Other shapes that reuse the same wall and flange values, such as a heart or circle, so the whole set feels the same in the hand. A matching stamp or embossing plate that fits inside the cutter opening. Printing Print it flange-up or flange-down on the bed. Flange-down needs no supports, and the thin walls grow straight up from the flange. Use food-safe filament if you want to use it on dough.
90mm Can Ring Pull Lever Tool
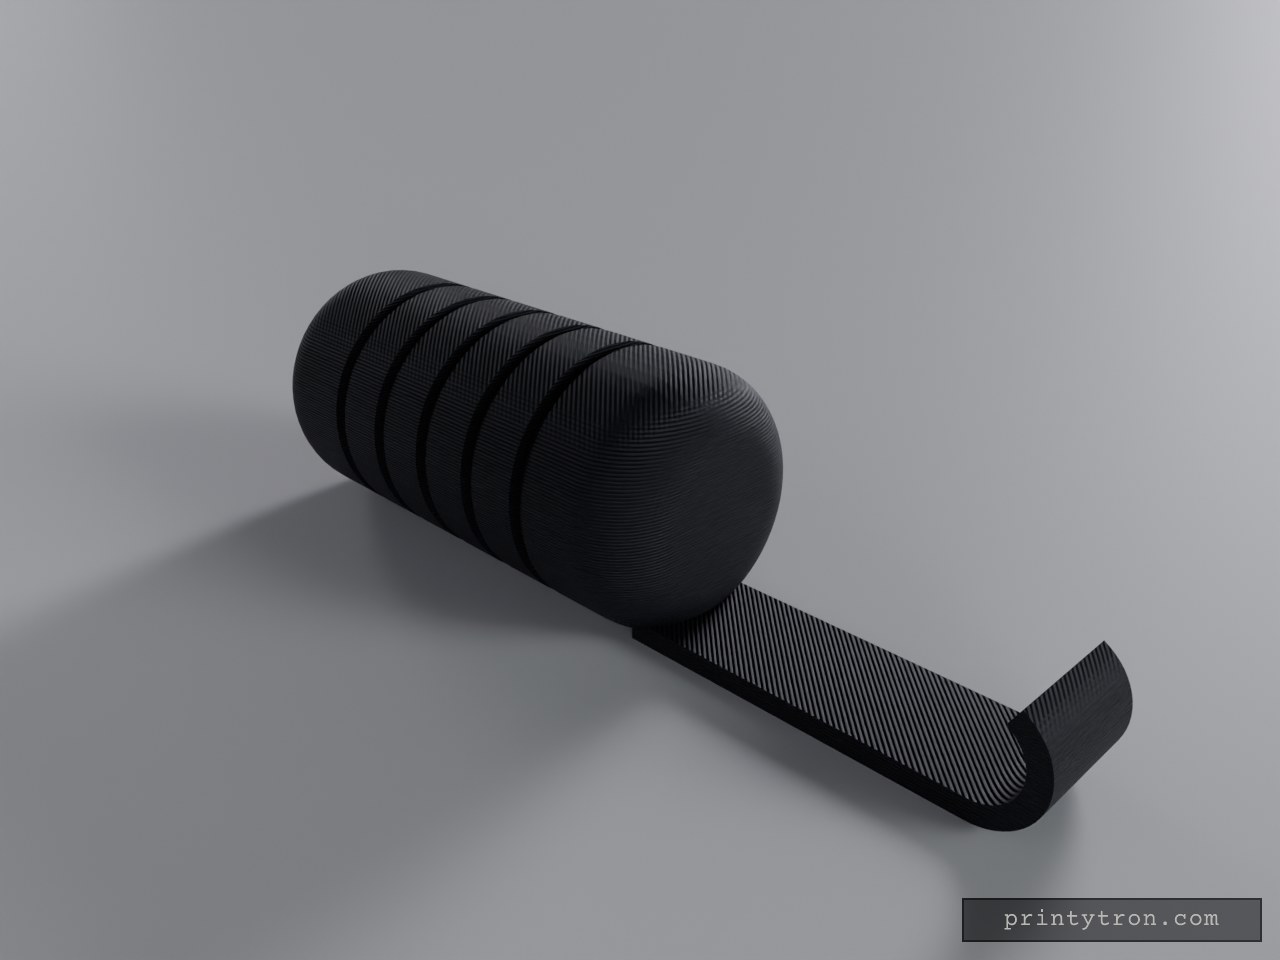
A hand-held lever for lifting can ring pulls without using fingernails. A thin curved hook slides under the ring, and a thick barrel handle gives the leverage to lift it. Suited to anyone with limited grip strength or short nails. Specifications Overall length: 90 mm Handle: 25 mm diameter barrel, about 55 mm long, with ring grooves for grip Hook blade: 2 mm thick, 12 mm wide, curved upward at the tip to slide under the ring Construction: single welded body, printed as one piece Orientation: print with the handle and blade lying flat on the bed. Supports may be needed under the barrel's curved underside. Material: PETG or PLA. PETG is preferred for the 2 mm blade because it flexes before it breaks. Use: ring-pull cans such as beans, soups and drinks Notes The 2 mm blade is the thinnest part. Print it with at least 3 perimeters for strength. The grip grooves are shallow, so the handle stays easy to wash.
Bag Holder Stand with Spring Clamp Ring
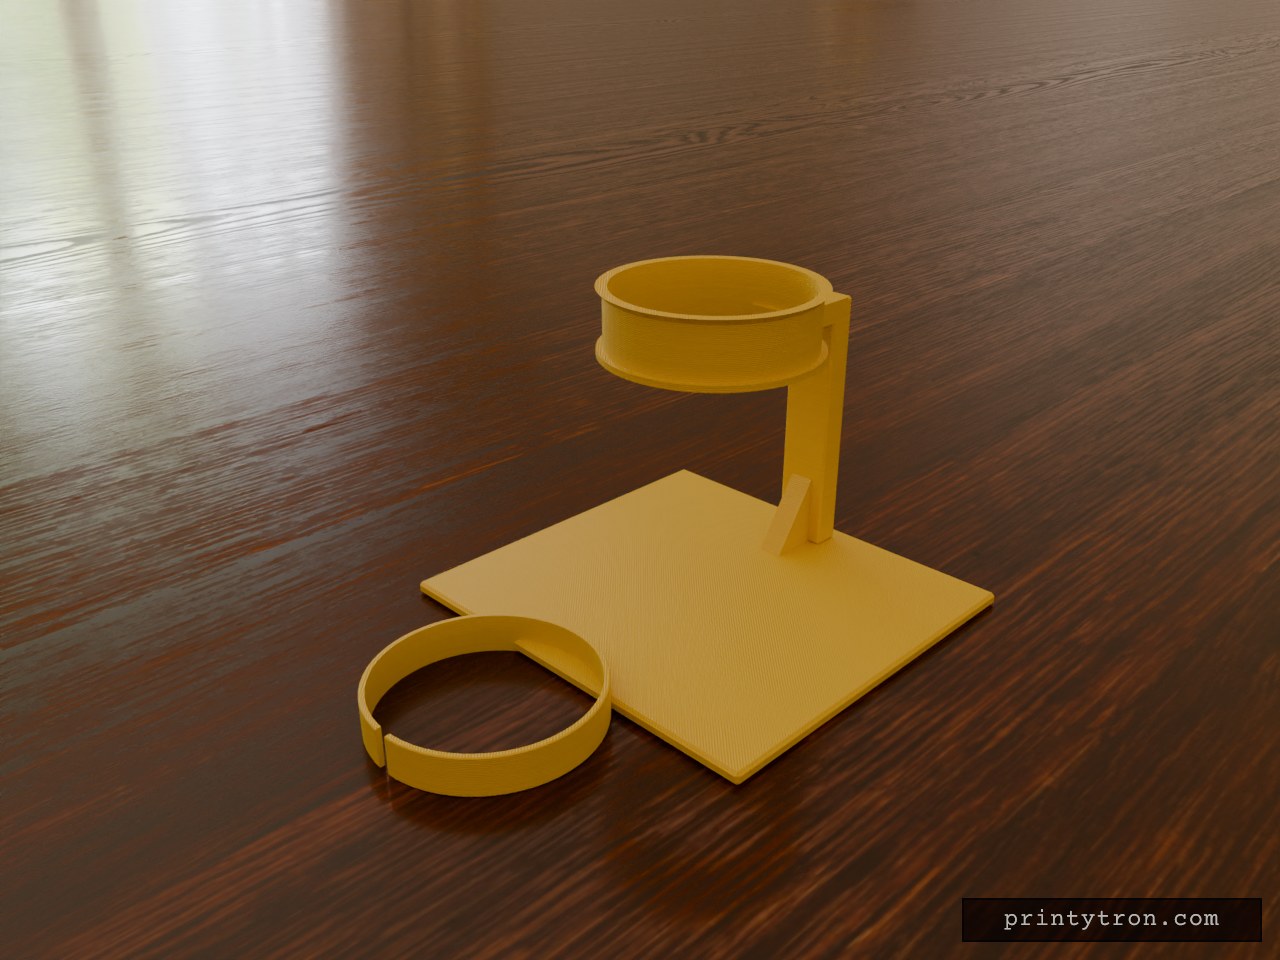
A freestanding stand that holds a freezer or piping bag open so both hands are free for filling. The bag mouth is pulled through a 120 mm inside-diameter ring, folded over the outside, and secured with a separate split clip that grips the folded rim all the way round. The base is a wide 270 × 250 mm plate with a rear post, so the stand resists tipping when a bag is loaded. The ring sits at the top of the post, 165 mm above the plate, with a flared lip to keep the fold from slipping off. Ring: 120 mm inside diameter, 40 mm tall, on a short arm off the post Base: 270 × 250 mm, 8 mm thick, chamfered edges, with a gusset on the post Clip: split spring ring, 24 mm tall, with finger tabs for opening Parts: base with post, ring, and clip are colour-labelled; the clip prints separately Material: PETG suggested for the clip so it keeps its spring To use, pull the bag mouth up through the ring, fold it down over the outside, then snap the clip over the fold. The ring height suits bags up to roughly 165 mm long; longer bags will rest on the base. The clip's grip has not been test-printed, so the gap may need adjusting for thicker or thinner bag film.
Brim — Flat-Bottom Rounded Bowl
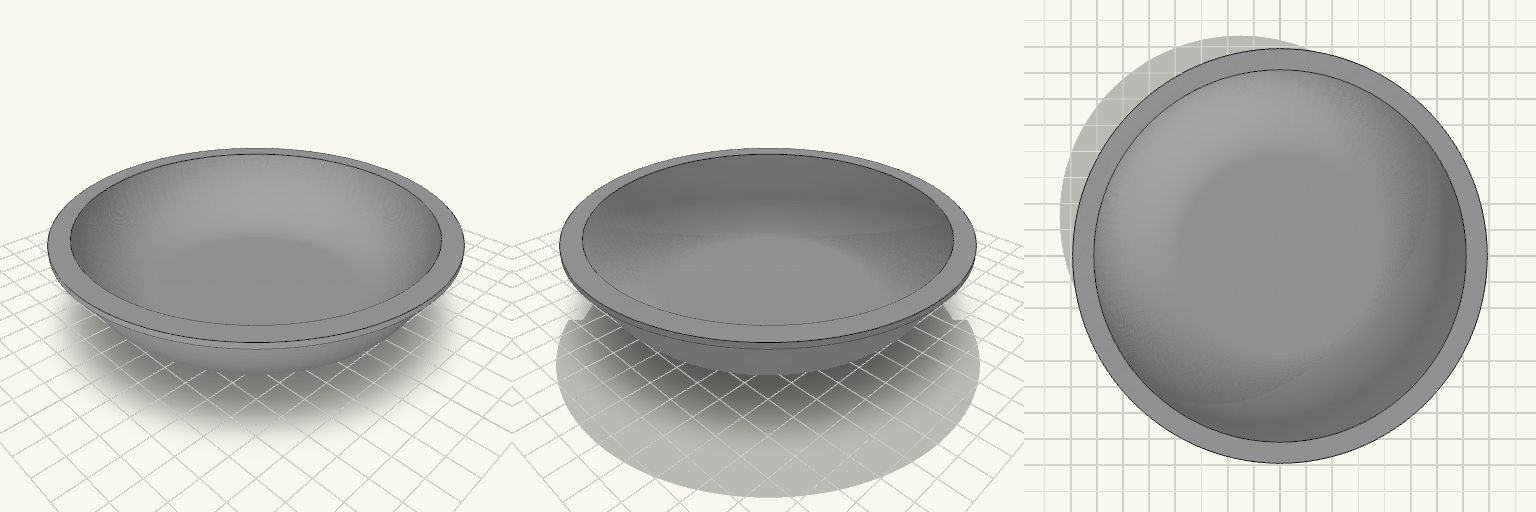
Brim is a shallow serving bowl with a flat 75 mm base that sweeps up in a smooth curve to a wide, flat rim. The flat base keeps it stable on a table and easy to print without supports on the bottom face. Dimensions Outer rim diameter: 138 mm Rim width: 5 mm, flat and horizontal Opening inside the rim: 128 mm Depth: 30 mm Flat bottom diameter: 75 mm Wall thickness: 2 mm throughout Print notes Print rim-up or base-down; base-down is the natural orientation. The steepening curve near the rim may need supports or slow cooling.
Caneca porta-latas com alça em peça única
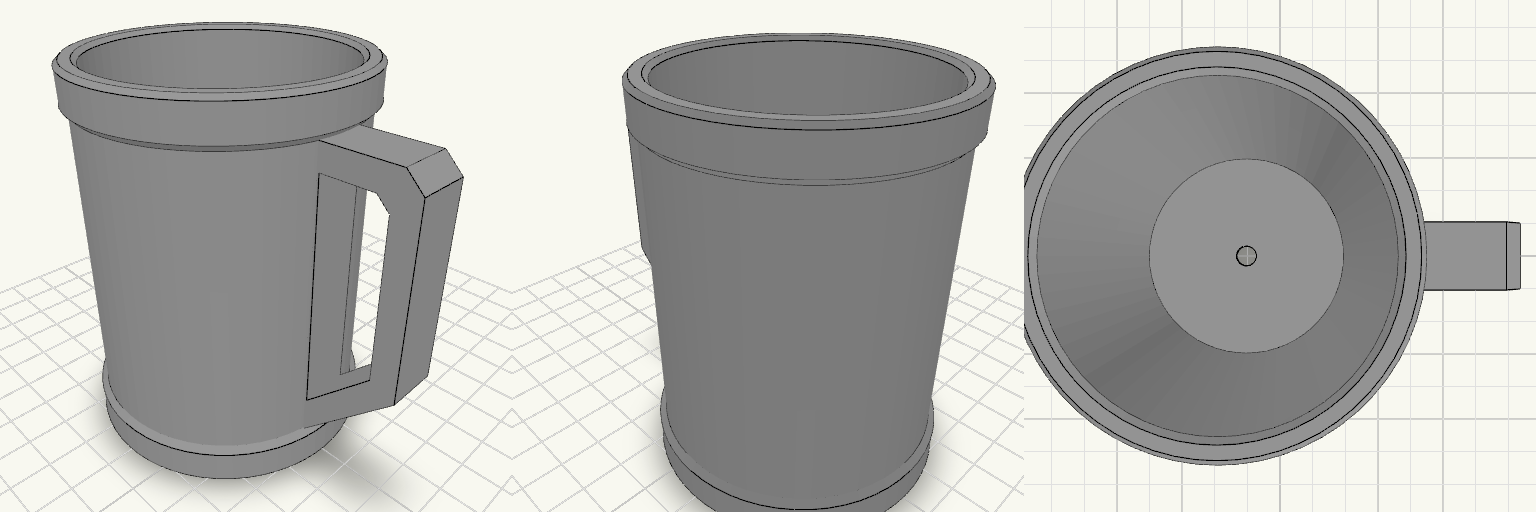
Caneca porta-latas em peça única para latas de 269 ml. O corpo cilíndrico tem Ø externo de 64,6 mm e 90 mm de altura, com cavidade reta de Ø 58,6 mm e 87 mm de profundidade útil. A parede tem 3,0 mm e o fundo 3 mm; um furo de Ø 6 mm no centro do fundo alivia o ar, e um chanfro de 1 × 45° na borda interna do topo guia a entrada da lata. Duas faixas salientes de Ø 67,6 mm reforçam o desenho: uma na base, de Z=0 a 10, e outra no topo, de Z=80 a 90, ambas com chanfros de 45°. Entre Z=10 e Z=80 o corpo é liso, para receber adesivo. A alça fica em um dos lados, com 12 mm de largura e avanço até X=54. Ela sobe até Z=80, encostando no início da faixa superior, e mantém topo plano com barra vertical na ponta; a diagonal de 45° fica embaixo. As barras do perfil têm cerca de 6 mm, e as quinas externas e as do furo são chanfradas a 45°. O vão interno acompanha o perfil, com teto em Z=74; o chanfro na quina ajuda a impressão, mas o trecho ainda forma uma ponte e pode pedir suporte. Altura total: 90 mm Pegada na mesa de impressão: 87,8 × 67,6 mm Cavidade: Ø 58,6 mm por 87 mm de profundidade útil Parede de 3,0 mm e fundo de 3 mm Furo de alívio de ar: Ø 6 mm Faixas salientes: Ø 67,6 mm, base de Z=0 a 10 e topo de Z=80 a 90 Alça: 12 mm de largura, até X=54, topo em Z=80, barras de cerca de 6 mm e chanfros de 45° Vão da alça: teto em Z=74, com chanfro na quina; pode pedir suporte sob a ponte
Sentinel Cylinder Candy Dispenser
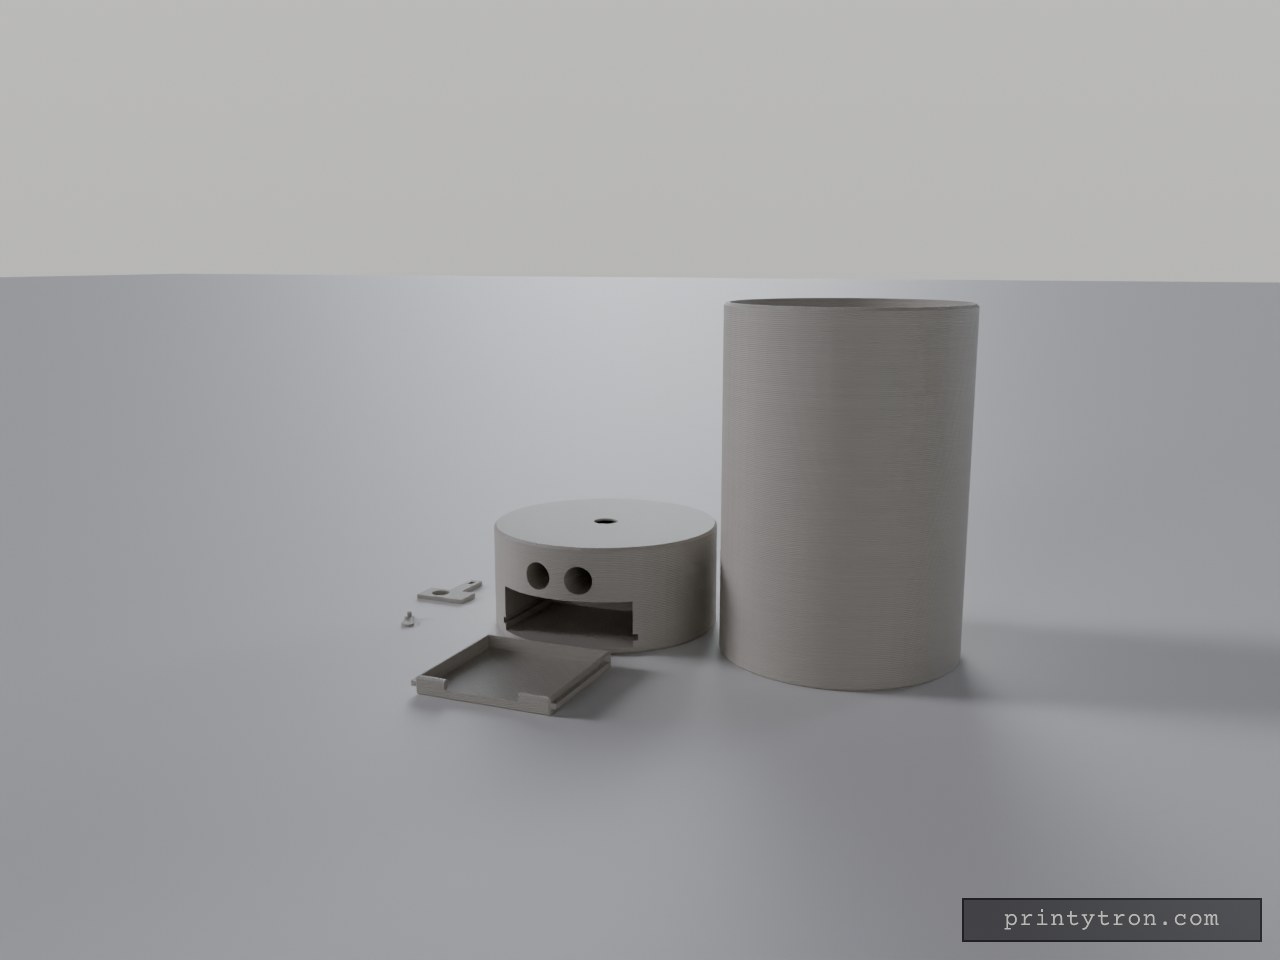
A candy dispenser with a watchful streak: the body stands as one straight 105 mm cylinder from foot to rim, and two eye holes on the front give it the look of a sentinel standing guard over the opening below. Those eyes are through-holes opening into a pocket for an ultrasonic sensor, so a wave of the hand can trip the servo below the gate slot and slide the gate open, dropping candy into the hand opening below. That opening is a genuine hole cut clean through the front wall, about 63 mm wide and 21 mm tall, sized for an average hand rather than a large one. A retractable catch tray rides on side rails on its floor, just under the outlet, with a low notch at the front so you can scoop the candy out with your fingers. A cone at the floor of the candy cylinder funnels the sweets down to the outlet, and the whole thing stands 200 mm tall — a tall column that holds a serious load of candy while keeping a modest footprint on the counter. All five pieces are laid out separately on the plate, each oriented for printing without supports. The candy cylinder is silk white, the base pink, the catch tray light blue, and the gate slider and servo horn white. The printed parts Base Housing — a round 105 mm pink body, 48 mm tall. The hand opening sits at the front bottom, open through the wall. The two sensor eye holes sit just above it, also cut clean through, so the sensor has a clear line of sight out the front. The servo bay is sized for an SG90: the servo slides in from the back wall, shaft up, with its mounting ears resting in a slot cut into the housing. A round recess above the body lets the shaft boss sit so the horn runs flush under the gate. The wider body leaves room to open the sensor pocket to full size. Candy Cylinder — a 105 mm open cylinder, 152 mm tall, in silk white, with roughly 3 mm walls, flush with the base so the body reads as one uninterrupted column. A wide, shallow cone at its floor feeds the outlet; everything above it is candy storage. Gate Slider — a flat 26.3 × 33.8 × 2.3 mm white plate that slides sideways in a slot across the outlet, just under the candy cylinder floor. A solid bar covers the outlet when closed; a 12 mm hole lines up when open. Its tail has a slot for the servo horn pin, and about 60° of servo sweep moves the gate roughly 13.6 mm — enough to fully open or close the outlet. Servo Horn — a 10.1 × 13.3 × 3.2 mm white horn with a pin that rides in the gate’s tail slot. The servo below the gate slot turns it to shift the gate. Catch Tray — a 64.5 × 57 × 7.5 mm light-blue tray that slides into the hand opening on two side ribs set in matching grooves, and sits directly under the outlet. Its back and side walls are about 1.5 mm thick, the front wall carries a low scoop notch, and the front edge stands about 1.5 mm proud of the housing as a pull tab. The rails are 3 mm wide with about 0.5 mm clearance in the grooves. There is no end stop, so the tray pulls out completely; a small snap bump would add a stopping point. It prints flat and needs no supports. Before you print The servo pocket matches an SG90: about 12.6 mm wide and 23 mm tall, with a mounting-ear slot. The sensor pocket and eye holes are undersized for an HC-SR04. Open those up while keeping the outside dimensions, or plan on a smaller sensor. The wall between the servo bay and the hand opening is thin, about 0.6 mm at final scale. Print the base with extra perimeters. The 152 mm cylinder is a tall, thin-walled tube — print it upright as laid out, and print it slowly. Check that it fits your printer’s height; if not, split it into two stacking rings. The gate slot has only about 1.4 mm of material above it before the cylinder floor, and the wall between the hand opening and the sensor pocket is thin. Print the base with extra top layers and extra perimeters for strength. Keep the gate plate flat on the bed so it slides cleanly through its slot, and keep the tray flat so its side rails and walls stay square. The base and candy cylinder have no locating lip, so glue or tape them together. Test-fit a real SG90, ultrasonic sensor and tray before final assembly. Wire the sensor and servo to the same controller. When the sensor sees a hand, the controller turns the servo to open the gate, waits, then turns it back to close. Remix hooks — cap the 105 mm cylinder with a lid, open the outlet up for faster dispensing, open the sensor pocket to HC-SR04 size now that the round base has the room, widen the hand opening, deepen the catch tray, add a small snap bump to give the tray a stopping point, or add a shallow funnel lip around the outlet for easier loading.