Plumbing-Aisle Hex Adapter, 3/8 to 1/2 Inch
Made by a Guest
Created yesterday
Description
A pocket-sized piece of the plumbing aisle: a low, wide hex body gripped in the middle, a slim 3/8-inch male thread dropping from the bottom and a 1/2-inch male thread rising from the top. A 10 mm bore runs clear through all three sections, so it steps one thread size up to the other while staying hollow end to end. Total height is 40 mm, and the hex is pared down to an 8 mm slab — still a real wrench flat between the two threaded ends, but a much stubbier profile than a stock fitting.
Design notes
- Bottom end: 3/8-inch male thread, 17.1 mm across at 18 TPI and 14 mm long.
- Top end: 1/2-inch male thread, 18 mm long at 14 TPI.
- Hex body: 8 mm tall, 27 mm across the flats.
- Both threads are modelled straight rather than tapered, so wrap them with thread tape — the seal comes from the tape, not the thread form.
- Printed polymer won't hold rigid PVC working pressure; keep this to low-pressure lines or display use.
- Prints as a single piece with no assembly.
Pairs with
- Low-pressure runs that need to step a 3/8-inch port up to a 1/2-inch fitting
- Tight spots where the shorter hex body clears a surrounding boss or housing
- Jigs, test rigs and spigot adapters where a hollow through-bore matters
- Props and display builds that want a believable threaded joint
Images
More like this
Explore more in Workshop & Tools →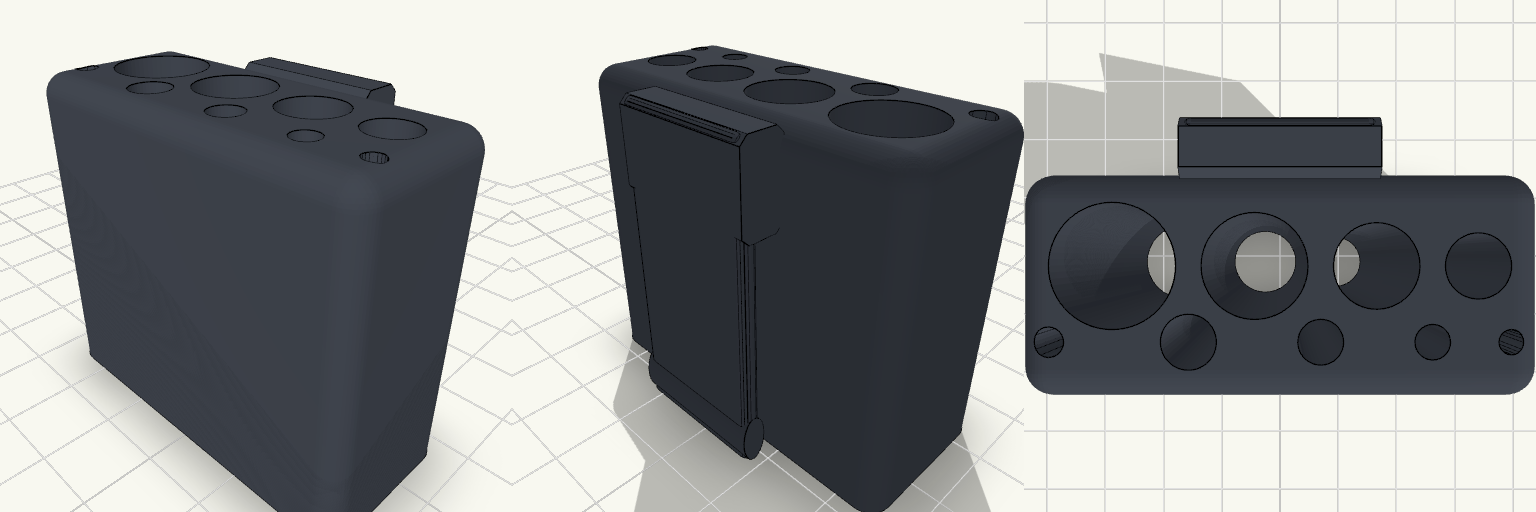
Two-Row Honeycomb Hex Key Pouch
A two-row pouch for nine hex keys from 2 to 12 mm. The back row holds the four large holes and the front row holds five small ones, set into the gaps and ends of the back row so the pouch stays compact. A belt strap runs up the back, and an oval hook at the bottom holds the pouch against the belt. Remix hooks Wall thickness: 1.6 mm between neighbouring holes. This drives the row spacing and the overall depth. Hole list: back row 12.5, 10.5, 8.5 and 6.5 mm. Front row 5.5, 4.5, 3.5, 3 and 2.5 mm. Each has 0.5 mm of clearance. Height: 45 mm. Increase it for longer keys. Strap: 20 mm wide and 2.5 mm thick, standing 3 mm off the body. Lower hook: an oval rod, 6.8 × 3.4 mm, that attaches to the strap only. It leaves about 2.5 mm of clearance to the body. Pairs with: the single-row variant, if you want a slimmer pouch that is wider.
Sharpie to 11mm Plotter Adapter
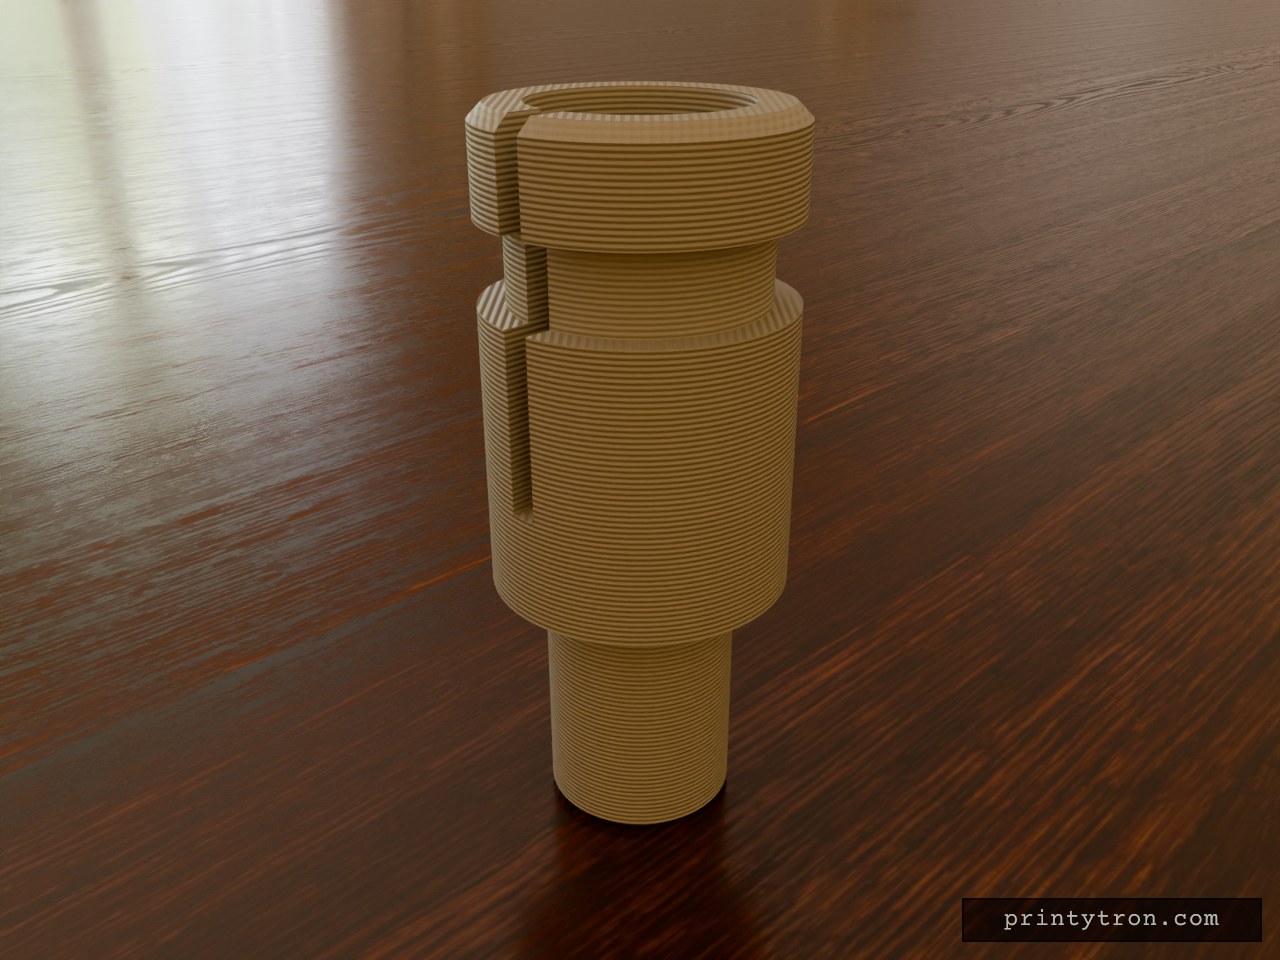
A sleeve that lets a standard Sharpie sit in a pen plotter holder built for 11 mm pens. An 11 mm neck, 15 mm long, goes into the plotter's holder. A 26 mm collar above it, 17 mm outside diameter, holds the marker in an 11.5 mm bore. A 1.6 mm slot runs down the front of the collar, and a zip-tie groove is cut around it. Cinching a tie closes the slot and squeezes the Sharpie in place. The bore is sized for the 11.3 mm grip section. The 13 mm cap shoulder will not pass through it, so the marker loads from the grip end and the shoulder stops above the collar. Remix hooks Bore diameter (11.5 mm): The main fit parameter. Go up 0.2 mm for a looser slide, or down for a tighter grip. This also changes how far the slot has to close. Slot width (1.6 mm): A wider slot gives more clamp travel but less wall contact. A narrower one gives a stiffer, gentler grip. Neck diameter and length (11 mm, 15 mm): Match these to a different plotter holder. Other pen sizes only need the neck changed. Tip passage (7 mm): Widen it for fat-tipped markers, or narrow it to give the tip more support. Collar length (26 mm): Shorten it to save material. Lengthen it for a steadier hold on a long marker. Zip-tie groove (4.5 mm wide, 3 mm deep): Widen it for wider ties, or add a second groove for two-point clamping. Pairs with Any Sharpie-style round marker near 11.3 mm. 2.5 mm or 3.6 mm zip ties, depending on groove width. Variants for other markers: change the bore and keep the neck the same.
Smooth Vacmaster to Shop Hose Adapter
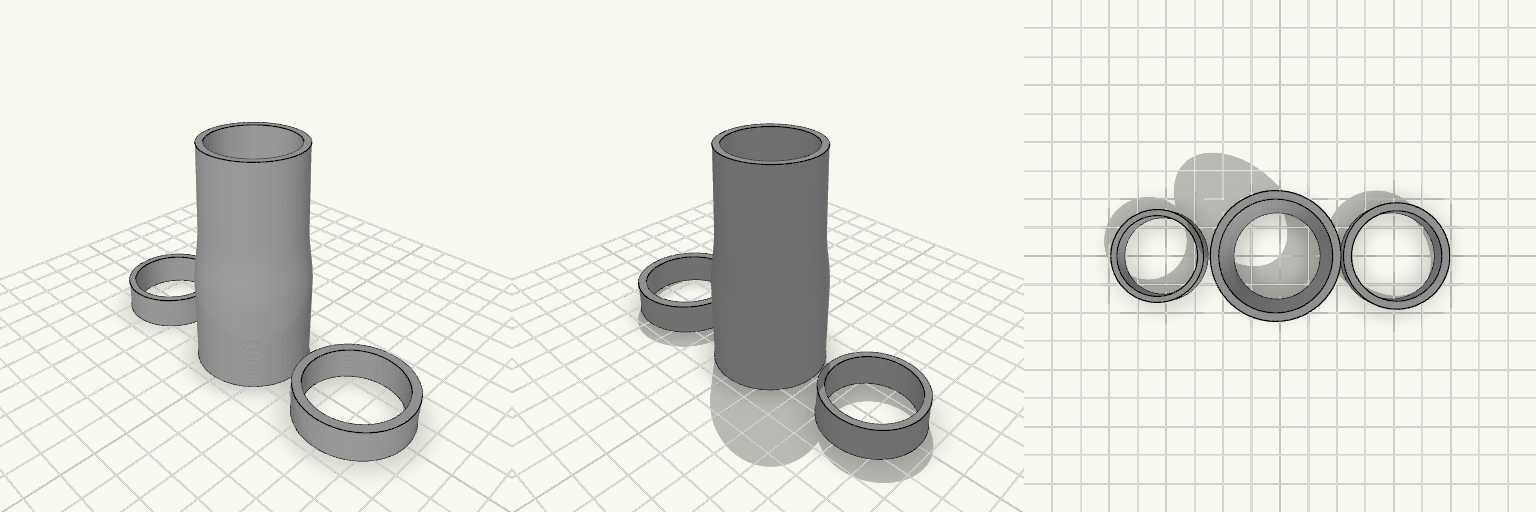
A smooth two-section adapter that joins a Vacmaster 2.5 gal shop vacuum port to a shop hose. One end is a tapered male spigot that locks into the vacuum port; the other is a tapered female socket that wedges the hose in place. The inner bore and outer surface blend through smooth transitions, so there are no hard ridges in the airflow path and the outside has a continuous profile. The adapter stands 70 mm tall and 35.5 mm across the base, so it prints upright with the wide socket end down on the plate — no supports needed. Two 10 mm test rings sit flat on the plate beside it so both fits can be checked before printing the full adapter. With the rings included, the set spans about 113.5 mm across the plate. Hose socket (bottom, 35 mm): bore tapers from 30.5 mm at the mouth to 29.5 mm, wedging a 30.16 mm hose partway down. Vacmaster spigot (top, 35 mm): outside diameter tapers from 32.5 mm at the base to 31 mm at the tip, with a 27 mm bore. Smooth transitions: the inner bore narrows from the 29.5 mm socket to the 27 mm spigot bore along a smooth curve over about 20 mm; the outer body flows into the spigot over about 22 mm. The old ledge and shoulder are gone. Internal stop: the junction is a gentle cone rather than a hard shelf; a 30.16 mm hose still wedges in the socket taper before reaching it. Test rings: the socket ring has a 35.5 mm OD and a bore from 30.5 mm to about 30.2 mm; the spigot ring tapers from about 31.4 mm to 31 mm OD with a 27 mm bore. Both are 10 mm tall and print flat. Print settings: PETG or ABS, at least 5 perimeters for an airtight seal, 100% infill or walls only, no supports. Because shop-vac ports vary between units, print the two included test rings first, then commit to the full 70 mm adapter.
Rough Cone light diffuser
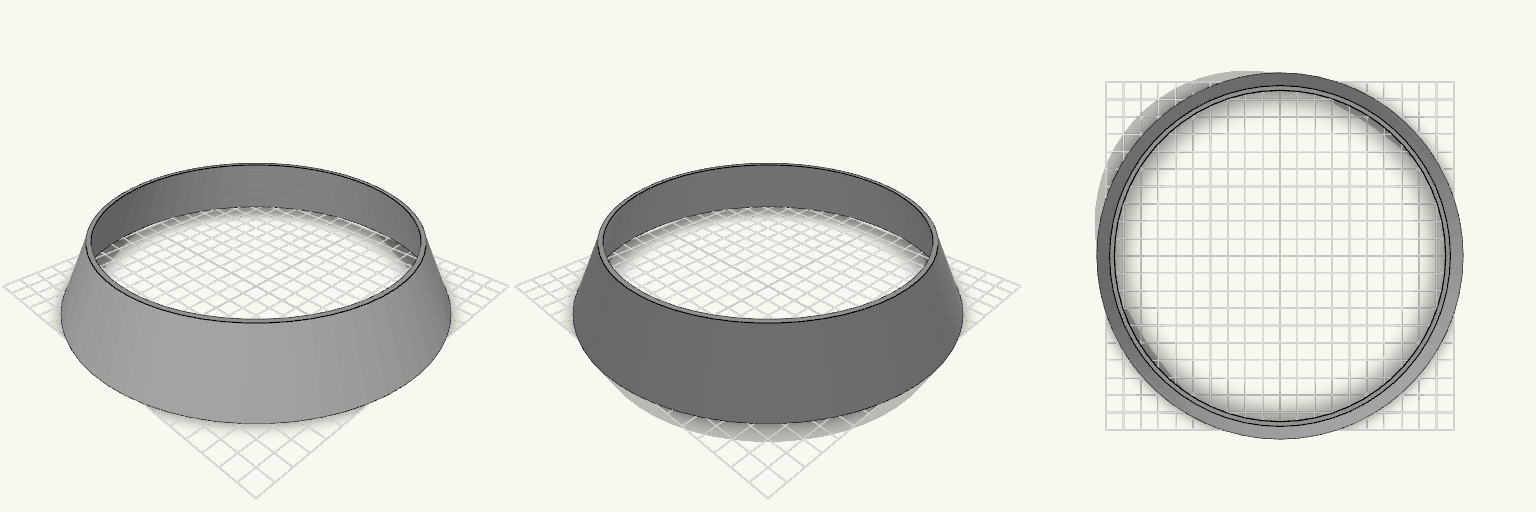
Two round openings that don't share a diameter is the small annoyance that stops everything downstream — the hose won't seat, the liner won't sit, the funnel wobbles instead of funnelling. This is the plain fix: a hollow truncated cone, wide at the bottom and narrow at the top, open at both ends so anything poured or pushed through it passes straight through instead of bottoming out. Fit dimensions Bottom outer diameter: 210 mm Top inner diameter: 170 mm Overall height: 38 mm Wall thickness: 2.4 mm Both ends open — it is a sleeve, not a capped cone Printing It prints as one piece sitting on its 210 mm base, so no assembly and no separate parts to line up afterwards. The wall is thin enough to stay flexible in the hand but still hold its shape, and the shallow flare means the outer surface is not a long unsupported overhang. Check the 170 mm top against whatever has to pass through it before printing — that is the number that decides whether the part works; the 210 mm bottom decides whether it sits down properly.
M8 Threaded Rod Clamp, 3 Inch
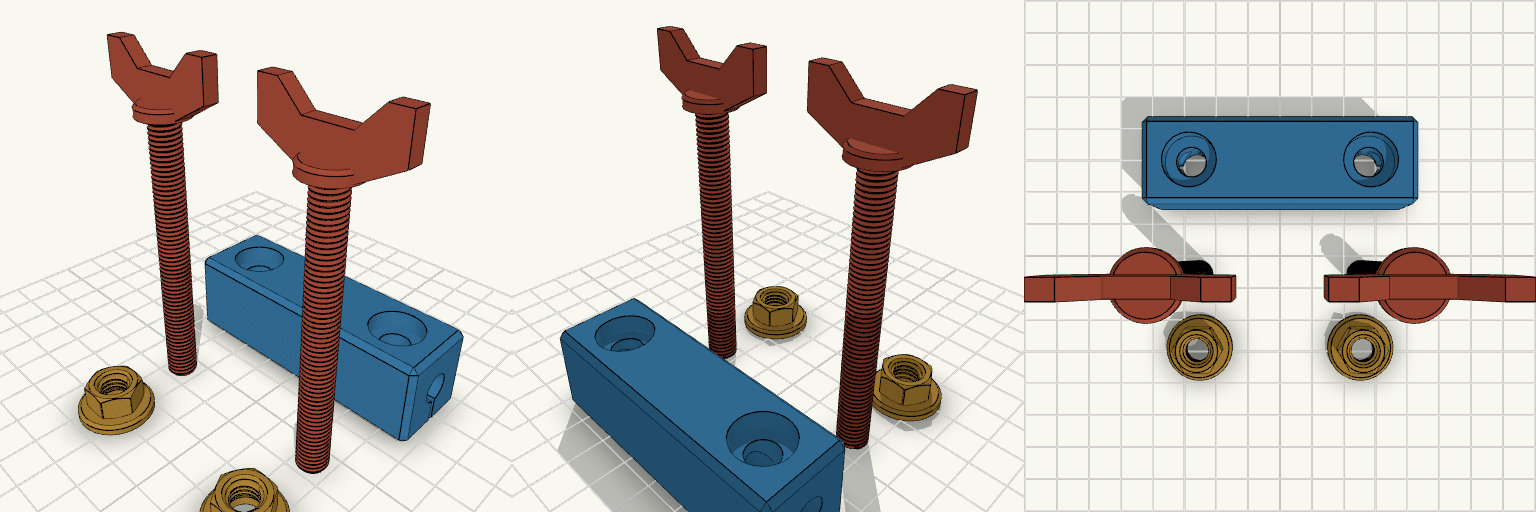
A clamp block that squeezes onto M8 threaded rod, with matching M8 × 1.25 wing screws and flanged nuts. The block is 76.2 mm (3 in) long and 24 × 24 mm in section, with an 8.4 mm bore running its full length; a slit through the lower half is closed by two screws at 25 mm either side of centre. It replaces a bought rod clamp and a pair of hand-tightened screws — everything on the plate is printed and then fitted together. Thread and fits M8 × 1.25 mm coarse thread throughout: the screw shank is threaded 8 mm, the nut bore carries the matching thread with 0.15 mm clearance so the pair turns together off the plate. Fine-pitch M8 × 1.0 will not match. M8 threaded rod, studding or 8 mm plain shaft in the bore. The bore is 8.4 mm with no give — measure your rod before printing. The flange pad under each nut has an 8.6 mm clearance hole, so only the hex section engages the thread and the pad bears flat on the work. The two bolt holes sit 50 mm apart (25 mm either side of centre, ±25 mm). Ordinary steel M8 × 1.25 hex screws and nuts will seat in the same counterbores and pockets if you would rather not print the hardware — though steel nuts come without the clamping pad, and the head counterbores are sized for hex heads, not the printed wing collars. What is on the plate Clamp Body — 76.2 × 24 × 24 mm, flat on the bed in the middle. M8 Screws — two off, each a 3 in (76.2 mm) threaded shank under a wing head: a round collar with two tapered wings, 34 mm tip to tip and 4 mm thick, about 92 mm overall. Laid out head up; the wings are flat plates, so if your slicer allows, stand each screw on its head with the shank up for the cleanest wing and thread. M8 Nuts — two off, each with a round 20 mm pad on its underside, 2.3 mm thick with a chamfered edge. Pads face the work when fitted. All pieces are separated with no overlaps, ready to print flat and assemble after. Check before printing The thread pair: matched at M8 × 1.25 but not test-fitted. If the printed screw and nut run too tight or too loose, the 0.15 mm clearance is the number to change. The screw length: a 3 in shank in the 24 mm block leaves about 52 mm of thread projecting below the body. Check that projection clears whatever sits under the clamp, and that the 34 mm wing head has room to turn once the thread is engaged. The 24 mm square section sets how far the clamp stands off its mounting surface — check it clears, and allow the 2.3 mm pad under each nut where the pad bears on the work. What it does not fit It is a rod clamp, not a nut clamp: it will not grip an M8 nut or bolt head in the bore. It does not suit 10 mm or 12 mm rod, and the bolt holes take M8 only — smaller screws will not seat in the counterbores or the nut pockets. Fine-pitch M8 × 1.0 hardware will not thread into these nuts. The pads are round, not square, and are sized only for the M8 pockets in this body.
SpoolScope — Filament Remaining Gauge
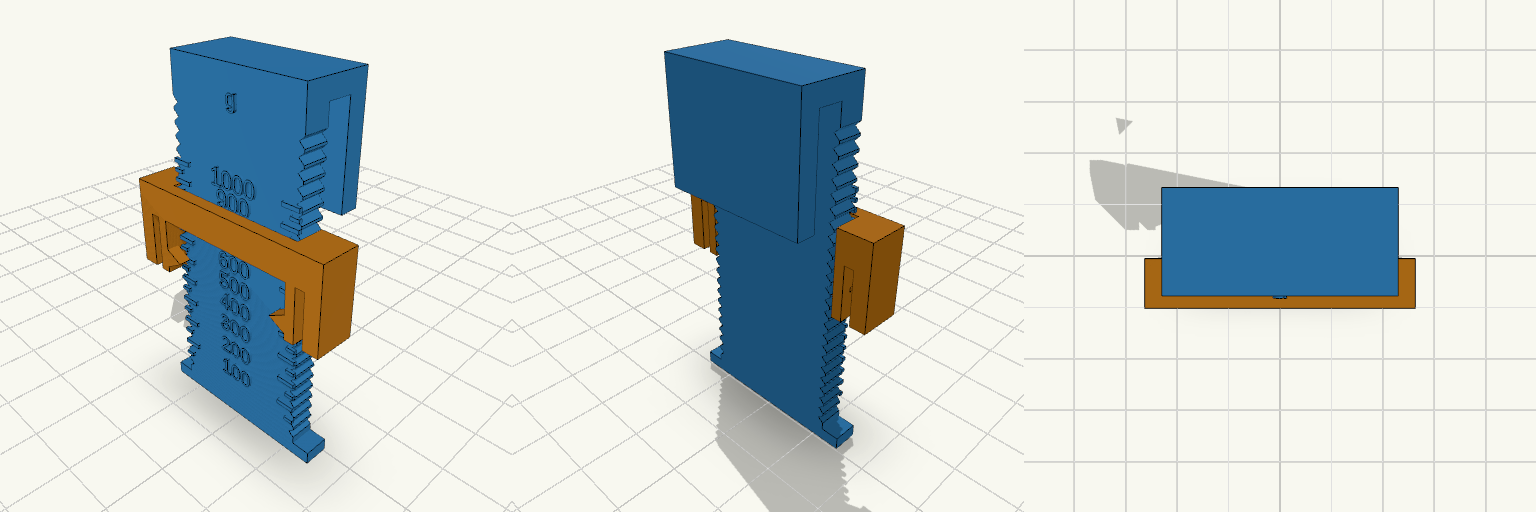
SpoolScope is a two-part gauge for estimating how much filament remains on a standard spool, made for spools that sit out of easy view in an AMS or on a shelf. The rail hooks over the flange rim; the sliding block rides on it with light detents, so you can push it down until it touches the filament, lift the gauge away and read the result. Raised ticks and numbers plus an unambiguous arrow on the block make the measurement clear without needing line-of-sight while the gauge is in place. Features Two printed parts: a rail with a rim hook, and a detented sliding block. Gram scale from 0 to 1000 g, with ticks every 50 g and numbers every 100 g. Ticks follow filament geometry rather than an even spacing: closer together near full, wider apart near empty. Arrows on the block tip directly toward the scale, and the detents hold the reading after the gauge is lifted off. Hook gap of 4 mm, sized to clear flanges from 2.8 mm to 3.6 mm thick. Dimensions Flange diameter: 200 mm. Hub outer diameter: 95 mm (from a measured Polymaker spool). Full-roll diameter: 170 mm (estimated from a 1 kg PLA roll on a 95 mm hub and a 65.6 mm spool width). Hook gap: 4 mm. Fitting and calibration Sized around Polymaker and Inland 1 kg spools; other brands are worth checking against the hub and flange figures above. The scale can be shifted by a single fixed offset if a first print reads consistently high or low, so a weight check against a known spool is worth doing before trusting the numbers. If the error differs between a full and an empty spool, the hub and full-roll values are the ones to correct. Print notes Both parts are laid out flat on the print plate. The block contacts the filament at its outer edges rather than at the centre, so a reading can sit slightly high; a weight check against a known spool is the best way to confirm the scale.