IN Beads Slip-Knot Spacer
Created today
Description
A sleek, miniature 3D-printable cylindrical spacer designed to conceal a sliding knot on an adjustable bracelet. Measuring exactly 14mm in length with a 10mm outer diameter, the body houses a spacious 7mm internal chamber that comfortably fits a 6mm tied knot.
Design Notes
- Precision Fit: The 3mm cord openings on each end feature gently flared inner edges to prevent cord snagging during adjustment.
- No Supports Needed: The internal chamber geometry bridges cleanly, keeping the pathway perfectly unobstructed.
- Recessed Branding: The "IN Beads" logo is deeply debossed at 0.4mm into the front face, perfectly scaled for high-resolution resin printing.
- Surface Ready: The outer rim carries a smooth 0.3mm radius, preparing the part perfectly for a brushed metallic post-processing finish.
Images
More like this
Explore more in Gifts, Seasonal & Personalized →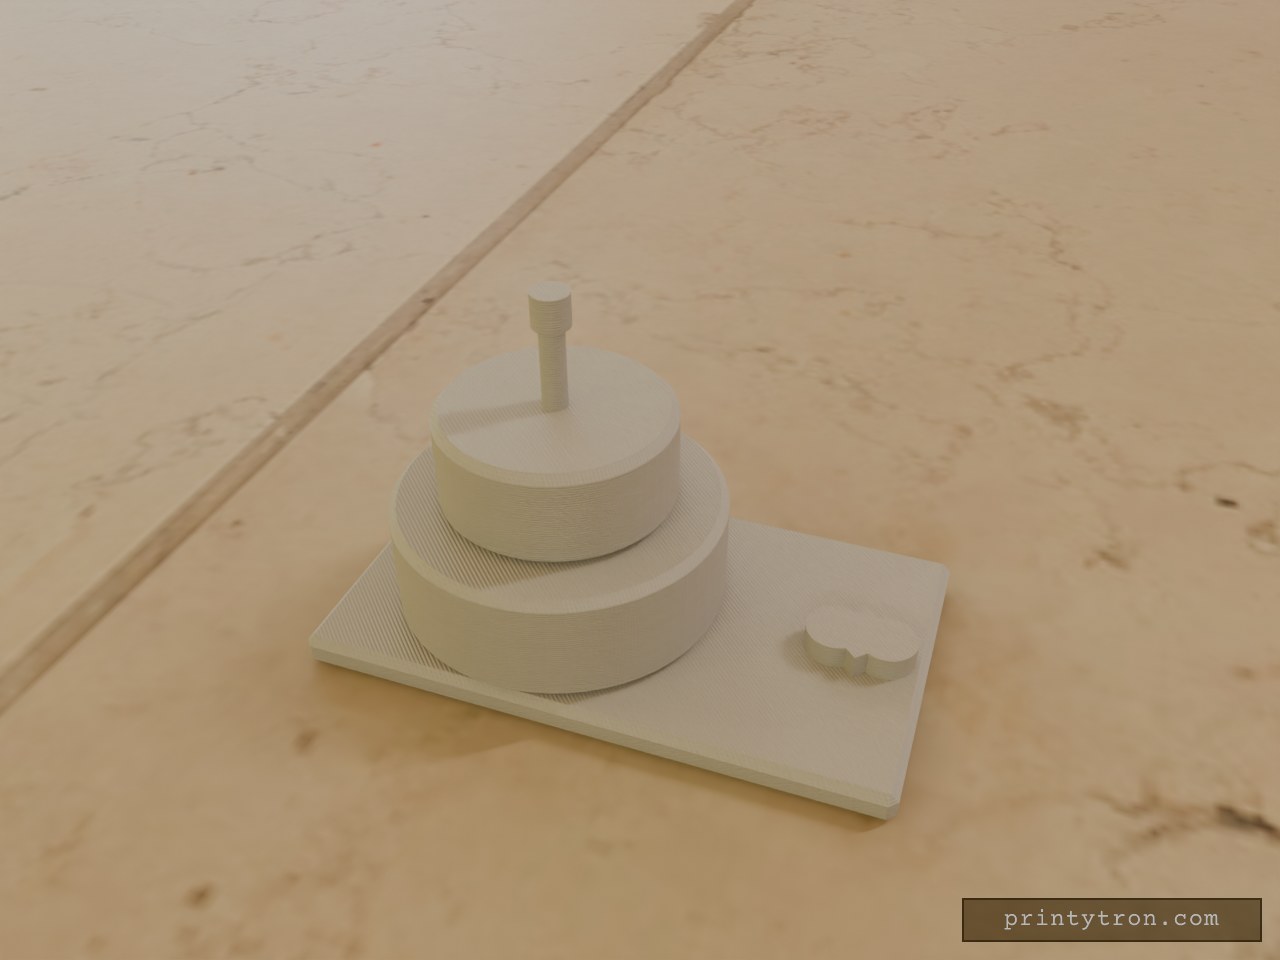
Mini tort decorativ aniversare 2 ani
What it's for Un tort în miniatură pe două etaje, cu lumânare și inimioară, ca decor sau cadou pentru ziua unei fetițe de 2 ani. Dimensions Soclu: 70 × 40 × 4 mm Etaj inferior: Ø40 × 14 mm Etaj superior: Ø28 × 12 mm Înălțime totală: aprox. 44 mm Remix ideas Adăugați numele fetiței pe soclu. Înlocuiți inimioara cu o stea sau o floare. Printați în culori pastel diferite.
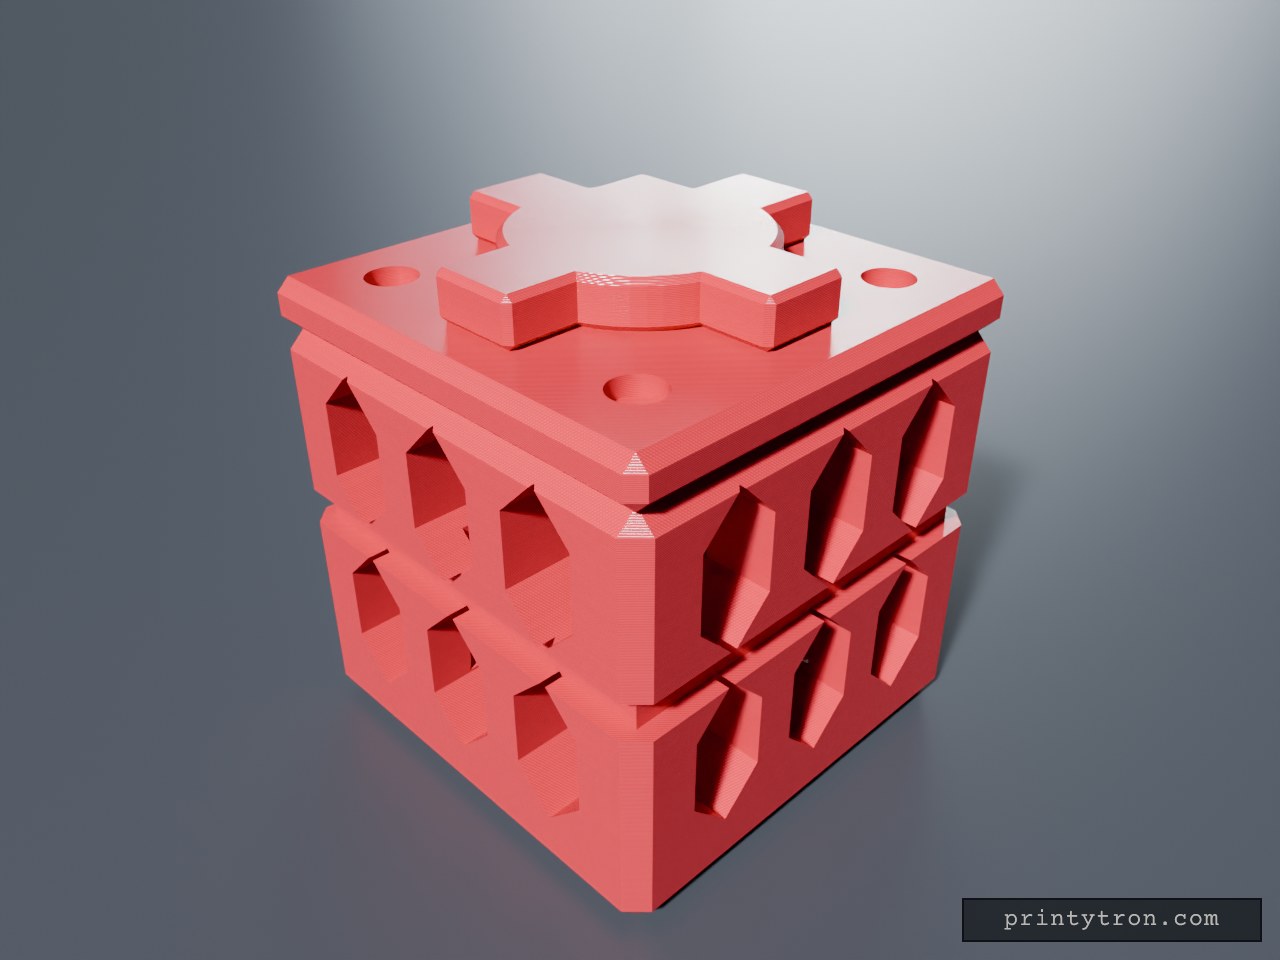
150mm Bayonet Twist Vault
A 150mm mechanical drop-in vault, built around a 50mm twist-lift track. This replaces the friction fit of the original 150mm Borg Friendship Vault with a proper bayonet mechanism. The outer cage runs three 18mm tall helical tracks to guide the core. The top cap terminates in a 40mm hexagonal drive plug; dropping it onto the core and twisting counter-clockwise forces the payload to lift 50mm out of the chassis. Bore Clearance: The 98mm core runs inside a 102mm cage bore. Verify your machine holds tolerances on large cylinders. Support-Free: The massive 90mm flat bridges of the original have been replaced by mechanical vertical slots with 45-degree angled roofs. No supports needed for the cage or core lugs. Payload Capacity: The hollow inner void measures 76mm in diameter by 110mm deep. To assemble, line up the core lugs with the vertical entry slots on the inner walls of the cage, push down to the top stop, and twist right to lock it securely to the bottom.
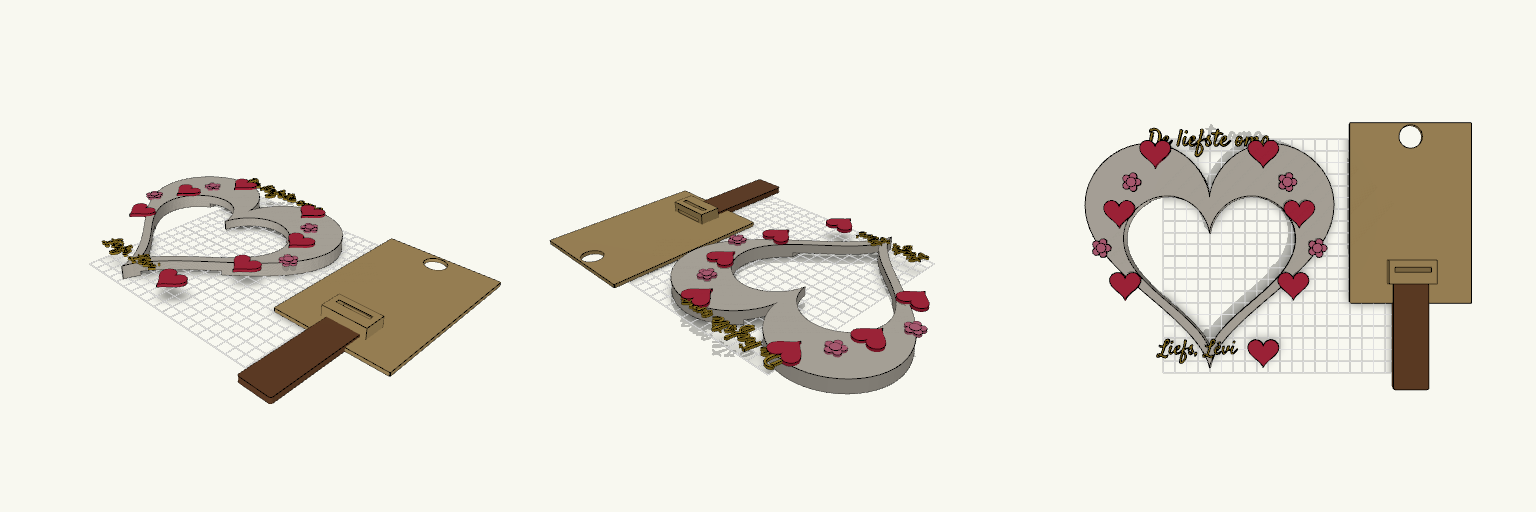
Hartvormige fotolijst voor oma
Hartvormige fotolijst ontworpen rondom de standaardafmeting van een 10x15 cm foto. De lijst bevat verhoogde details zoals bloemen, kleine hartjes en de tekst in het Satisfy-lettertype. Omdat reguliere emoji's niet naar gcode vertalen, is het hartje in de tekst vervangen door een massief 3D-element. Constructie en Printen De Sponning: Aan de achterkant zit een uitsparing van exact 104x154 mm. Dit geeft rondom 2 mm speling voor de foto, plus de 3 mm dikke rugplaat. Ondersteuning: Print het hoofdframe plat op zijn rug. Voor de sponning van de foto is in de slicer een beetje "support" (ondersteuning) vereist. Montage: De rugplaat klemt strak in het frame. De losse standaard schuift onder een hoek van 45 graden in de rugplaat. Gebruik eventueel een klein beetje tape of lijm als de frictie van je print niet strak genoeg is.
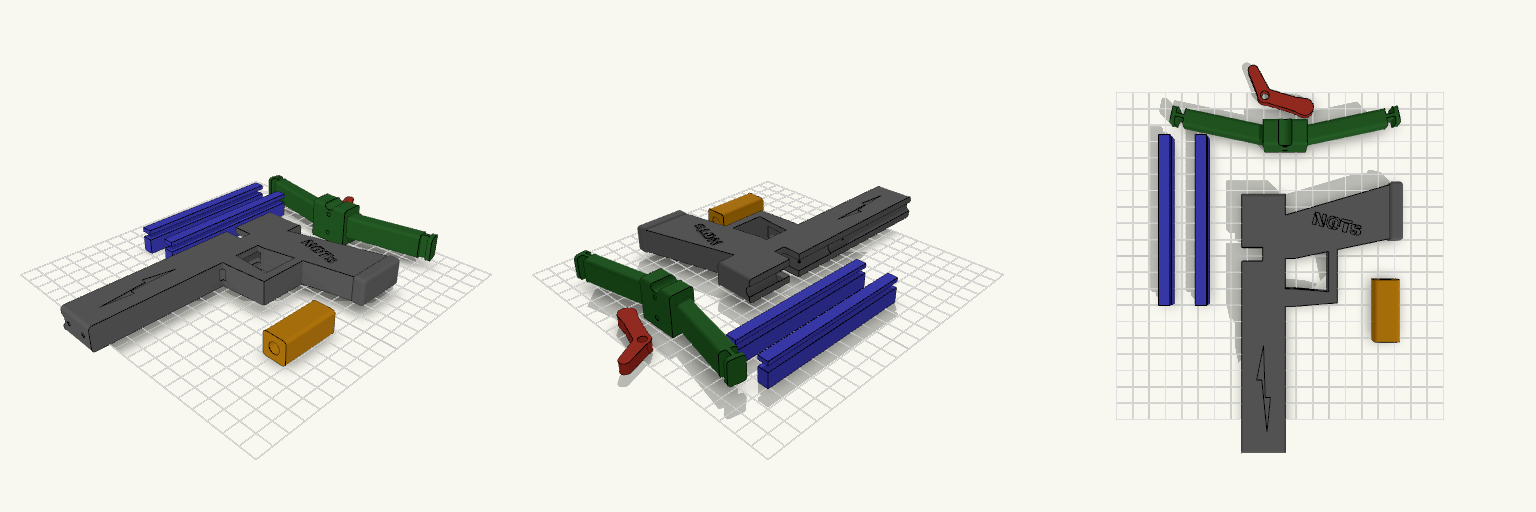
Snap-Fire — Auto Crossbow
A fully print-in-place auto-reloading mini crossbow. This model is scaled for standard 6mm airsoft BBs and features a gravity hopper that drops the next shot right onto the firing groove every time the string is drawn back. Features Auto-Reload Hopper: Stack 5-6 BBs vertically; pulling the string cycles the next shot. String Guide Tracks: Side rails capture the rubber band on release so it flies perfectly straight without jumping off the barrel. Print-in-Place Trigger: The trigger mechanism prints fully assembled with a built-in pivot pin. Just wiggle it free after printing. String a standard rubber band between the side notches on the front arms and feed it through the guide tracks to shoot.
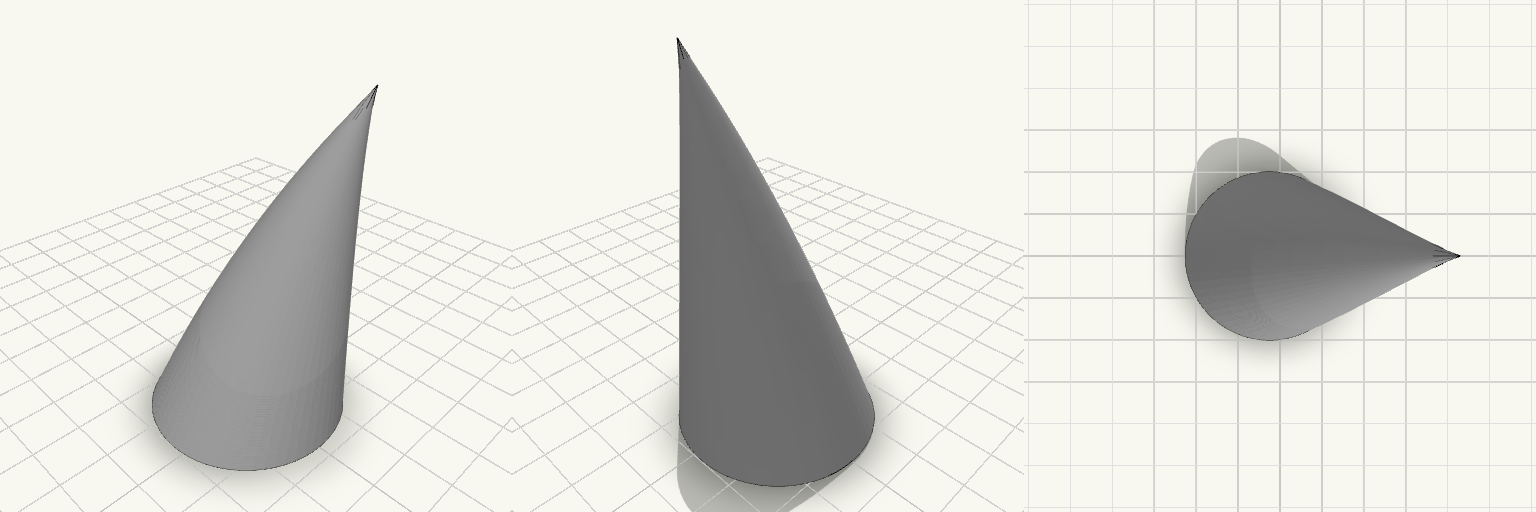
Curved Halloween Horn for "Power"
A hollow, gently curved cone horn with an open base, sized for Halloween costumes. Base diameter is 40 mm, height 60 mm, with the tip leaning 25 mm to one side and a 2.5 mm wall. Remix hooks Base diameter (D = 40 mm): widen for a headband mount, narrow for a hairclip or small hat. Bend (25 mm): lower for a straighter horn; higher gives a hook-like sweep, but needs more support when printed upright. Wall (2.5 mm): thin it to save filament, thicken for durability. Height (60 mm): stretch for a taller, more dramatic horn. Pairs with A mirrored copy for a matching left and right set. A headband, a hat, or a printed base ring with a slot for mounting.
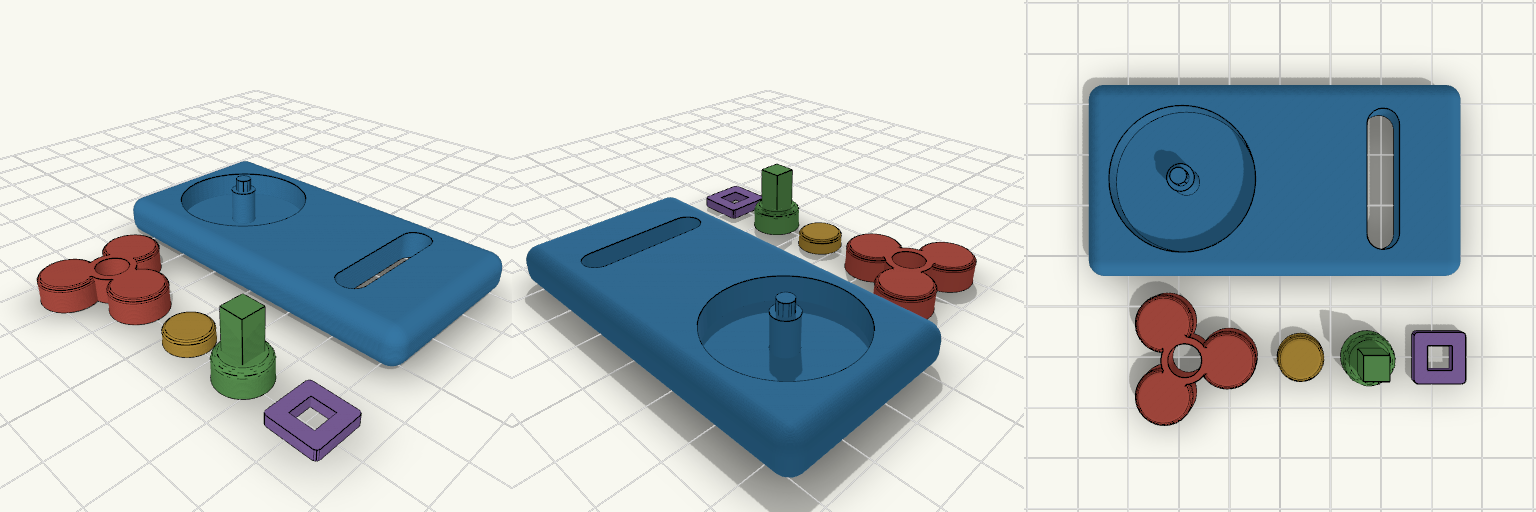
Kids Fidget Board with Spinner
A fidget board for small hands: a base with a three-lobe spinner and a sliding button in a track. Printed as five separate pieces, so nothing fuses and no supports are needed. Base: 70 × 36 mm with a spinner pocket, a fixed axle and a through slot with an underside recess. Spinner: prints flat, drops over the axle with 0.7 mm clearance per side. Axle cap: glues onto the peg at the top of the axle to hold the spinner on. Slider button: prints flat with the stem pointing up. The stem passes through the slot. Retaining foot: glues onto the stem underneath, inside the recess, so the button slides but cannot lift out. Assemble in this order: spinner, then cap; button stem through the slot, then foot glued on. Use glue suited to the filament, and check that glued parts are fully secure before giving the toy to a young child.