3D-printable gifts & personalized pieces
Cake toppers, ornaments, seasonal displays and custom-text pieces made to order. Browse what makers built, or describe the exact gift you need and Printy makes it — right down to the name and date.
Need one that fits your exact measurements? Start building →
Newest
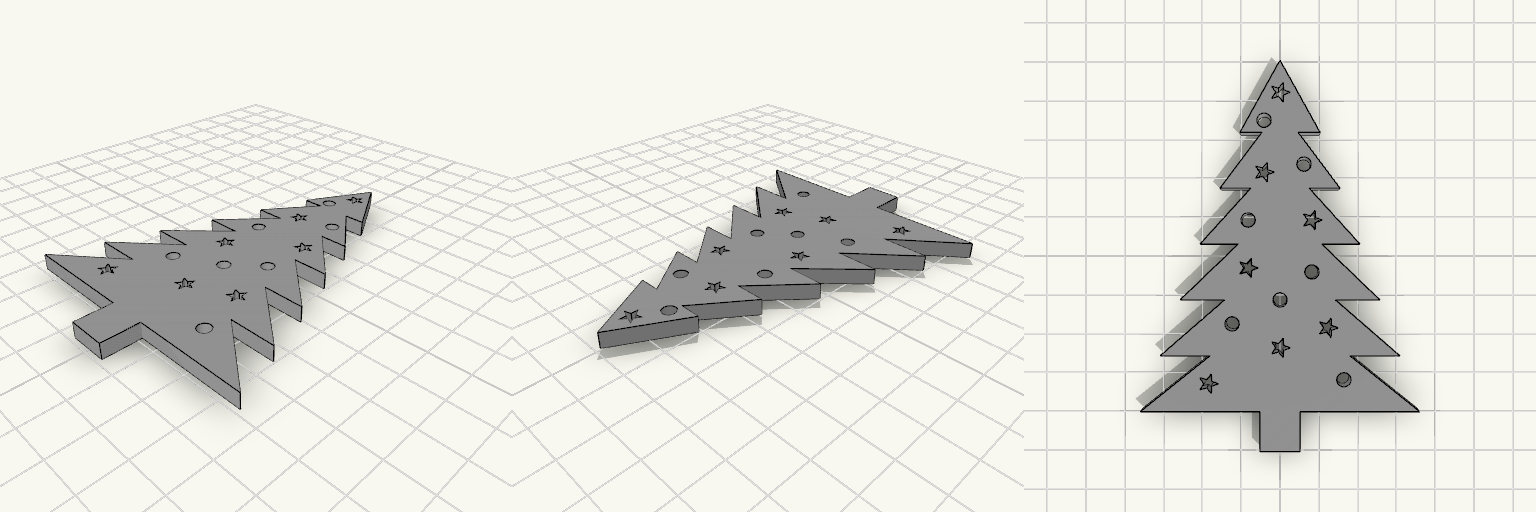
Flat Six-Tier Christmas Tree Cutout
What it's for A flat, two-dimensional Christmas tree cutout with six stacked, tapering tiers over a short trunk. The tip is a plain point — no star, no topper — and the silhouette stays clean and unbroken. Seven small stars and seven small circles are scattered across the tiers as through-holes in those same shapes, punching light through the flat body and adding detail without any surface relief. It prints as one flat piece and comes off the plate ready to use, with no assembly and no supports. Dimensions Overall footprint: 70 mm wide × 98 mm tall Thickness: a constant 4 mm Tiers: six stacked branches Star holes: 7 through-holes, roughly 2.6 mm across the points Circle holes: 7 through-holes, 3.6 mm across Top: plain pointed tip, no star All of the star and circle holes sit inside the tree's outline, including the ones near the tip, so nothing breaks the outer silhouette. Print notes Print flat on the plate. The constant 4 mm body means there are no overhangs and no supports are needed. The holes are small, so a 0.4 mm nozzle prints them cleanly; the star points are sharp and may round off slightly. The flat faces are a good place for a colour change or a two-tone filament swap. Remix ideas Scale the outline up or down for a larger wall piece or a small tag. Thin the body to 2–3 mm for a lighter decoration, or thicken it for a freestanding table piece. Enlarge the star and circle holes for a stronger see-through effect, or change their count for a denser or sparser look. Add a name across the trunk, or add a hanging hole if you want to suspend it.
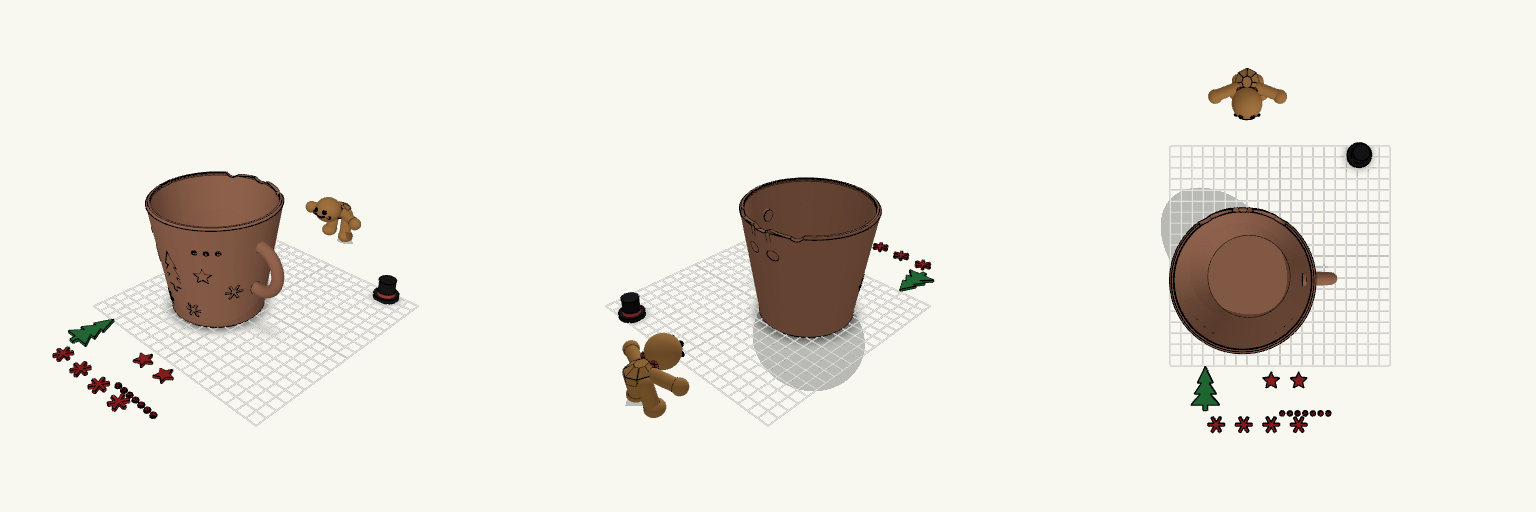
110 mm pot à bonbons pain d'épice
Pot à bonbons en forme de tasse de chocolat chaud, avec un bonhomme en pain d'épice couché sur le rebord arrière. Il n'y a pas de couvercle : le dessus reste ouvert et les bonbons se prennent par le haut. La pièce se présente en volumes séparés, posés à plat sur le plateau, à réunir à la colle après impression. La cote qui commande tout, c'est le diamètre au sommet de la tasse : 110 mm. C'est lui qui définit l'ouverture et l'encombrement du pot une fois monté. La tasse fait 100 mm de haut, son diamètre passe de 80 mm au pied à 110 mm au sommet, avec des parois de 3 mm, un fond de 5 mm et une base parfaitement plate. L'anse, sur un côté, porte l'emprise à 130 mm de large pour environ 110 mm de profondeur. Les pièces du plateau Tasse : 130 × 110 × 100 mm environ, avec les creux des motifs sur la face avant et l'emplacement du bonhomme sur le rebord arrière. Bonhomme pain d'épice : debout sur ses pieds, 68 × 44 × 51 mm ; le corps ne touche pas le plateau. Sapin de Noël : à plat, 26 × 40 × 2 mm — trois étages, un petit tronc et une étoile au sommet. Décors rouges : à plat, 2 mm d'épaisseur — deux étoiles, quatre flocons et sept demi-perles. Visage (yeux et sourire), Nœud et joues, Chapeau haut de forme (22 mm de large, ruban rouge à part) : chacun traité comme une pièce distincte. Une fois collé, le bonhomme repose sur le rebord par le torse, les bras et les jambes, la tête relevée vers l'avant, coiffé du haut de forme noir incliné vers l'arrière. Le sapin vert occupe le centre de la face avant, entouré des décors rouges en relief de 2 mm, sur une paroi de 3 mm qui s'évase. À vérifier avant de lancer Ouverture : 110 mm de diamètre au sommet, la référence pour la tasse. Plateau : la tasse seule occupe déjà environ 130 × 110 mm ; les autres pièces se répartissent à côté, sans se toucher. Bonhomme : il est modélisé debout et son corps ne porte pas sur le plateau — il faut le coucher sur le dos dans le trancheur, sinon il s'imprime dans le vide. Chapeau : le bord large reste en porte-à-faux ; prévoyez un support dessous. Couleurs : chaque pièce séparée reçoit son filament dans le trancheur (tasse chocolat, sapin vert, décors rouges, chapeau noir). Un STL ne contient aucune couleur. Ce à quoi ce modèle ne convient pas Aucun couvercle n'est prévu, ni à visser ni à poser : ce n'est pas un pot fermé. Les pièces n'ont pas d'ergots d'emboîtement. Elles se posent bord à bord et demandent de la colle ; sans collage, l'ensemble ne tient pas. Le bonhomme n'est pas une figurine libre : sa découpe suit le rebord arrière de cette tasse précise. Le chapeau et le visage sont des pièces rapportées, pas des éléments venus de matière avec la tête.
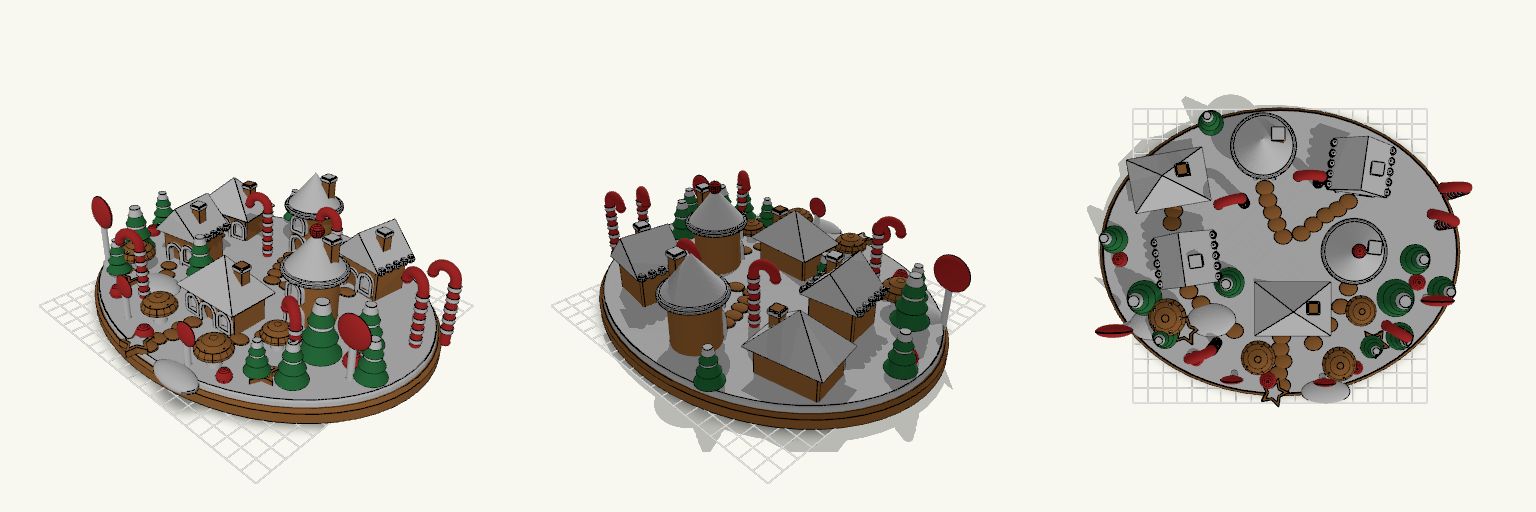
Village de Noël en pain d'épice
À quoi ça sert Un village de Noël miniature en pain d'épice, posé sur un socle ovale enneigé. Six maisons occupent la scène : une maison à pignon, une tour ronde à toit conique et une chaumière pyramidale, chacune répétée deux fois et enfoncée dans la neige. Des chemins en pas de biscuit relient les portes au reste du village. Six sucres d'orge se dressent entre les maisons et sur les côtés, accompagnés de sucettes à disque rouge uni sur bâton blanc, de bonbons ronds, de champignons, de biscuits étoilés et de dix sapins. Tous les éléments sont intégrés à la composition plutôt que posés au hasard. Dimensions Encombrement au sol : environ 240 × 197,5 mm, pour une hauteur d'environ 66 mm. Le village est bas et large : le socle laisse de la neige libre autour des maisons, ce qui rend la scène aérée. Emprise au sol des groupes : pain d'épice environ 240 × 197,5 mm ; glaçage et neige environ 234 × 193,6 mm ; bonbons rouges environ 226 × 137,3 mm ; sapins environ 230,6 × 161,2 mm. Notes d'impression Le modèle est réparti en quatre groupes de couleur — pain d'épice, glaçage et neige, bonbons rouges, sapins — disposés séparément : comptez plusieurs pièces à imprimer puis à réunir. Prévoyez le temps de changement de filament ou une impression par couleur. Les fenêtres et les pointes de sapins sont les détails les plus fins : avec une buse de 0,4 mm, des fenêtres un peu plus grandes faciliteraient le rendu. Les maisons ajoutées à l'arrière et les sucres d'orge supplémentaires rapprochent certains éléments : vérifiez qu'aucune pièce ne se touche avant de lancer l'impression. Aucun test d'impression n'a été réalisé, et la solidité des plus petits reliefs (rebords de glaçage, pointes) n'a pas été vérifiée. Idées de remix Rapprocher les maisons et réduire le socle pour un village plus compact. Ajouter des collines basses en pain d'épice pour donner du relief sans revenir à des montagnes. Varier les six maisons : taille ou forme de toit différente d'un exemplaire à l'autre. Agrandir les fenêtres ou épaissir les bords de glaçage pour une impression plus tolérante. Changer les couleurs des quatre groupes pour varier l'ambiance : pain d'épice plus clair, glaçage coloré, bonbons assortis au sapin.
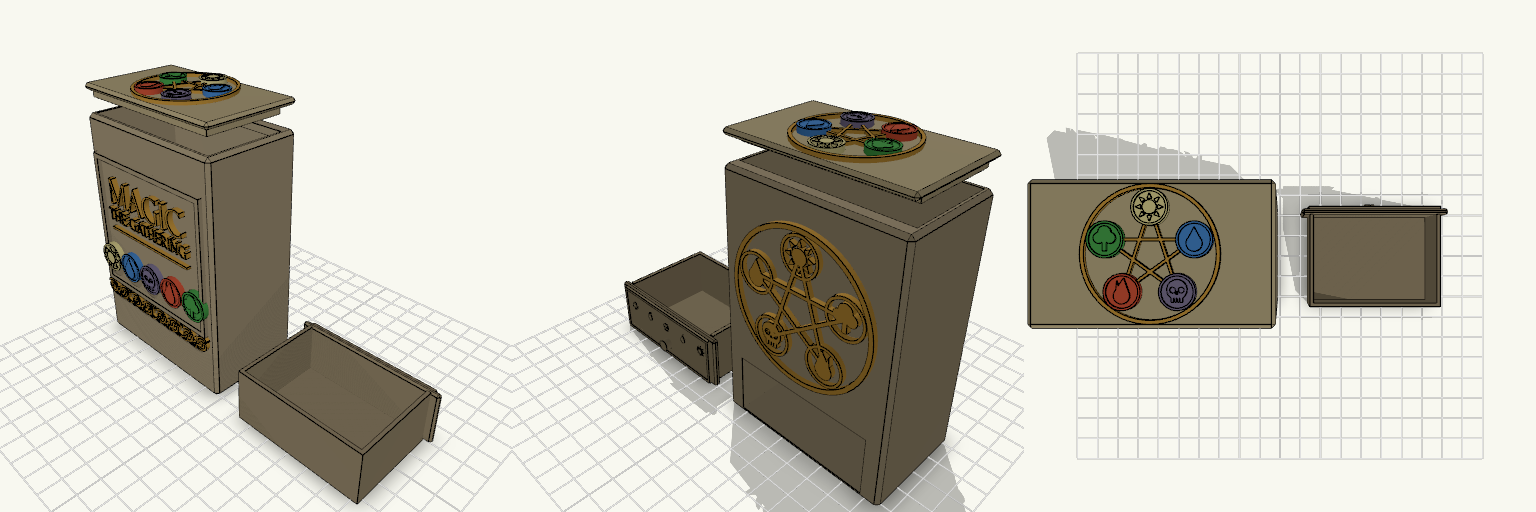
Planeswalker's Five-Color Drawer Deck Box
A deck box dressed like a spellbook cover: raised "MAGIC / THE GATHERING" title, five mana medallions (sun, drop, skull, flame, tree) and a gold swirl band on the front, with the five-colour wheel on the back wall and on the lid. The sliding dice drawer is laid out beside the box, flat on the build plate and ready to print on its own. Open-top deck cavity with a blocker lip across the back Tall drawer with a raised border and mana symbols on its face Separate lid with a plug and a pentagram wheel Front art stands directly off the wall, with no backing plate
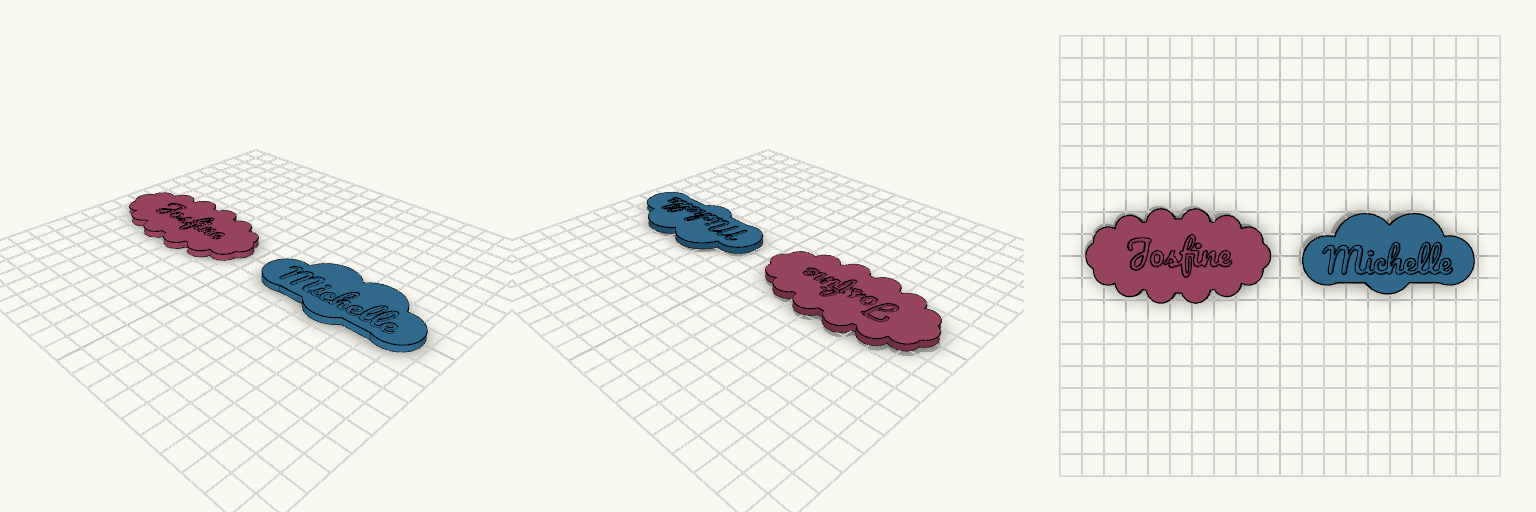
naamkaartjes elisa
Twee naamkaartjes voor aan een deur: Josfine op een bloemvorm en Michelle op een wolkvorm. De namen zijn in het kaartje verzonken, dus het oppervlak blijft vlak. Josfine: bloemvorm, roze Michelle: wolkvorm, blauw Dikte: 3 mm, naam ca. 1,4 mm diep ingegraven Geen ophanggat: ophangen met lintje, plakstrip of haakje Beide kaartjes printen plat zonder support.
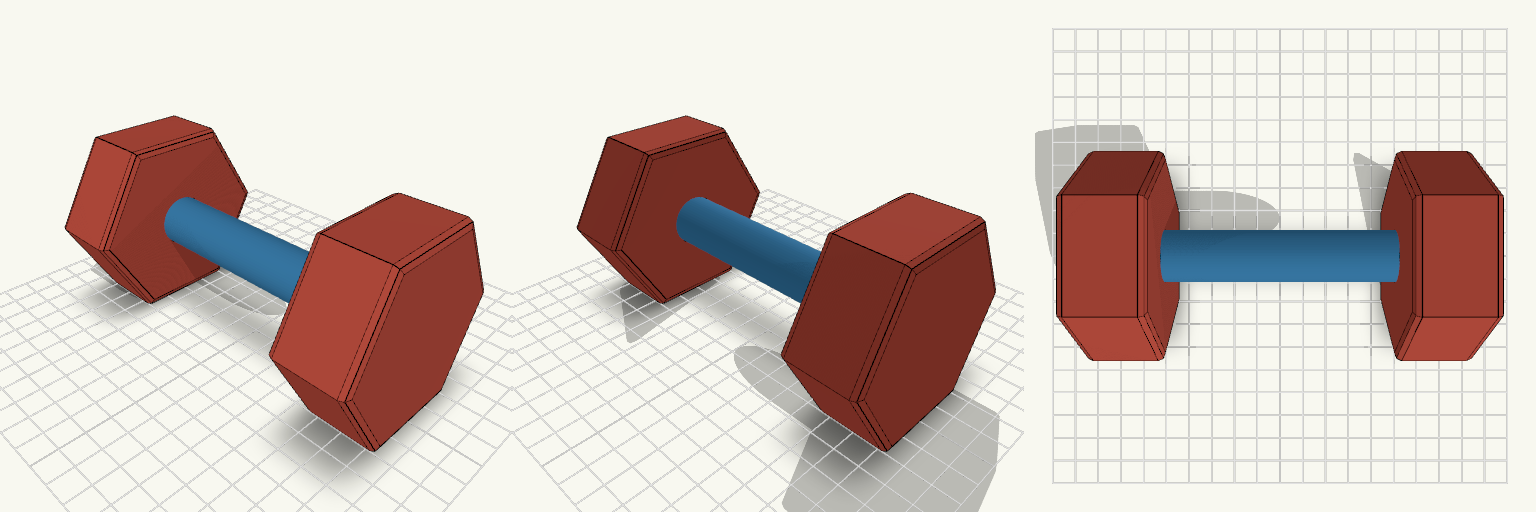
kids dumbel
Een kinder-dumbbell die niet wegrolt: de ronde gewichten van een gewone dumbbell rollen van tafel, deze zeshoekige gewichten liggen stabiel op een vlakke zijde. Maten en printen Handvat: 20 mm dik, 100 mm lang, rond en glad Gewichten: zeshoek van 80 mm over de hoeken (ca. 69 mm vlak tot vlak), 30 mm breed Totale breedte: 148 mm, hoogte: ca. 69 mm Print op een vlakke zeshoekzijde; afgeronde randen, geen steun nodig
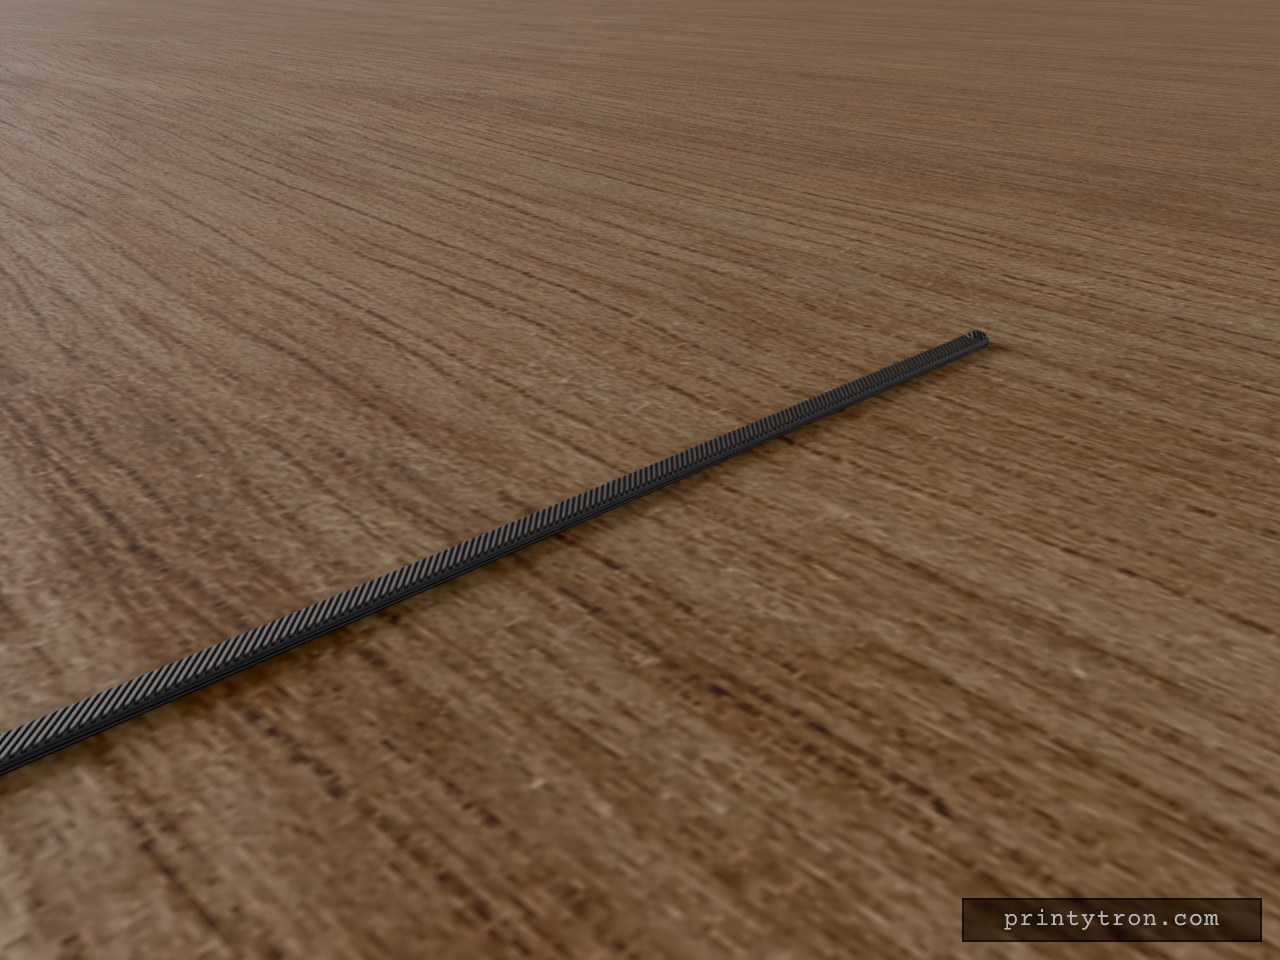
Cast Scratcher Wand, 300mm
A long, thin scratcher wand for reaching down inside a cast. It measures 300 mm long, 8 mm wide and 3 mm thick. Every edge is rounded at 1.4 mm so it slides in smoothly and soothes without catching or scraping skin. One end has a low dome bump, and the other end has a hang hole so the wand can live on a sofa arm, a hook or a loop of cord. It prints flat on the plate with no supports. The dome peaks at about 4.5 mm. Remix hooks Length (L, 300 mm): Shorten it for a forearm cast. Lengthen it for a full-leg cast. Stiffness drops as it gets longer, so consider more thickness if you go past 300 mm. Thickness (T, 3 mm): Thicker is stiffer but needs a wider gap in the cast. Thinner flexes more and can snap in some filaments. Width (W, 8 mm): 8 mm fits most cast gaps. Go narrower for tight padding. Tip bump: The dome is a flattened sphere (80% height) about 7.6 mm across. Make it taller for a firmer scratch, or remove it for a smooth rounded tip. Add a textured pad or ridges if you want something more aggressive. Hang hole (4.5 mm): Fits a small hook, a split ring or thin cord. Enlarge it for a lanyard or carabiner. Move it inward if you want a stronger handle end. Edge rounding (1.4 mm): This is close to the maximum for a 3 mm thickness. Reduce it for a crisper profile. Pairs with A sofa-arm hook or a loop of paracord through the hole. PETG or nylon for flex and durability. PLA works but is more brittle at this thickness. A second copy with a different tip as a spare. Colour regions The shaft and handle are one colour, and the bumped tip is another. This is a single printed piece, not an assembly.
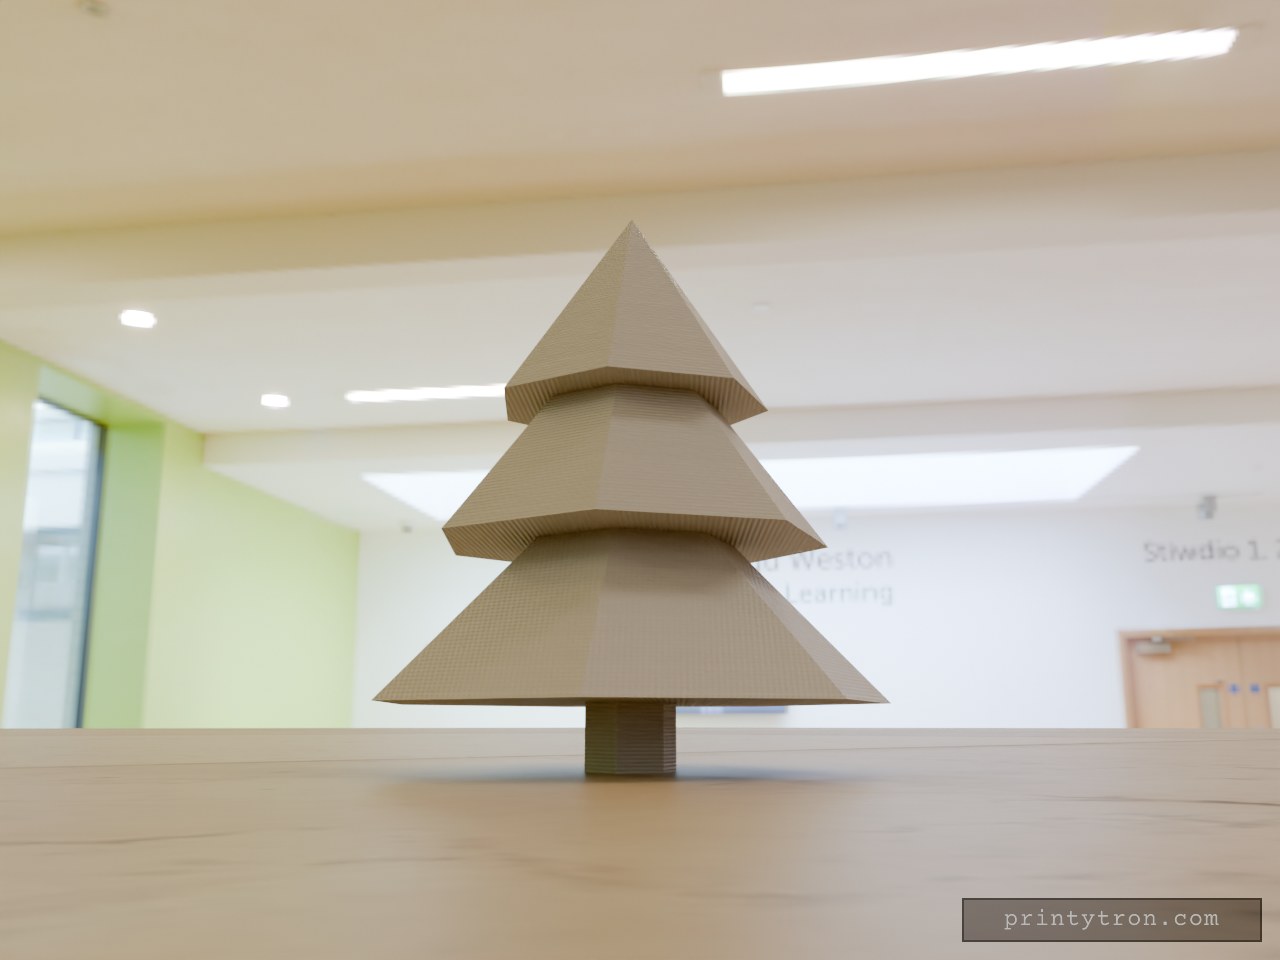
Árbol navideño lowpoly
Árbol de Navidad lowpoly formado por tres pisos facetados de siete lados sobre un tronco hexagonal, que termina en punta cónica. Sin brazos, sin manos y sin estrella: es solo el arbolito, con caras planas y aristas marcadas. Su tamaño reducido, de unos 48 mm de alto, lo hace apto para repisas, escritorios, vitrinas o para esconderlo en rincones donde no se espera encontrar decoración navideña. Composición: tres pisos facetados de siete lados sobre tronco hexagonal; punta en cono, sin estrella. Medidas: unos 48 mm de alto en total; cuerpo del árbol de aproximadamente 42 × 43 mm; tronco de unos 8 mm de ancho. Estilo: lowpoly, con caras planas y aristas marcadas. Uso: decoración navideña de escritorio, repisa o vitrina; también como pieza pequeña para colocar en lugares inesperados. Impresión: una sola pieza, sin partes móviles ni ensamblaje; el tamaño reducido permite imprimir varias a la vez.
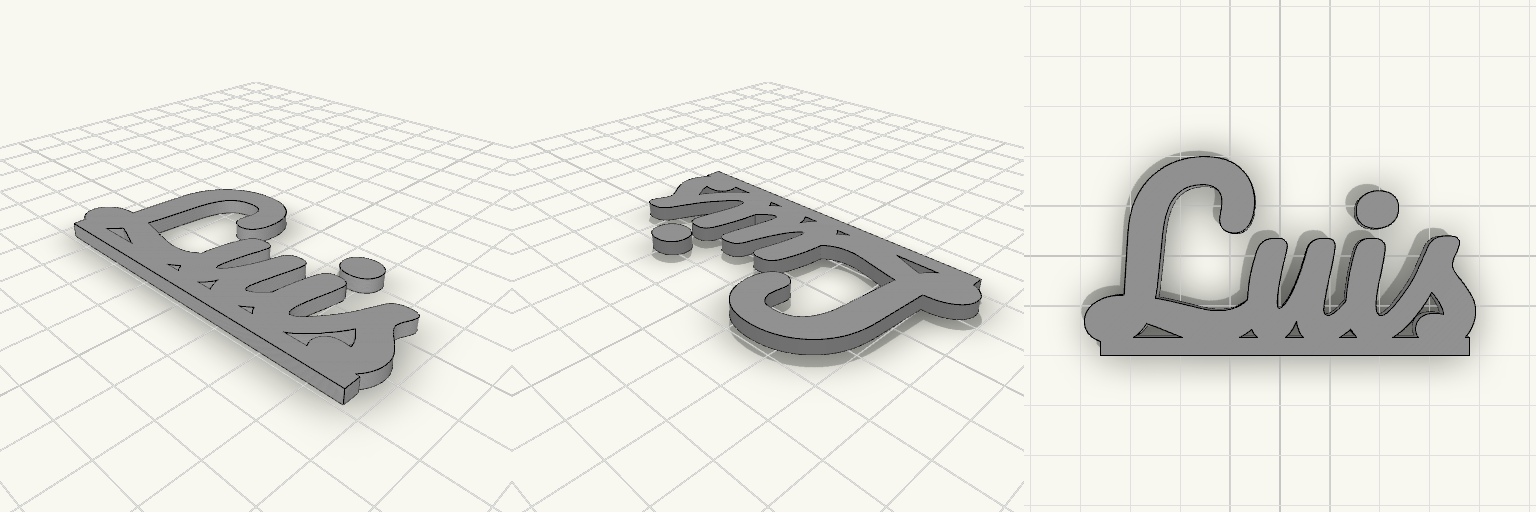
Nombre Luis en cursiva plana para pegar
Para qué sirve Letrero plano con el nombre «Luis» en letra cursiva, pensado para imprimirlo y pegarlo sobre otra superficie: una puerta, una caja, un estante o cualquier objeto al que quieras darle nombre. Las letras están unidas entre sí y se apoyan sobre una base fina, de modo que todo el nombre se imprime y se maneja como una sola pieza. Al ser completamente plano y de poco grosor, se puede pegar con adhesivo, cinta de doble cara o resina, sin necesidad de soportes ni anclajes. Dimensiones Ancho: 76,2 mm Fondo: 38,7 mm Grosor: 3 mm Se imprime tumbado, tal como se apoya en la cama Ideas de remezcla Cambiar el nombre manteniendo la misma cursiva y el mismo grosor. Aumentar el grosor a 4–5 mm para usarlo como pieza exenta sobre una repisa, sin pegarla. Añadir un pequeño taladro o un ojal en la base si prefieres colgarlo en lugar de pegarlo. Notas de impresión La pieza es plana y de una sola capa de altura, así que no requiere soportes. Una altura de capa fina (0,12–0,16 mm) ayuda a que los trazos de la cursiva y la unión entre letras queden limpios.
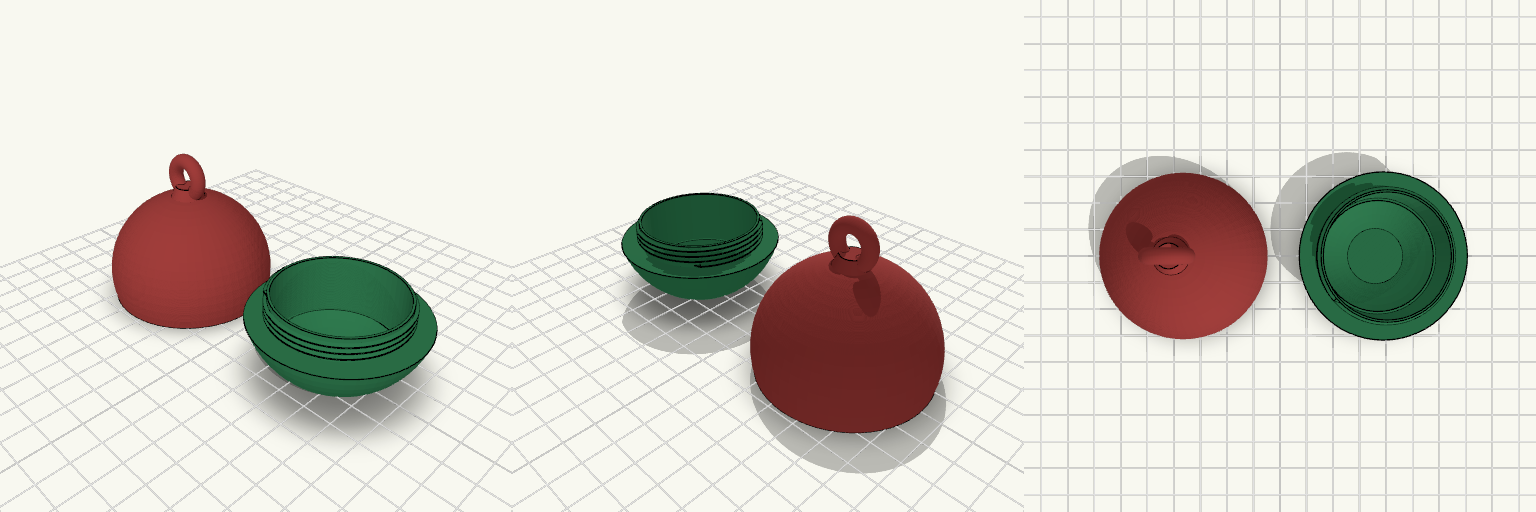
Pallina Scrigno Avvitabile da Albero
Una pallina di Natale a due metà che si avvitano e custodiscono una piccola sorpresa. Dentro è cava, con pareti sottili e un anello tondo in cima per appenderla all'albero. Metà con anello: sede filettata femmina a filo sfera Metà verde: collare filettato maschio da 46 mm, passo 2 mm Tetto della metà verde appiattito Gioco di 0,4 mm sulla filettatura
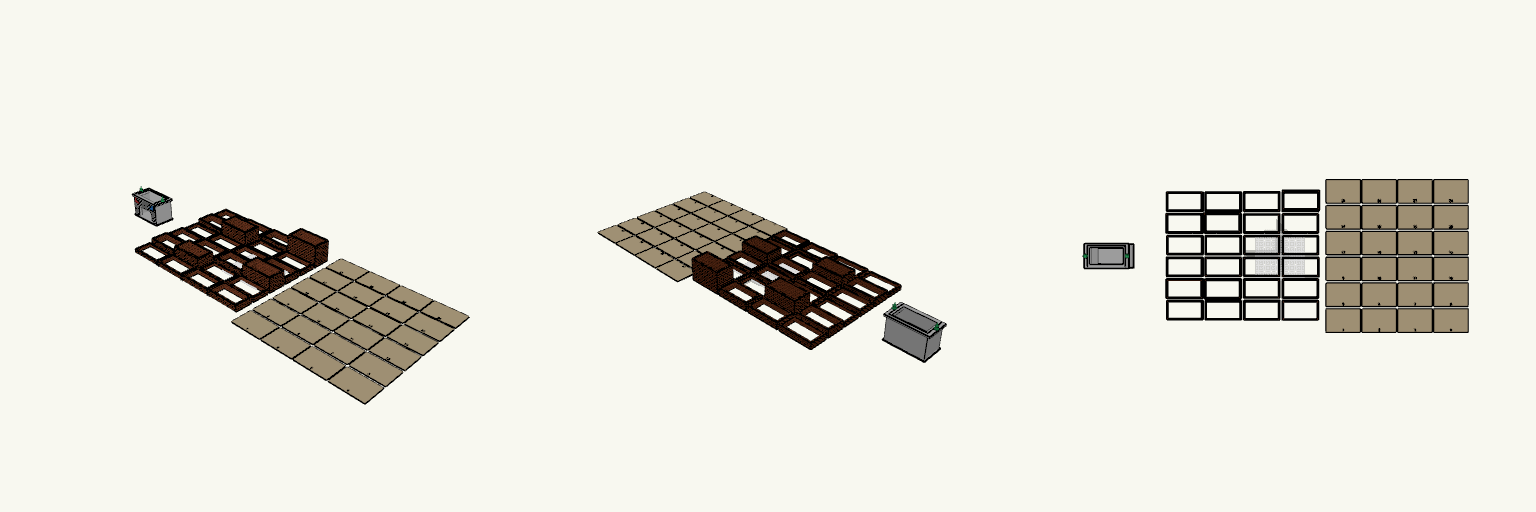
24-Compartment Chimney Advent Calendar stackable
Advent calendar built as a fireplace with a stackable chimney. The fireplace is one printed piece; the chimney is 24 separate thin-walled segments, each 150 x 80 mm, with a numbered card between each pair. Pulling a card drops the sweets above it down the chimney into the firebox. Fireplace: one piece, white, with brick-line texture, arched firebox opening, mantel, funnel into the firebox, two stockings and two small trees. Segments: 24 pieces, 150 x 80 mm outside, 1.6 mm walls. Heights 20-40 mm for most, 60, 70 and 80 mm for three, and 100 mm for the last. Cards: 24 cards, 144 x 98 x 1.2 mm, numbers 1-24 engraved on the handle. Each rests on the inner lip at the top of the segment below and slides in through a slot at the front bottom of the segment above. Locating ring: a low ring on the mantel keeps the first segment in position; the front is open for the first card. Print notes: segments print open-end up with no supports. The stockings and trees are part of the printed fireplace. Stack height: roughly 1.0 m with all 24 segments.
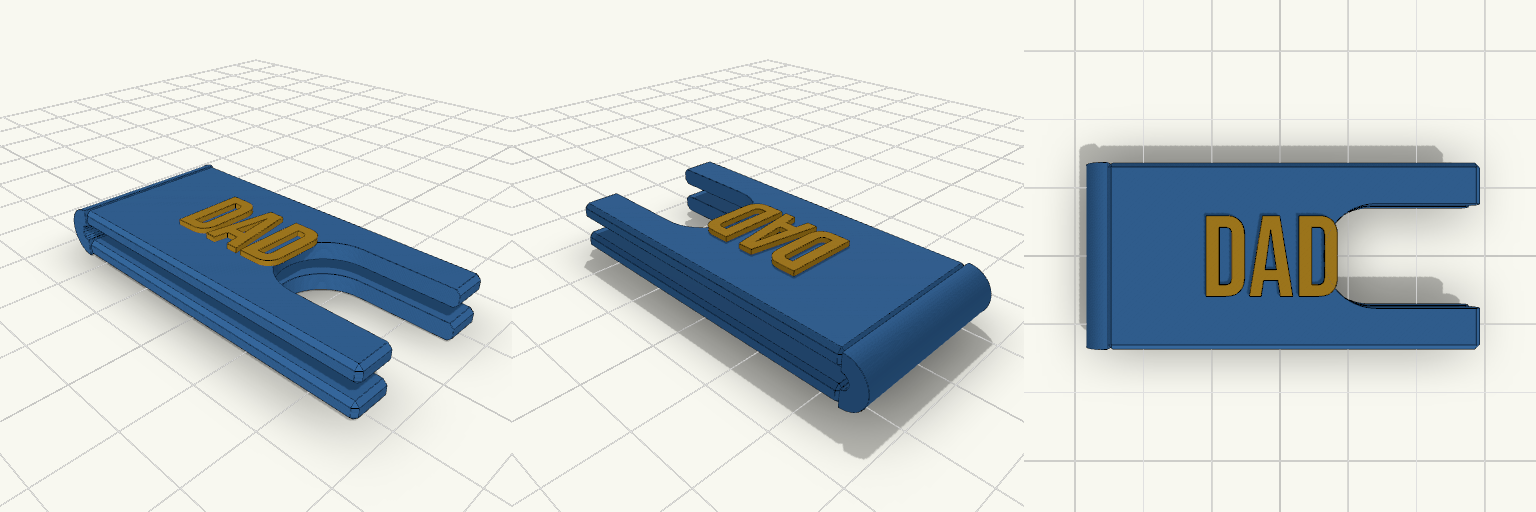
Pop — Bottle Opener Money Clip
Pop is a U-shaped money clip with a bottle opener slot cut into one short edge, sized as a birthday present for Dad. Two flat leaves are joined by a rounded spring bend, and a raised DAD in Bebas Neue sits on the top face. The result is a single-piece print that holds a folded stack of banknotes and opens a bottle. Dimensions Overall footprint: 50 x 25 mm Leaf thickness: 2.5 mm each Gap between leaves: 2.4 mm, sized for a folded stack of about 8 banknotes Overall height: about 7.4 mm, plus 0.8 mm of raised lettering Chamfered outer edges for a softer feel in the pocket Features Bottle opener slot: a rounded notch open to the short edge, cut through both leaves Spring bend: a rounded fold at the closed end that lets the leaves flex Embossed DAD: raised 0.8 mm on the flat top face Two named regions: the clip body and the DAD lettering, so they can be colored separately Print notes PETG is a good choice for the flex and the stress at the opener slot. Orient the part so the layer lines run around the bend, not across it. The clip prints flat on its bottom face with no supports needed for the main body. Two-color printing works for the lettering, since it is a separate raised region.
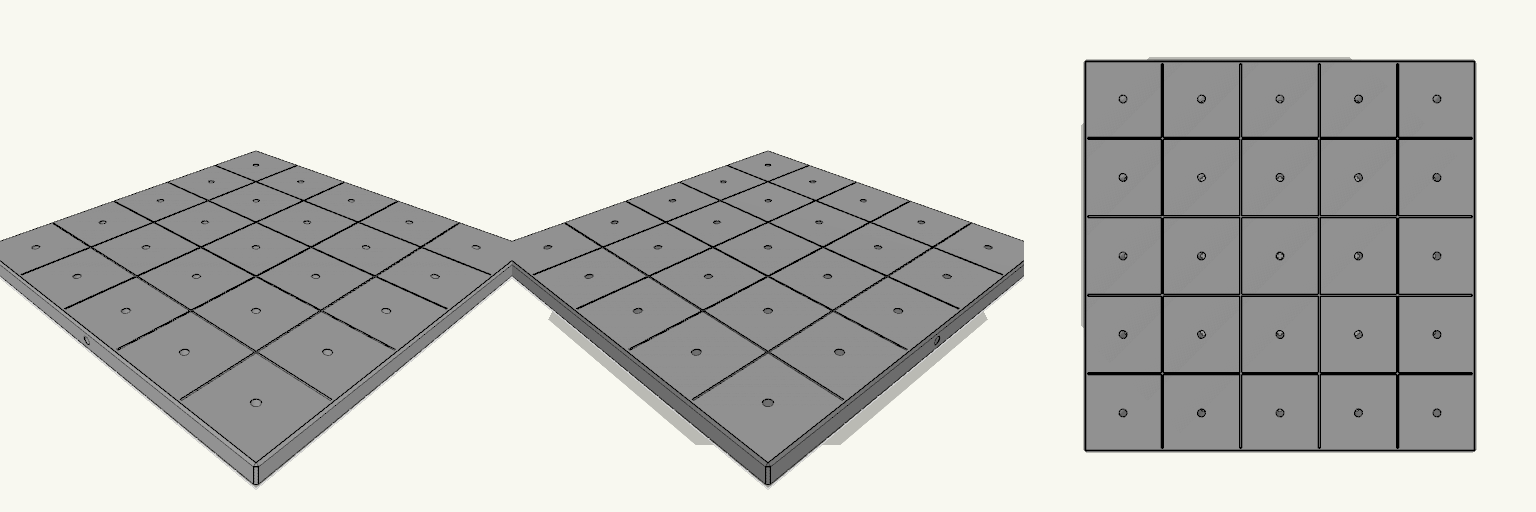
ploca 1/4
A 200 x 200 x 10 mm board with a 5x5 engraved grid and a 4 mm through-hole in the centre of each of the 25 cells. Two 4 mm side holes, 6 mm deep, sit at the midpoint of the front and left faces. Check before printing Side hole depth: 6 mm, drilled in from the face at mid-thickness (5 mm). Fit notes Holes are 4 mm nominal, so no clearance is added. They suit M4 screws only with a tight fit. Ream or enlarge them if needed. The side holes are blind and do not meet the vertical holes.
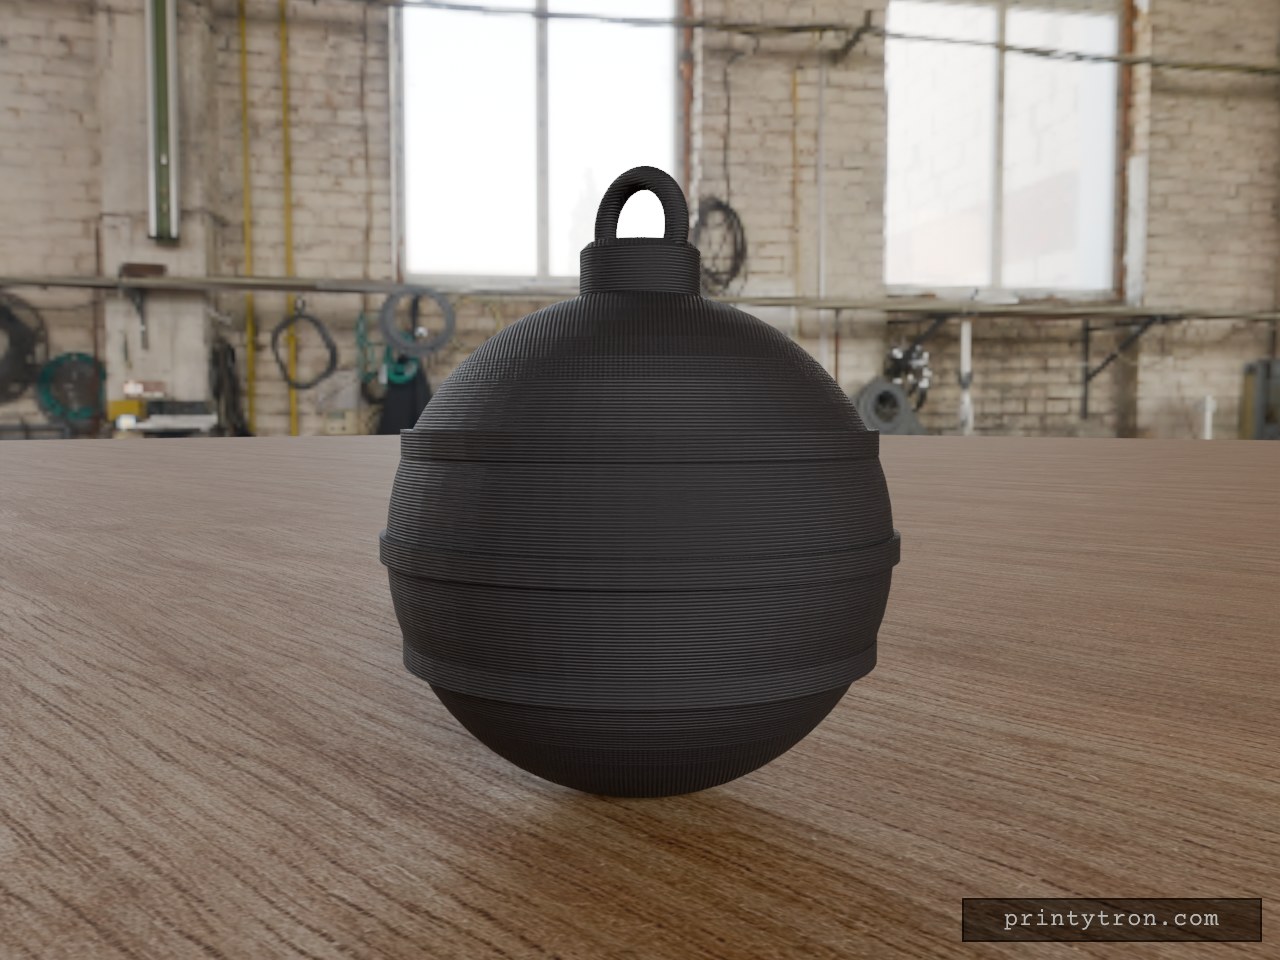
Pallina Natalizia Vetro Soffiato Classica
Una pallina da albero dal sapore vintage, con la sua sfera lucida, il cappuccio dorato e l'anello per il filo. Tre fasce in rilievo girano attorno al corpo come i vecchi addobbi di vetro soffiato. Diametro sfera: 50 mm Anello in alto per nastro o gancio Tre fasce decorative che si possono stampare in un colore a contrasto Ottima da appendere o da regalare
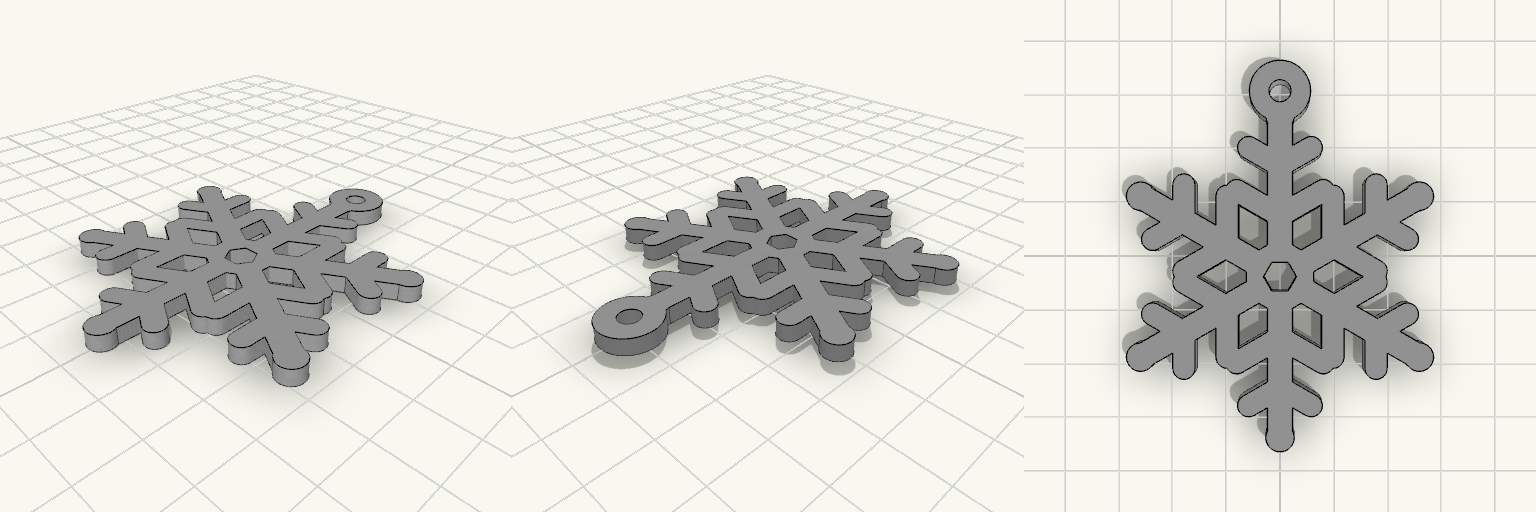
4 mm Hanging Hole Snowflake Christmas Ornament
A flat, six-armed snowflake ornament with a 4 mm string hole through a round eyelet that sits on the tip of the top arm. It prints as one solid piece, 3 mm thick, flat on the bed with nothing to support. Fits String, twine or thin ribbon up to roughly 4 mm through the eyelet; a knot or bead wider than the hole keeps it from pulling through. A tree branch, hook or nail with about 71 mm of clear height, so the eyelet and the point below it hang free. Does not fit / not included No hook, clip, stand or separate hanger — the eyelet is part of the print itself. No text, logo or engraved date; nothing is lettered on it. Not a multi-part kit; there is nothing to assemble. Check before printing Overall footprint is 55.3 mm wide across the flat sides and 70.5 mm tall including the eyelet, at 3 mm thick. Confirm the hanging spot leaves that much room and that your cord end passes the 4 mm hole — a hole that prints slightly tight may need a quick ream with a 4 mm drill bit. What is on the part Six broad arms, 4.5 mm wide with rounded ends, joined by side branches 4 mm wide — thick enough to handle and pack away each year. A 14 mm hexagon at the centre with a 6 mm hole through it, which trims filament without thinning the arms. An 11 mm rounded eyelet overlapping the full width of the top arm, so it reads as an extension of the arm rather than something stuck on. Every arm and branch is solid and properly joined, so the whole ornament stays low on filament while holding up to a season of hanging.
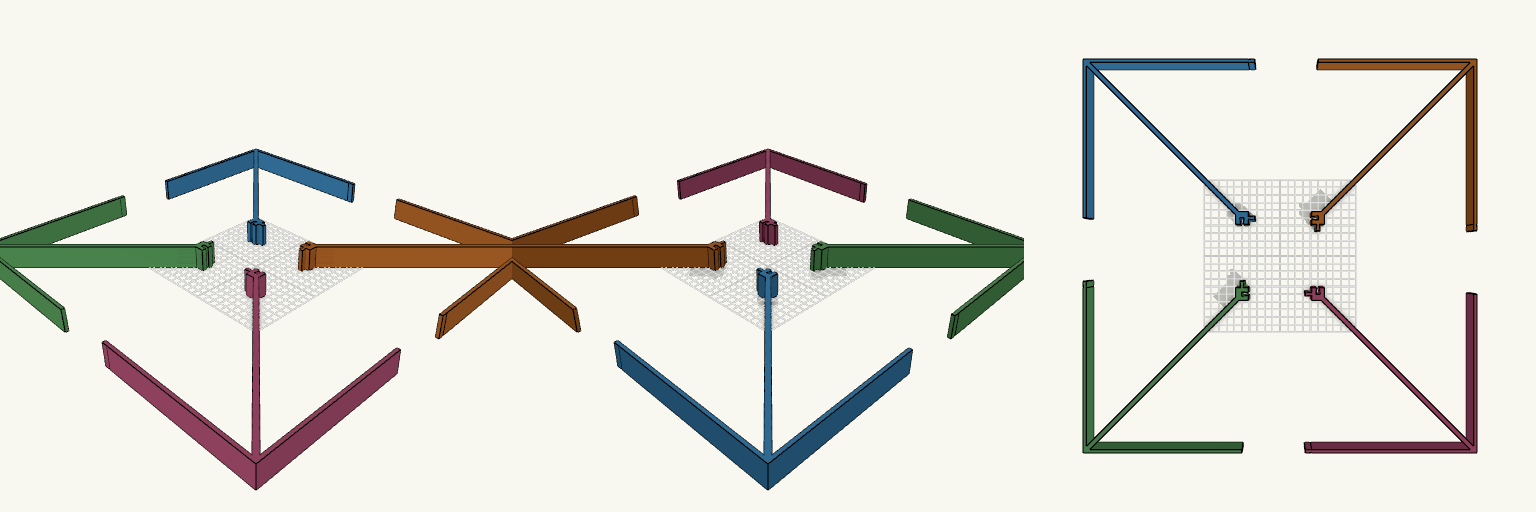
Lantern Support Frame Stops Cardboard Sides Bowing
A cardboard Diwali lantern bows at the panels and loses square at the corners. This insert frame sits inside the lantern and holds all four walls out at full width, so the sides stay flat instead of sagging inward. Assembled, it measures 417 mm square, with a 4 mm thin outer border and two 6 mm diagonal braces crossing at the centre in an X, all 30 mm tall. Fit Assembled outer size: 417 × 417 mm (41.7 cm) Inside opening: 409 × 409 mm, set by the 4 mm border Height: 30 mm — depth is what keeps the cardboard from flexing, so go taller before wider if it still bows Two 6 mm diagonal braces meet in the middle of the opening Hidden inside the lantern once it is closed up Printing and assembly Prints as four separate corner pieces, labelled Corner Piece A–D. They are the same shape rotated, so print the same piece four times. Each piece is about 209 × 217 × 30 mm, so the bed needs roughly 217 mm square plus printer margin. Inner joints use dovetail tabs and matching sockets at the centre where the X arms meet. Slide each tab straight down into its socket; these joints lock mechanically. Outer wall joints use a plain full-thickness slot, open at the outer face and 0.3 mm wider than the tab. The neighbouring tab slides in flush with both wall faces; a 4 mm wall is too thin for a dovetail lock there, so add a drop of glue. Tabs sit inside the sockets and do not add to the outer size. Each tab extends 8 mm past its cut edge — without that it cannot lock — and it is hidden once the frame is assembled. The outer-wall tab sits at the centre of the 4 mm wall, 2 mm in from the outer edge, with its tip trimmed flush so nothing sticks out past the wall faces. The border is only 4 mm wide, so the joints are the weak point: print with extra perimeters and handle the assembled frame by the border rather than the tabs.
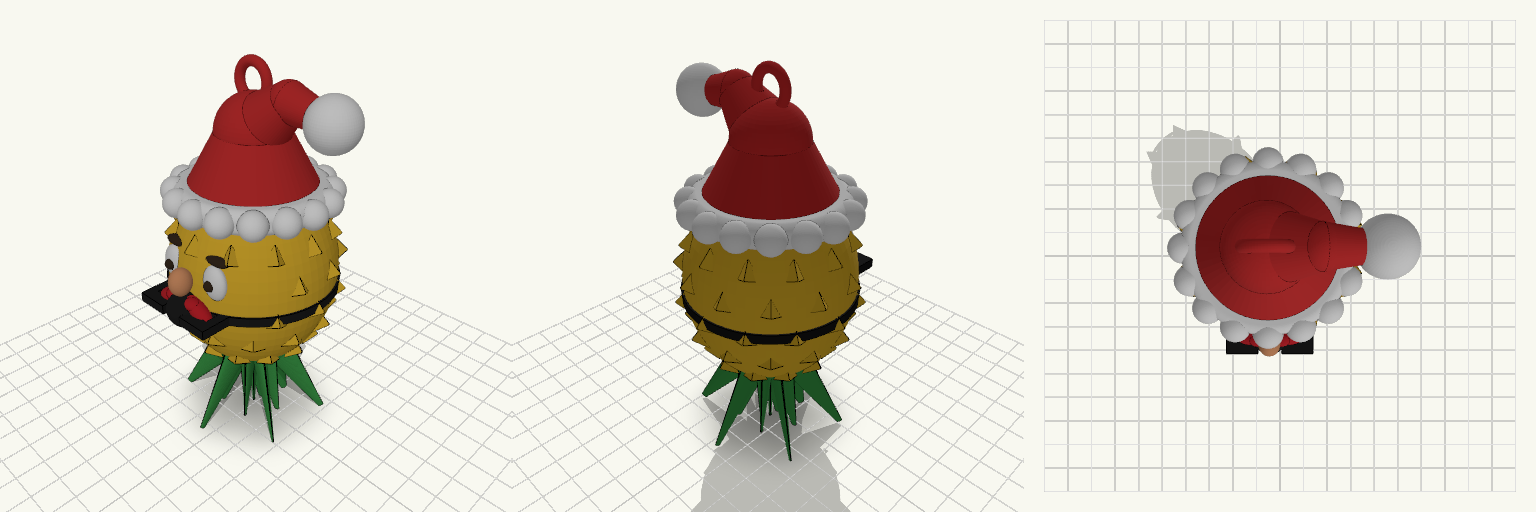
Festive Headstand: Upside-Down Pineapple with Ball Gag
A cartoon pineapple does a festive headstand: it balances on an oversized leafy crown, the fruit body rising above, and a big fluffy red Christmas hat droops off to one side, ending in a single large rounded bobble. Two wide-open eyes with dark pupils and brows sit on the fruit, a small skin-toned nose between them, and a black ball gag framed by small red puckered kissing lips takes the place of a mouth. The lips form a compact ring with cupid's-bow lobes on top and a fuller lower lip, set back into the fruit's surface around the ball so the black shows through the middle. The strap runs around the head and across the front, outside the lips, lying against them as it passes over their corners and into the ball, so the lips sit behind it. The leaves are the star of the stand: a dozen broad blades plus a ring of shorter ones fan out beneath the fruit and lift it clear of the surface, giving the upside-down pose its height and silhouette. The body is scaled in staggered rows of triangular scales, kept clear of the face, so the fruit reads as a pineapple from any angle. And yes — the inverted pineapple is the classic swinger sign, worn here in full holiday dress. Use it as intended, or simply as a seasonal oddity. Made to hang A loop sits upright on the hat's peak, ready for a hook, ribbon or tree branch. With no base disc under the crown, the pineapple rests on its leaf tips — perfect for hanging, less so for standing on a shelf. The hat's tip droops to one side and ends in one large rounded bobble, so check clearance around the hook. Design notes Tall, wide leaf crown with 12 broad leaves and a ring of shorter ones; it doubles as the stand. Face: two open eyes with pupils and brows, a small nose, a black ball gag, and small red puckered kissing lips with a cupid's bow. The lips are sunk back into the face around the ball rather than standing proud of it, so the strap sits in front and the red shows as a ring. Strap wraps the back of the head and bands across the front outside the lips, resting against the face and covering their corners. Staggered triangular scales wrap the body in rows, with the face left smooth. Oversized hat with a thick trim of rounded puffs and a smooth bobble, finished with the hanging loop. The fluffy hat trim is the widest point, so check your bed size before printing.
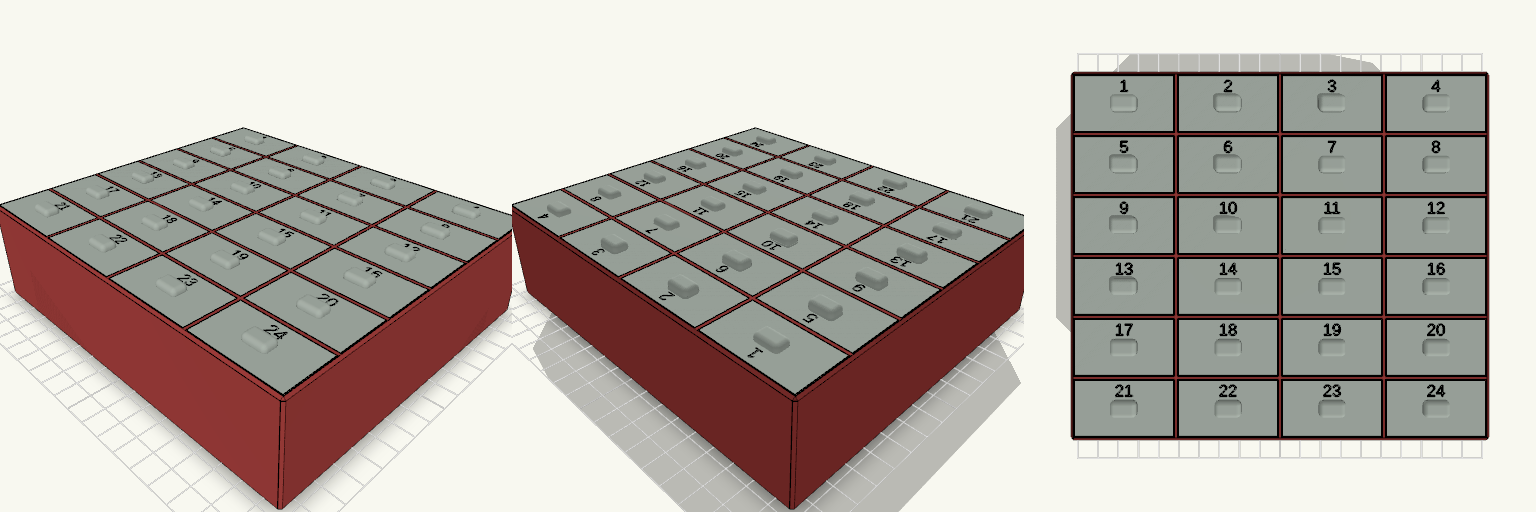
Yuletide Vault — 24-Drawer Advent Calendar
A print-in-place advent calendar with 24 identical sliding drawers in a 4 × 6 grid. Every drawer front carries an engraved number from 1 to 24 and a soft-edged finger handle, so the countdown opens one small compartment at a time. The drawer bodies, fronts and matching frame openings keep clean square corners; only the handles are rounded, giving a comfortable grip without softening the rest of the geometry. Each cavity is sized around a 35 mm × 20 mm candle, making the drawers practical for a daily treat or a small gift. The whole assembly fits the Bambu Lab A1 Mini build plate and prints without supports in the sliding channels. Features 24 identical drawers arranged in 4 columns and 6 rows, numbered 1–24. Square drawer bodies, fronts and frame openings; only the handles are softened, with an edge radius of about 1.5–2 mm. Each drawer has an 11 × 7 mm handle that protrudes 3 mm, centred on the front. Engraved numbers sit 0.6 mm deep in the strip above each handle, clear of the grip area. 0.4 mm clearance on every side and at the back keeps the drawers sliding freely. A stop ridge inside each pocket catches the drawer's back wall after about 40 mm of travel, so drawers cannot fall out accidentally. Drawer cavity: 38.5 × 42 × 22 mm, sized to hold a 35 × 20 mm candle. Dimensions Overall footprint: 175.2 × 154.2 × 49.6 mm including handles — fits the A1 Mini's 180 mm plate. Drawer outside: 41.5 × 45 × 23.5 mm; wall and floor thickness: 1.5 mm. Frame divider walls: 1.2 mm. Print notes The calendar prints as one piece with the drawers already seated in the frame. The back face lies flat on the plate and the fronts and handles face up, which avoids supports in the channels. Print in white PLA for the intended look.
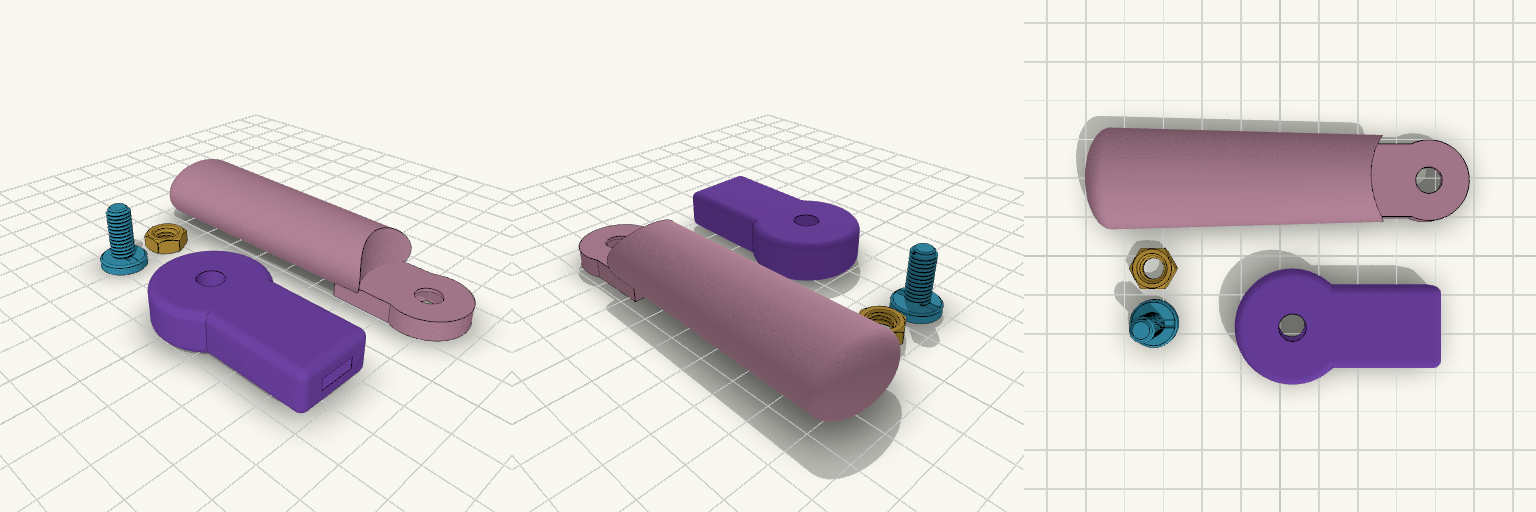
3 de noviembre mango fav
Mango de 9,4 cm con un soporte giratorio y una ranura frontal para meter y pegar una cuchara. La ranura mide 0,9 cm de ancho, 0,3 cm de alto y 1 cm de fondo. Se imprime en cuatro piezas separadas —mango, soporte, tornillo y tuerca—; el tornillo y la tuerca roscados M6 unen las dos piezas principales y fijan el soporte en la posición elegida. El soporte barre unos 180°: izquierda total, recto hacia delante y derecha total; no da la vuelta completa porque el tope trasero choca con el mango. Los bordes del soporte van redondeados y el hueco con el mango es de 2 mm, pensado para una niña de 5 años. Ganchos para remezclar Ranura frontal: 0,9 cm de ancho, 0,3 cm de alto y 1 cm de fondo, centrada. Es el primer ajuste si cambias de cuchara: un mango de más de 3 mm de grosor no entra. Rosca: M6 de paso 1 mm, tornillo de 1,4 cm. Con capas de 0,12–0,16 mm sale más limpia. La holgura de la tuerca (0,15 mm) es lo primero que se ajusta si queda dura o floja. Orificios: 6,6 mm en el disco y en el soporte. Rebaje de la cabeza de 12,4 mm. Hueco hexagonal de la tuerca de 11,9 mm y 5,2 mm de profundidad. Hueco con el mango: 2 mm. Más pequeño limpia peor y deja menos margen de dedos; más grande se nota. Soporte: parte redonda de 2,8 cm de diámetro, brazo de 2 cm de ancho que llega a 3,6 cm del tornillo y 1,06 cm de grosor. La ranura frontal es la zona a cambiar para otro tipo de cuchara. Material: PETG por el calor de la cuchara, 4 perímetros. Combina con un tornillo y una tuerca M6 comerciales de acero inoxidable si se prefiere más resistencia que la rosca impresa. Para imprimir, coloca el mango plano, el soporte boca abajo con la cara de pegado contra la cama, el tornillo con la cabeza hacia abajo y la tuerca plana.
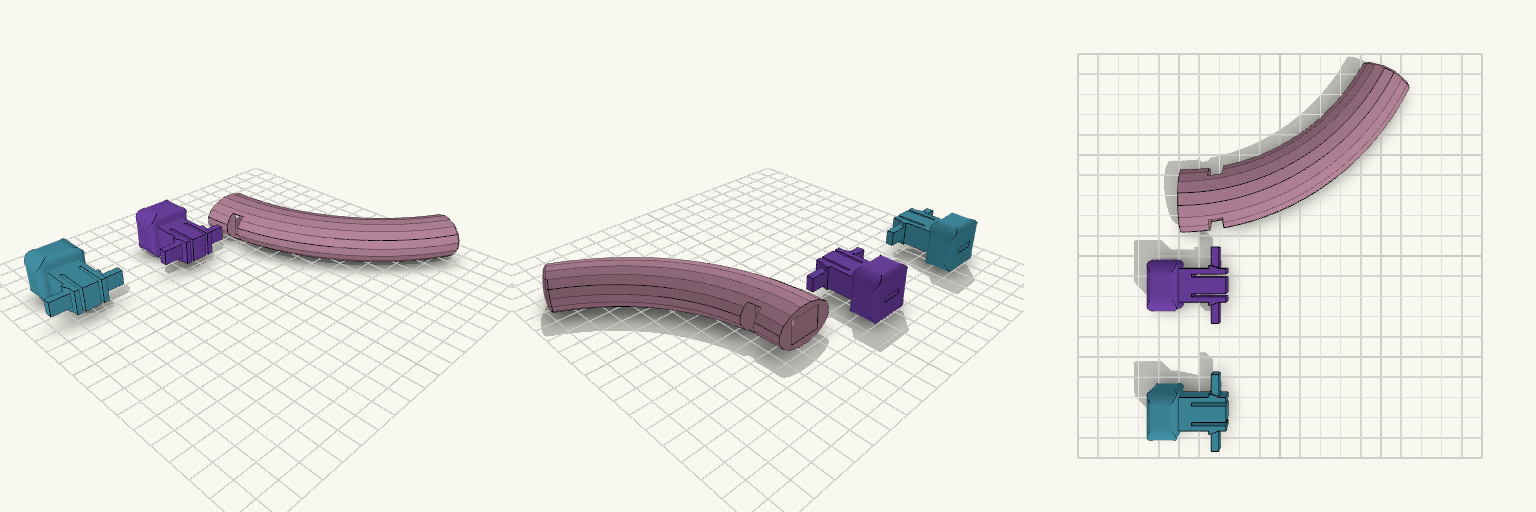
Pieza 3 de noviembre act
Mango banana de cucharilla adaptada con conector de clic de dos aletas. Sustituye al mango original de la cucharilla: la pieza de la cuchara se aloja en la ranura frontal del conector y el conector se encaja en el alojamiento del mango rosa. La unión es por clic; no usa rosca, bayoneta ni pasador. El conjunto está pensado para una niña con discapacidad que no puede mover la muñeca: el mango se curva hacia dentro, con radio de 110 mm y la punta desplazada unos 65 mm, para acomodar la mano sin girar la muñeca. El modelo incluye el mango rosa y dos conectores idénticos, morado y azul. El mango y los conectores se imprimen por separado y se unen por clic. Los dos conectores van separados 60 mm en el eje Y, con unos 24 mm libres entre sus tapas, para poder imprimirlos juntos sin que se toquen. La tapa visible del conector es redondeada, con esquinas de 7 mm y bordes de 3 mm; el cuerpo y el encaje siguen siendo cuadrados. Qué encaja Cuerpo del conector de 15,6 mm de ancho, 11,6 mm de grosor y 22 mm de largo, con tapa de 24 × 24 mm. Dos aletas de 2,4 mm, separadas del núcleo por ranuras de 1,6 mm; cada una lleva un resalte de 1,5 mm con rampa de entrada. Botones de pellizco de 3,5 mm de ancho: llegan a 18 mm del centro y sobresalen unos 3,3 mm por fuera de la pared del mango, que queda a unos 14,7 mm. Se pellizcan los dos a la vez sin meter los dedos en las ventanas, los resaltes se sueltan y el conector sale tirando recto. Ranura para la pieza de la cuchara: 10 mm de profundidad, 10 mm de largo y 3 mm de alto, centrada en la tapa. Medida a comprobar antes de imprimir La lengüeta de la cuchara debe quedar unos 0,2 mm por lado por debajo de la ranura de 10 × 3 mm; en la práctica, alrededor de 9,6 × 2,6 mm, con 1 cm de inserción. El alojamiento y las ventanas del mango están dimensionados solo para estos conectores. El saliente de los botones es una medida del modelo, no una prueba de agarre: si el pellizco queda justo, imprime primero un conector y compruébalo antes que el mango. Impresión y límites Imprime los conectores tumbados de lado, con las capas a lo largo de las aletas; el mango, tumbado con el alojamiento horizontal. PETG es preferible: en PLA las aletas aguantan pocas repeticiones. Con 3 perímetros en los conectores el clic cede algo más; con 4 o más queda más firme. Los dos conectores caben juntos en la cama con la separación actual; si la cama es pequeña, imprímelos por separado. No sirve para otros mangos ni para alojamientos distintos de este mango rosa. El TPU es demasiado elástico para dar un clic firme. La versión actual no se ha probado imprimiendo: la dureza del clic y el agarre de los botones se confirman con una impresión real.
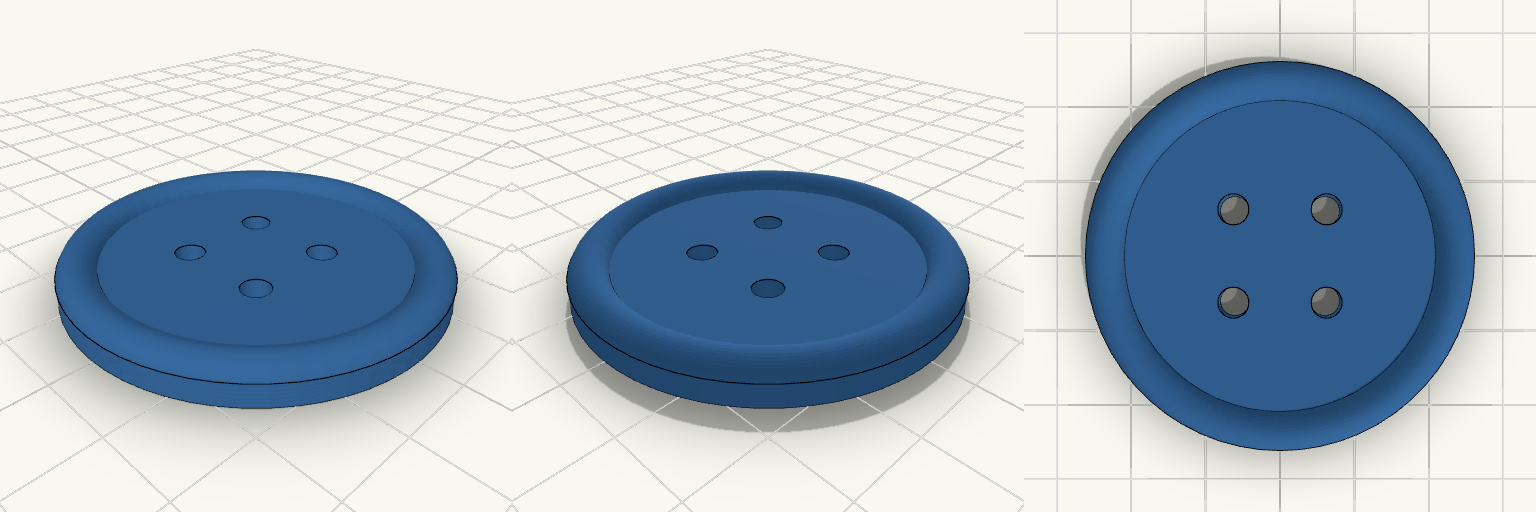
Round Button With Raised Rim
A flat round button with a raised, rounded outer rim and four holes at the centre, so thread or a finger doesn't slide off the edge. Key numbers Diameter: 50 mm Face thickness: 3 mm, rim peaks at 5 mm Rim: 5 mm round bead around the edge Holes: four 4 mm holes in a 12 mm square pattern Print: flat side down, no supports, 0.2 mm layers
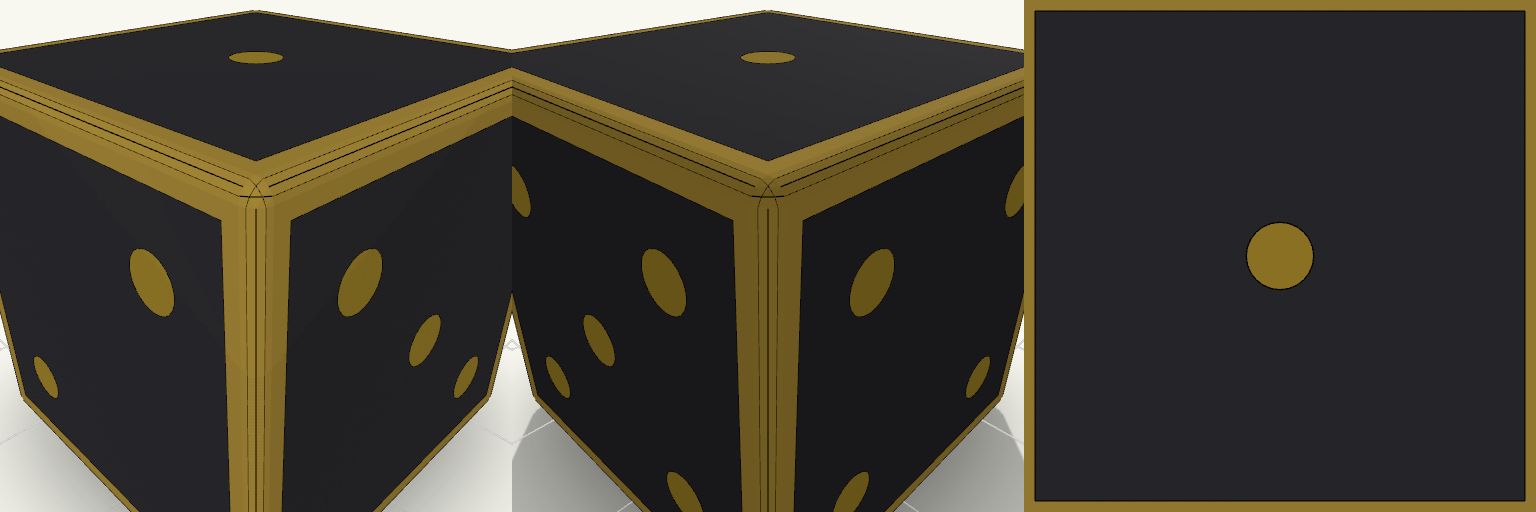
Black and Gold D6 Die
A 25 mm six-sided die in three colour regions: a black body, gold pips and gold edge accents. Corners are rounded at 0.8 mm and the numbering is standard. Body: matte black Pips: gold, flush with each face Edge accents: gold band along all twelve edges Opposite faces sum to 7 (1/6, 2/5, 3/4) Each colour is a separate piece of geometry, so it suits multicolour printing with a 3MF-capable slicer.
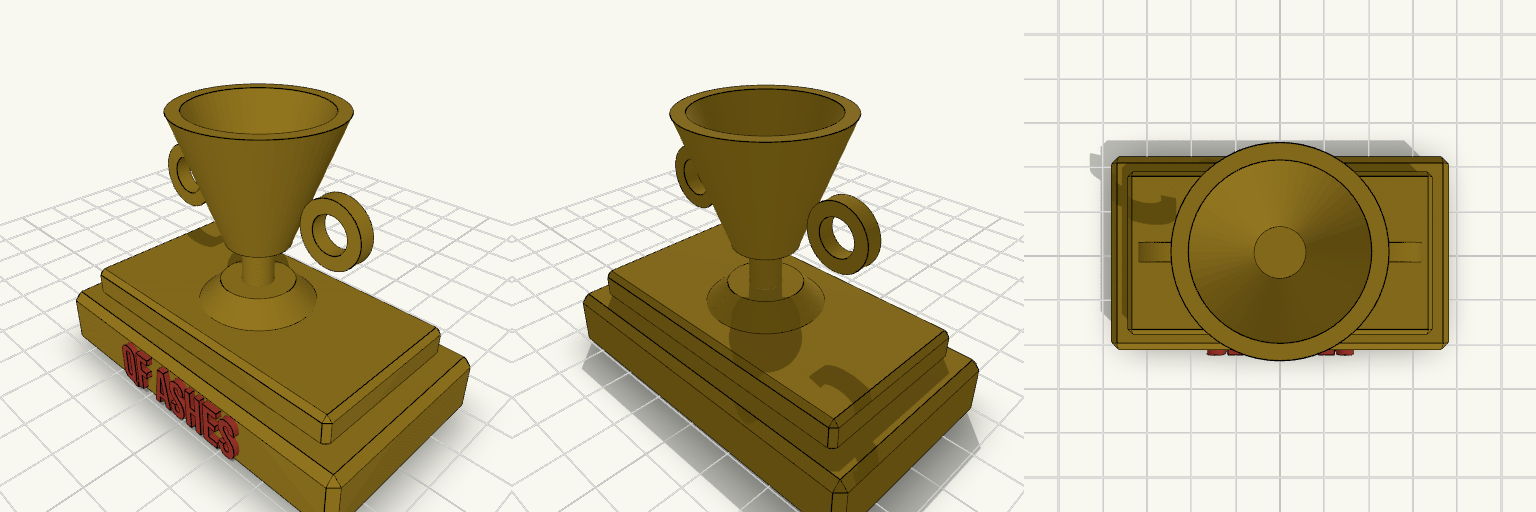
Ashes — QF Go-Kart Trophy Urn
Ashes is an urn-style trophy on a stepped block base, made for the Quick Finishers go-karting group. The front carries a single bold line of raised lettering, "QF ASHES", sized to read from across a room. Features Urn with twin ring handles on a two-step base Raised "QF ASHES" lettering on the front face Flat underside for easy printing Dimensions Base: 70 × 40 mm Overall height: 54 mm
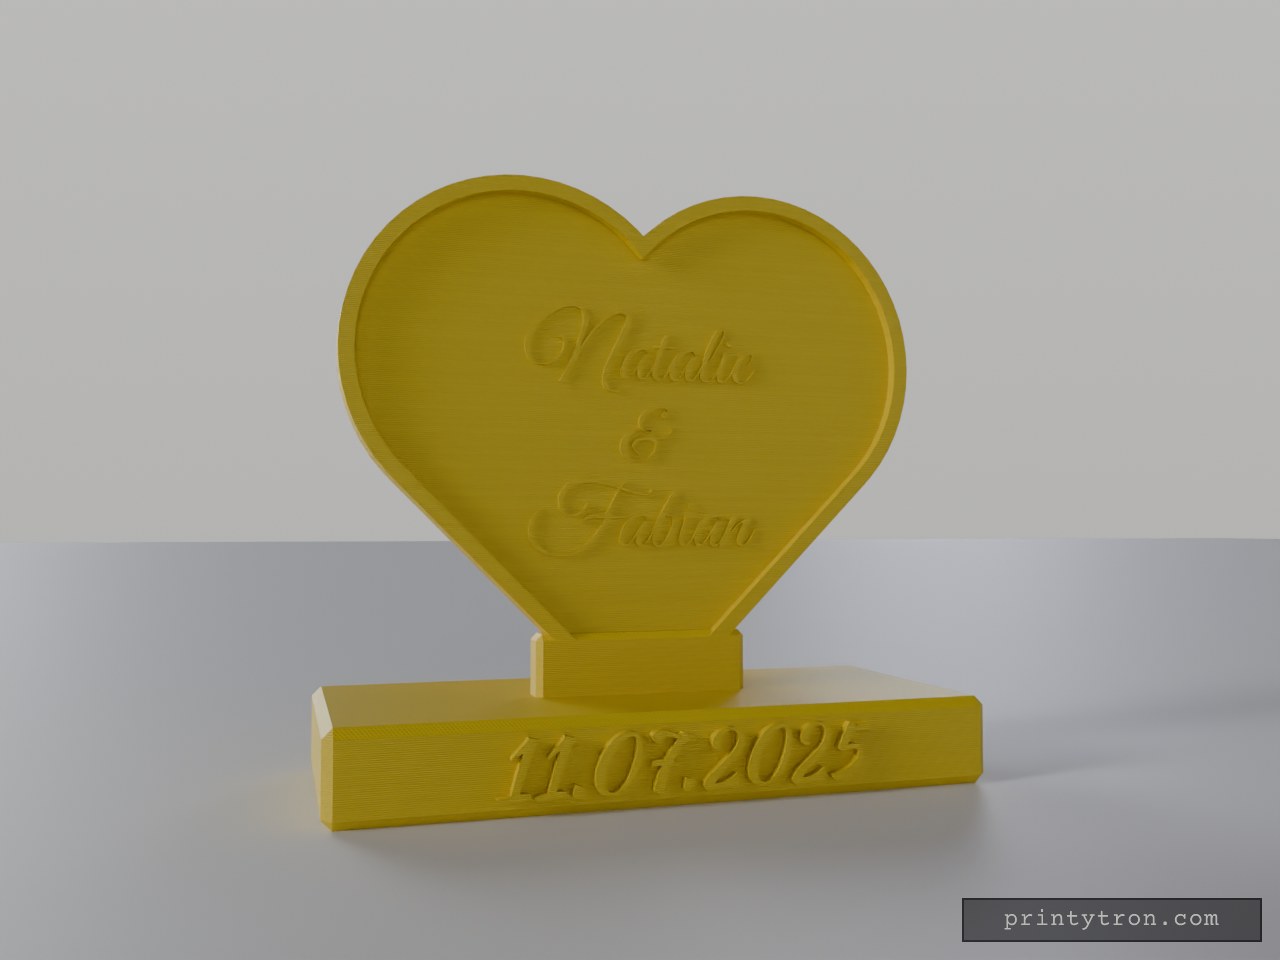
Herzförmige Namensplakette für Natalie und Fabian
Eine herzförmige Namensplakette, die senkrecht auf einem tiefen Sockel steht, statt beim ersten Anstoßen umzukippen oder als loses Kärtchen wegzurutschen. Im roten Herz stehen „Natalie & Fabian“ mittig und etwas höher in Schreibschrift; auf der Sockelfront steht allein das Datum „11.07.2025“ mittig in Schreibschrift. Namen und Datum sind etwa 3 mm tief eingraviert und weiß gefüllt. Sockel und Steg sind schwarz, Herz und Herzrand rot; ein breiter Steg hält die Herzspitze fest im Sockel. Maße und Druck Gesamtgröße ca. 229 mm breit, ca. 104 mm tief und ca. 217 mm hoch. Damit passt das Modell unter 25 cm, wenn der Drucker auch in der Höhe 250 mm schafft. Der Sockel ist ca. 101 mm tief; der Steg zwischen Herz und Sockel ist ca. 79 mm breit und ca. 13 mm dick. Ein Teil, nichts zu kleben oder zu stecken; ohne Stützen druckbar. Das Herz steht aufrecht, der Sockel liegt flach auf dem Druckbett. Für Schwarz (Sockel und Steg), Rot (Herz und Rand) und Weiß (Namen und Datum in der Gravur) brauchst du drei Filamente, Filamentwechsel oder ein Multicolor-System. Bei nur einem Filament bleibt die Schrift nur als Vertiefung sichtbar. Eine 0,4-mm-Düse und eine feine Schichthöhe halten die eingravierten Namen und Ziffern sauber.
Need a part that doesn't exist yet?
Start building →