Trícoro — Cantoneira para Tubo Quadrado 20 mm
Created today
Description
Trícoro é uma cantoneira de canto pensada para montar estruturas com tubo quadrado de 20 mm. Os três encaixes partem do mesmo canto — dois laterais, em X e Y, e um vertical em Z — com 90° entre si, permitindo formar cantos e arranques de estrutura com uma única peça. A cavidade de 20,4 mm deixa 0,4 mm de folga por encaixe, e a parede de 3 mm dá rigidez aos braços de 55 mm. A base fica plana, pronta para assentar na mesa de impressão, e a peça imprime como uma só parte.
Dimensões
- Medida total: 55 × 55 × 55 mm
- Comprimento de cada braço: 55 mm
- Cavidade por encaixe: 20,4 mm (para tubo quadrado de 20 mm)
- Folga: 0,4 mm
- Espessura da parede: 3 mm
Encaixes
- Dois encaixes laterais, nos eixos X e Y
- Um encaixe vertical, no eixo Z
- Todos a 90° entre si, partindo do mesmo canto
Notas de impressão
- A base fica plana em z = 0.
- Imprime como peça única; não requer montagem.
Images
More like this
Explore more in Home & Fixtures →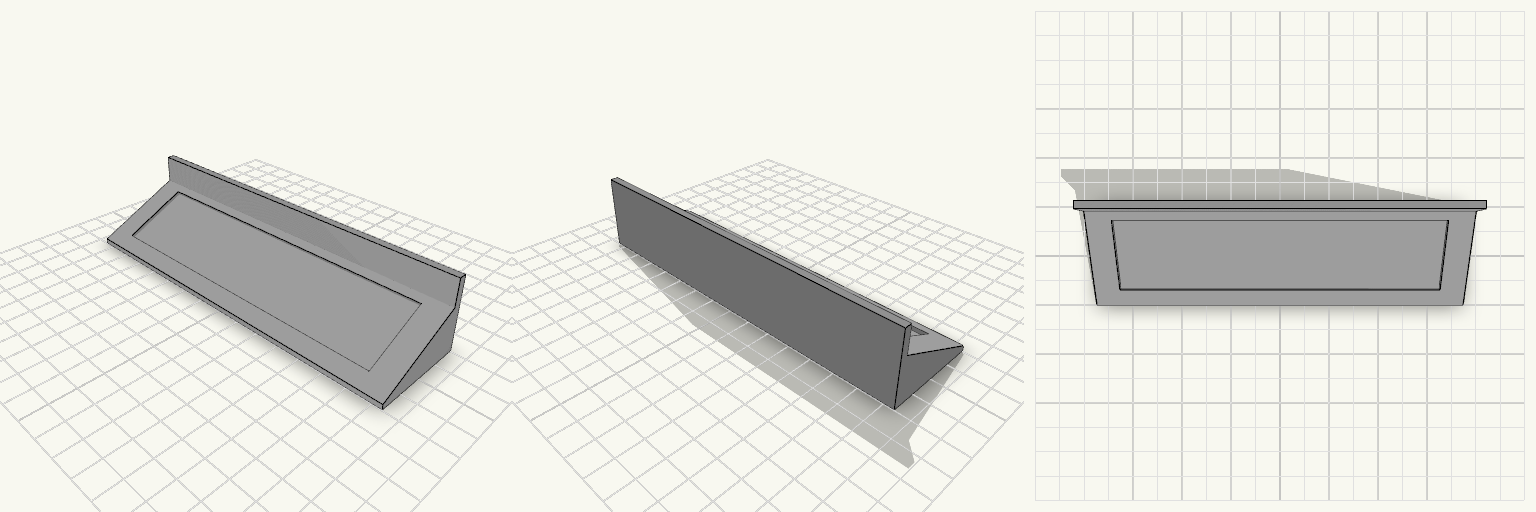
Keil für Echo Show 5 mit 20 mm Rückenhöhe
Der Keil hebt den hinteren Teil des Echo Show 5 an, damit er nicht mehr schief steht, sondern nach vorn geneigt sitzt. Er ist 148 mm breit und 40 mm tief; die Schräge steigt von 2 mm an der Vorderkante auf 20,5 mm hinten an. Am hinteren Ende sitzt zusätzlich eine 3 mm dicke Kante über die ganze Breite, die rund 10 mm über die Schräge hinausragt und das Gerät am Zurückkippen hindert – an der höchsten Stelle misst der Keil damit 30,5 mm. In die Schräge ist mittig eine Vertiefung von 128 × 30 mm eingelassen, 1,5 mm tief und parallel zur Schräge, in der die Standfläche des Lautsprechers liegt und nicht wegrutscht. Der Keil lässt sich unter den Lautsprecher schieben und passt auch unter eine Schrankhalterung, wenn dort mehr Neigung gewünscht ist. Remix-Hooks Breite (148 mm): eine Messung am Gerät, keine Schätzung mehr – wer die Auflage über die volle Standfläche laufen lassen will, ändert hier nichts; wer schmaler baut, sollte die Vertiefung im gleichen Verhältnis mitziehen. Tiefe (40 mm): bestimmt, wie weit der Keil unter dem Gerät hervorschaut. Weniger Tiefe heißt weniger Auflagefläche und eine kürzere Vertiefung, mehr Tiefe ergibt eine flachere Schräge. Rückenhöhe (20,5 mm) und Vorderkante (2 mm): das eigentliche Neigungspaar. Beide Werte zusammen ändern, sonst wird der Winkel steiler oder flacher als gewollt. Rutschkante (3 mm dick, ca. 10 mm über der Schräge, Gesamthöhe 30,5 mm): so niedrig wie möglich halten, damit sie hinter dem Gerät nicht aufträgt; eine Version mit zwei seitlichen Stegen statt einer durchgehenden Kante ist die naheliegende Variante. Vertiefung (128 × 30 mm, 1,5 mm tief): bewusst ein einfaches Rechteck, weil die genaue Form der Geräteunterseite nicht vermessen ist. Wer die Standfläche kennt, passt Länge, Breite und Tiefe an oder ersetzt das Rechteck durch eine gerundete Mulde. Oberfläche: eine geriffelte oder gummierte Auflage in der Vertiefung ist die einfachste Variante gegen Verrutschen; aktuell ist die Fläche glatt. Kombination: der Keil lässt sich mit einer Unterbauhalterung oder einer einfachen Schale kombinieren, wenn das Gerät gleichzeitig hängen und geneigt stehen soll. Vor dem Druck die Standfläche des eigenen Geräts prüfen – Breite und Tiefe der Vertiefung sind geschätzt, nicht nachgemessen.
Capuchón protector para tornillo de 7 mm
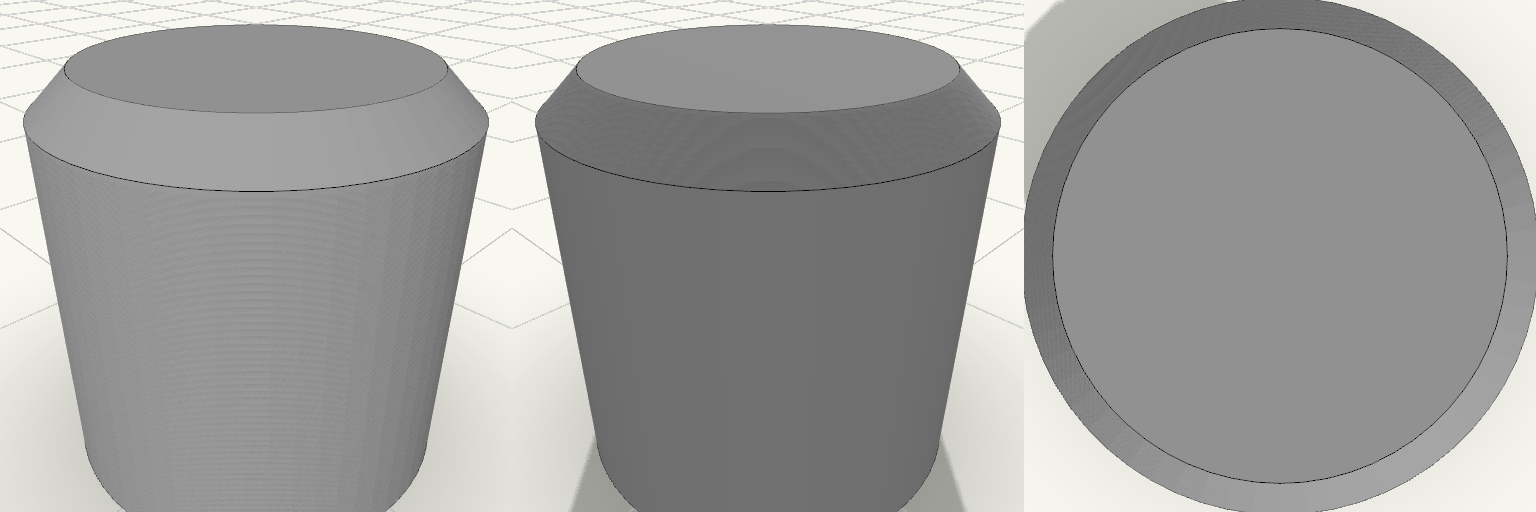
Capuchón cilíndrico con rosca interior pensado para cubrir la punta o la cabeza de un tornillo y dejar el extremo oculto y sin aristas vivas. La rosca interior está hecha para un tornillo de 7 mm con paso de 1,5 mm y 9 mm de profundidad, de modo que la pieza se enrosca en el tornillo. El extremo opuesto es cerrado, y el borde de entrada lleva un chaflán que facilita colocar la pieza sobre el tornillo. Medidas y construcción Rosca interior: para tornillo de 7 mm, paso 1,5 mm. Profundidad roscada: 9 mm. Fondo cerrado: 1,5 mm de espesor. Medida exterior: 10,5 mm de diámetro × 10,5 mm de alto total. Borde de entrada achaflanado para guiar la entrada del tornillo. Pieza única, se imprime tal cual, sin montaje posterior. Antes de imprimir, comprueba que el tornillo tenga 7 mm de diámetro y que el paso sea de 1,5 mm. Si el paso real no coincide, la rosca no enroscará; si el diámetro o el paso son distintos, conviene ajustar la rosca interior en consecuencia.
Tampão com travas para abertura semicircular
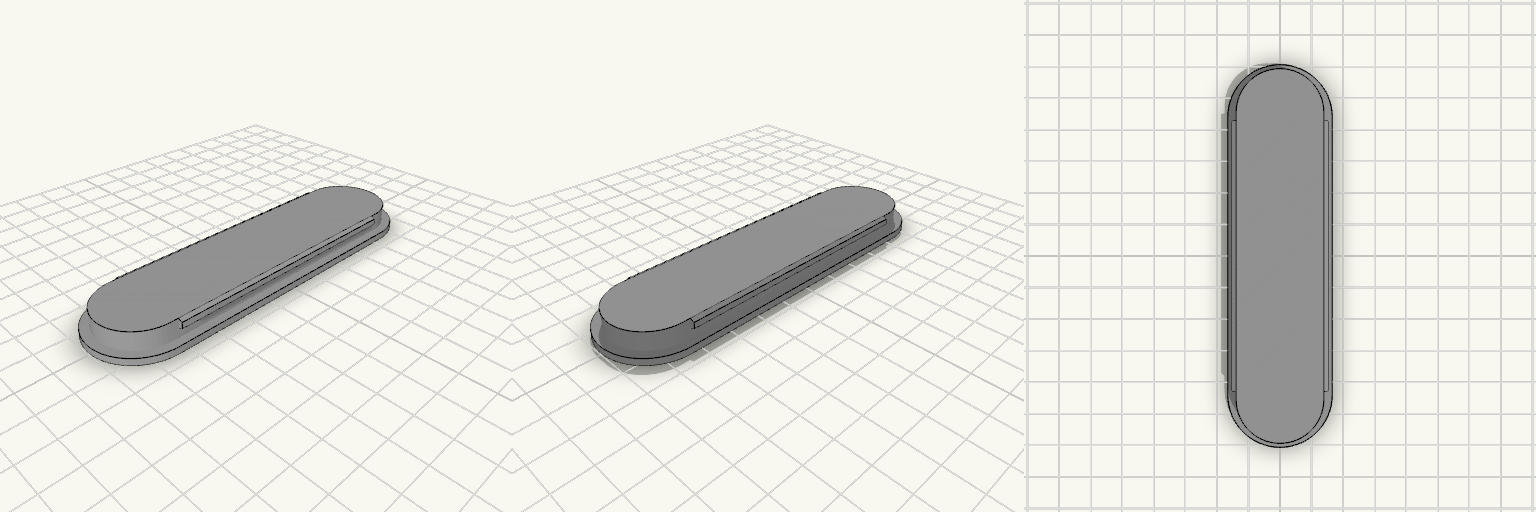
Um tampão para abertura retangular de pontas em semicírculo — aquele vão que fica aberto porque nada encaixa direito nele. A peça assenta por pressão: duas travas embutidas nos lados compridos prendem na abertura, a aba assenta na borda e o interior é oco por baixo, então o tampão cobre o buraco sem virar um bloco maciço. As laterais são maciças, sem fendas: é a parede fina que cede no eixo X na hora de encaixar. Medidas que decidem o encaixe Abertura coberta: 27 × 114 mm, com as duas pontas em semicírculo de raio 13,3 mm; o corpo tem 26,6 × 113,6 mm, já descontada a folga. Aba de 2,1 mm em volta: assenta na borda e impede a peça de afundar no vão. Espessura total: 8 mm, contando a aba — o perfil fica baixo, rente à superfície. Duas travas embutidas, uma em cada lado comprido, com 84 mm de largura cada; não há travas nas pontas, que brigariam com a curva. As travas ocupam a faixa de 5 mm a 8 mm na altura, com ressalto de 3 mm. Parede lateral de 1,8 mm, inteira e sem fendas nem aberturas: a flexibilidade vem só da espessura da parede. Interior oco e aberto por baixo; o topo é fechado por uma tampa de 0,5 mm. Peça completa: 32,6 × 119,6 × 8 mm. Para imprimir Sai em uma peça só, sem montagem, sem parafuso e sem cola. Imprima com o lado da aba para baixo, apoiado na mesa, para as travas saírem limpas. O topo é uma tampa fina de 0,5 mm: reduza a velocidade nas últimas camadas para ele não ondular. O interior é oco e aberto por baixo — dá para escolher o preenchimento e conferir a parede por dentro depois de imprimir. Use um material que ceda um pouco — PETG funciona bem; PLA muito rígido pode rachar a trava no primeiro encaixe. O encaixe depende da parede de 1,8 mm: se ainda ficar rígido demais, afine mais a lateral antes de mexer nas travas, mas abaixo de 1,5 mm a parede começa a ficar frágil.
Charging Station Marker Nail
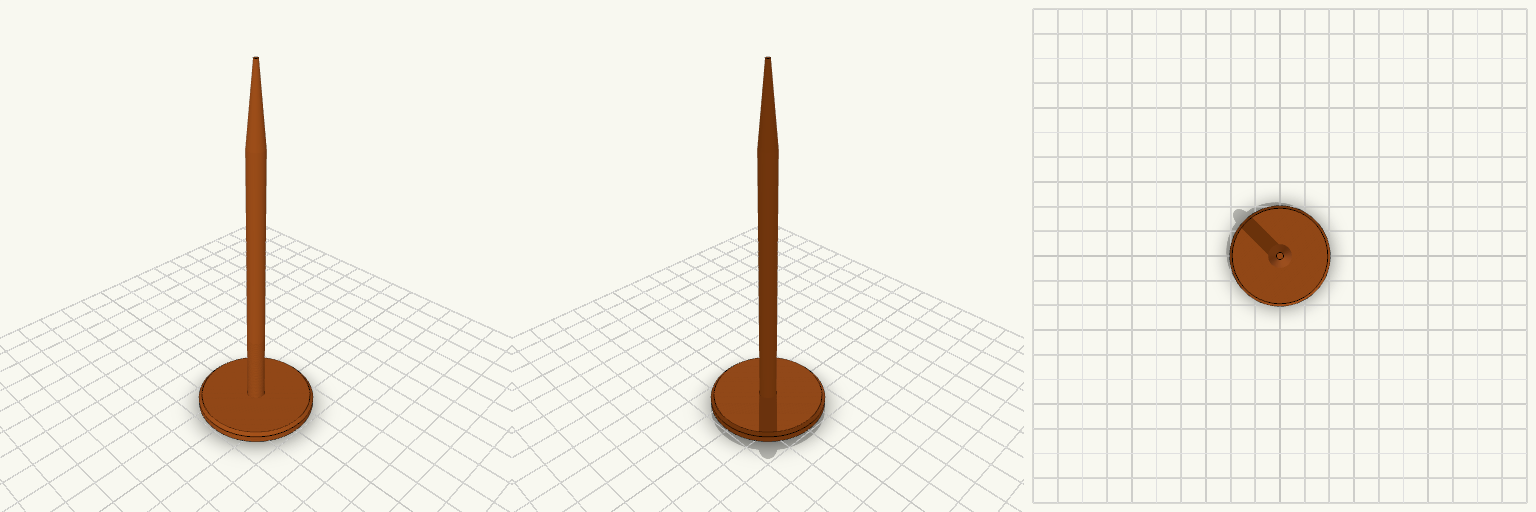
A ground marker nail for holding the position of a robot mower charging station while the charger is stored for the season. It is pushed into the soil where the charger's screw sits in summer. The nail has a wide, flat 40 mm head that stays visible at ground level, a slim 6 mm round shaft, and a tapered point for easy insertion. It prints head-down, so no supports are needed. Head: 40 mm diameter, 4 mm thick, chamfered edge Shaft: 6 mm diameter, about 90 mm long Tip: tapers to a point over 25 mm Overall length: about 119 mm Prints without supports
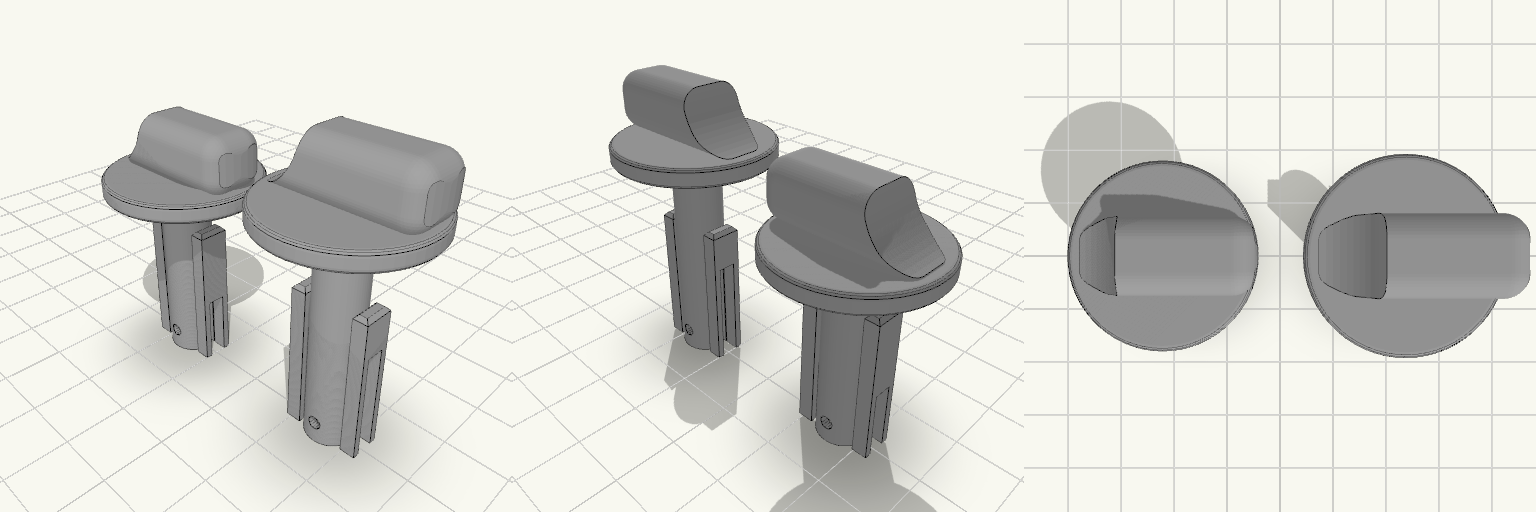
Perilla de estufa de repuesto con vástago reforzado
La perilla de la estufa que gira en falso o se parte deja el fuego sin control; esta perilla de repuesto se calza sobre el caño de gas y se traba con pasador, con el pulgar recortado al contorno del collar y todos los bordes del agarre redondeados para girar sin engancharse. La placa trae dos perillas: la original y una copia con vástago de 35 mm para cambiar el largo según la estufa. Cotas que deciden el calce Dos perillas en la misma placa: la original mide 41,5 mm de alto total (12 mm de cabeza + 29,5 mm de vástago); la copia mide 47 mm de alto total (12 mm de cabeza + 35 mm de vástago). En la placa ocupan 58 × 26 × 47 mm. Vástago: 8 mm de diámetro exterior, con dos aletas planas de refuerzo de 24 mm a los lados; en la copia, las aletas quedan en la zona de la punta. Vástago hueco: orificio de 5,5 mm de diámetro, abierto en la punta. En la original llega a 26 mm de profundidad y queda ciego en los últimos 3,5 mm hacia la cabeza, con paredes de aproximadamente 1,25 mm; la copia mantiene el mismo orificio de 5,5 mm. Agujero pasante: 2,2 mm de diámetro, horizontal, con el centro a 3,5 mm del extremo inferior; cruza la cavidad del vástago, así que la chaveta atraviesa el caño de gas. Endija: 3 mm de ancho, abierta en la punta; va a 90° del agujero del pasador, atraviesa el vástago y corta también las aletas laterales, dejando el extremo dividido en dos mitades flexibles. En la original llega a 11 mm; en la copia llega a 17,5 mm, la mitad de su vástago. Cabeza: collar de 26 mm de diámetro por 3 mm de alto; el pulgar mide 26 mm de ancho, 10 mm de grosor y 9 mm de alto sobre el collar, ya no pasa el contorno del collar, es plano de un lado y baja curvo del otro. Todas las aristas del pulgar tienen 3 mm de radio; los bordes del collar tienen 0,8 mm. Cada perilla se imprime de una sola pieza; la endija no separa el modelo, solo deja flexibles las dos mitades del extremo. El acabado negro mate sale del filamento que elijas, no de la geometría. Antes de imprimir, mide el diámetro del caño de gas y el del pasador: el hueco del vástago y el agujero pasante son las dos cotas que no perdonan, y si no coinciden es mejor ajustarlas antes de gastar material.
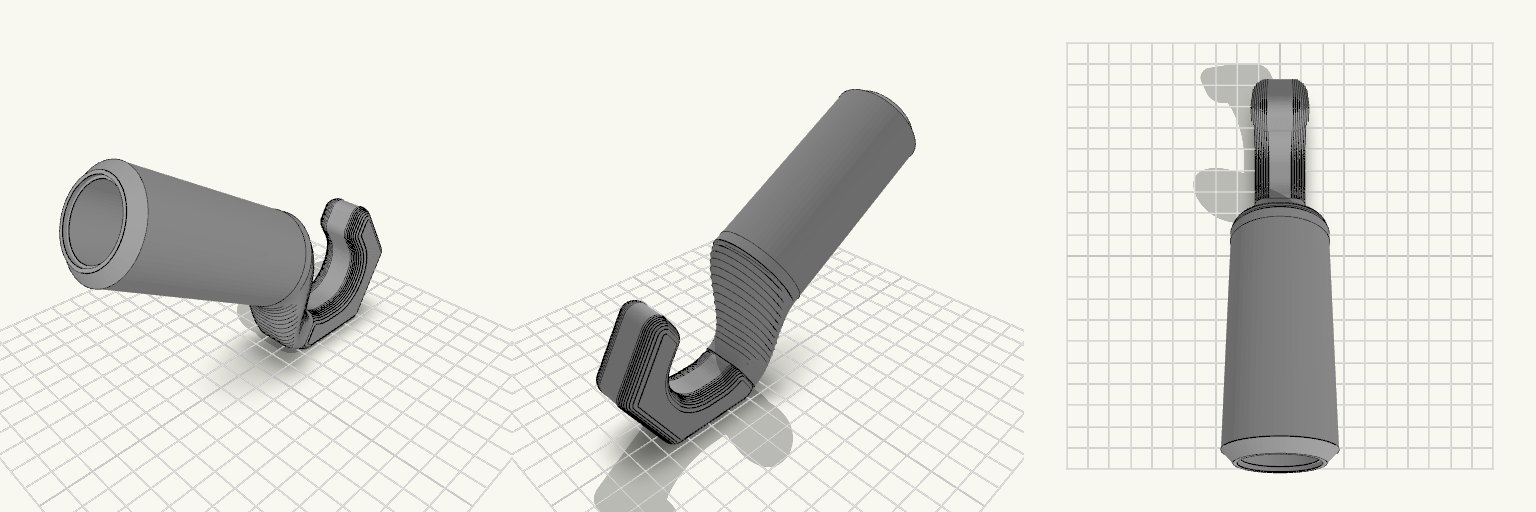
Broom Stick Hook for 25.3 mm Handles
What it's for A one-piece hook for the end of a metal broom stick. The sleeve fits over a 25.3 mm handle with a tight friction fit, and the inline half-hexagon hook rises from the top of the sleeve. Its centre sits on the stick axis, so a coat rack bar hangs in line with the handle and the broom hangs straight. The inside of the hexagon is 31 mm flat to flat for a rack rail up to 27 mm, with a smooth continuous inner path. The beam is 15 mm thick and 22 mm wide, with a 6 mm radius on its long edges and rounded outside corners. Between sleeve and hook, the sleeve's round outer radius eases into the beam's rounded section over about 34 mm, starting 8 mm below the sleeve's top edge and shifting onto the beam's offset line, so there is no flat shelf or sharp edge along the transition. The inside corners carry a 14 mm radius. There is no screw hole; use friction, glue, or a wrap of tape if the fit is loose. Inline hook at the end of the stick Sleeve for a 25.3 mm metal broom handle 25.5 mm bore for a tight friction fit Half-hexagon hook centred on the stick axis 31 mm inside opening for a rack rail up to 27 mm Rounded beam and a blended, edge-free sleeve-to-hook transition No screw hole; use friction, glue, or tape if needed Dimensions Overall size as oriented for printing: 38 × 147.6 × 106 mm Broom sleeve bore: 25.5 mm for a 25.3 mm handle Hook opening: 31 mm flat to flat inside, for a rack rail up to 27 mm Hook beam: 22 mm wide, 15 mm thick, 6 mm edge radius Hook centre: about 32 mm above the sleeve, on the stick axis Print notes The part rests on the angled hexagon face next to the flat outer face — the next face round from the opening — so it sits tilted about 30° from flat and the opening leans over rather than pointing straight up. The sleeve end angles up off the plate, which keeps the overhang under it smaller than a flat-face stance would, but that underside will likely still want a little support. Flat contact face is narrow: add a brim for grip The hook arch itself should print cleanly This design has not been test-printed For a hanging metal broom, use 5 or more walls and about 40% gyroid infill Check the neck around the hook gap after printing, since it carries the hanging load Test the friction fit on the handle before use Remix ideas Resize the 25.5 mm sleeve bore for other handle diameters Change the 31 mm hook opening for a different rail size Adjust the beam width or edge rounding for a different balance of comfort and stiffness Add a grip band or clamping collar for heavier handled tools