70 mm Cratered Moon Sphere2
Created today
Description
A roughly 70 mm ball pitted with 60 craters of uneven size and placement, so it reads as a moon rather than a clean sphere. The craters run from about 4 mm to 14 mm across and 0.5 mm to 1.5 mm deep, scattered across the whole surface — a few sit on the underside, so the face changes as you turn the part. A 3 mm blind hole enters from the front and stops at the centre, leaving the back solid; it runs 35 mm deep and takes a thin wire or cord pushed in from one side.
The ball is a hollow shell with a 3 mm wall, so there is no interior to fill — the hole opens into a sealed cavity that is otherwise closed. That keeps the weight and material down, but the top of the cavity is an overhang: it may need supports or it may sag slightly inside, where only you will see it. The outside still touches the build plate at a single point, so print it with supports or a wide brim, or split it at the equator into two hemispheres that each print flat-side down and join afterwards. The crater field is surface detail, so almost nothing here is locked in.
Remix hooks
- Diameter — about 70 mm on all three axes. The crater field and wall thickness scale with it; much past 200 mm and you are into split-and-glue territory on most beds.
- Wall thickness — 3 mm as it stands. Thinner walls save material but print shakier; thicker walls swallow the crater depth, so deepen the craters if you go up.
- Crater count and size range — 60 craters from 4 mm to 14 mm across. Raise the count and tighten the range for a finely pocked surface, or drop to a couple of dozen large ones for a few big basins.
- Crater depth — 0.5 mm to 1.5 mm. Shallower craters print cleaner overhead and read best under a wash; deeper ones catch more shadow but want slower overhangs — and they must stay well under the wall thickness.
- Minimum gap — a pair or two still meet, which the gap check misses because the cut widens slightly on the curved surface. Widen the spacing and count each crater's true surface width if you want every bowl cleanly separate; expect slightly fewer craters as a result.
- Wire hole — 3 mm wide, 35 mm deep, blind, entering from the front and ending at the centre. Scale it with the wire you have. Running it all the way through gives a threaded bauble; moving it off-axis gives one that hangs tilted.
- Cavity openings — the shell is sealed apart from the wire hole. A drain hole or a screw cap turns the hollow into a container.
- Distribution and split point — bias the scatter toward one hemisphere for a near-side/far-side look; cut at the equator for two support-free halves, or off-centre for a shallow cap and deep bowl, with a locating lip to register the halves.
Obvious variants
- A flat-bottomed version that stands on a shelf or glues to a base without supports.
- A solid version when weight matters more than material, with the full-depth craters of the earlier build.
- A scaled-down single-piece print when you want the cratered shape without the support hassle.
Pairs with
- A thin wire or cord pushed into the 3 mm blind hole for a hanging decoration, with a dab of glue to hold it.
- A socketed ring or base if you add a flat, for a stand-up display.
Images
More like this
Explore more in Decor & Display →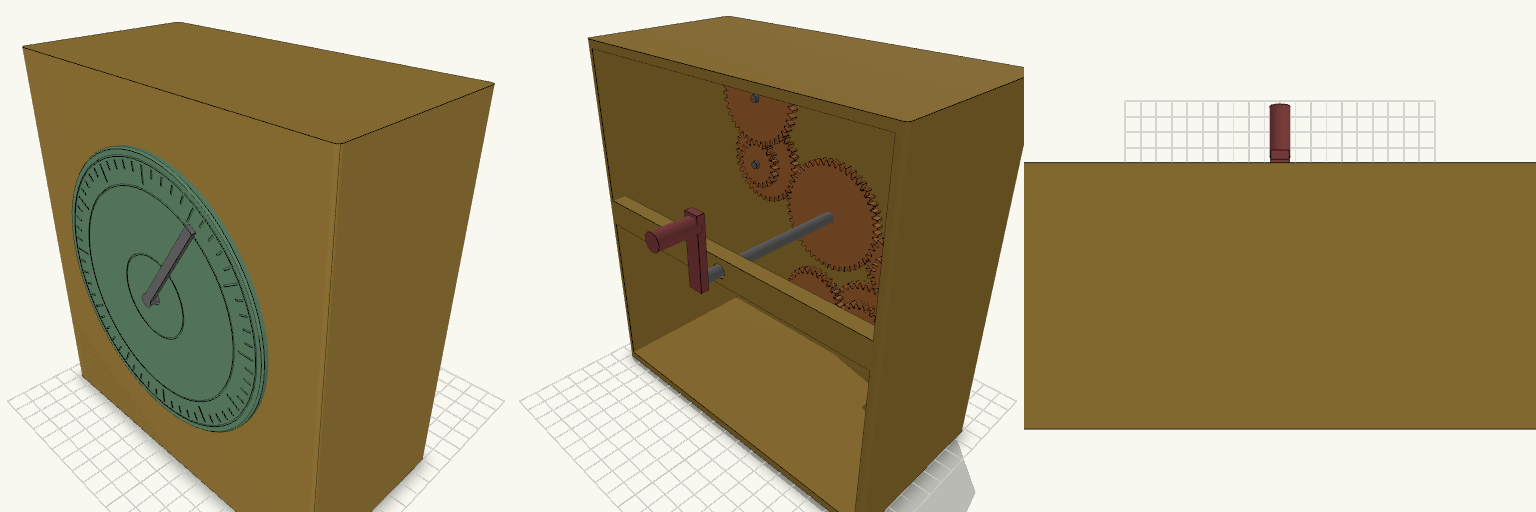
Antikythera Mechanism Desk Model
A simplified, life-size-style display model of the Antikythera mechanism: an upright case with a round front dial, a pointer, an open-backed gear train and a rear hand crank. Case 180 x 90 x 190 mm, open at the back to show the gears 130 mm front dial with ring grooves and 60 tick marks Nine spur gears (20 to 48 teeth, module 1.25) arranged in three layers, with phase-matched teeth so they mesh Fixed 4 mm pegs on the front wall carry the compound gears; the main 48-tooth gear is fused to a 6 mm axle that drives the front pointer Rear bearing bar supports the axle, with a crank handle on the back The gear train is a stylised interpretation, not a tooth-accurate copy of the original 30-plus gear mechanism. Print the case, dial, gears, axle and crank separately; the compound gears sit loose on their pegs with 0.3 mm clearance.
OO Gauge Flat-Pack Thatched Cottage with Dormers
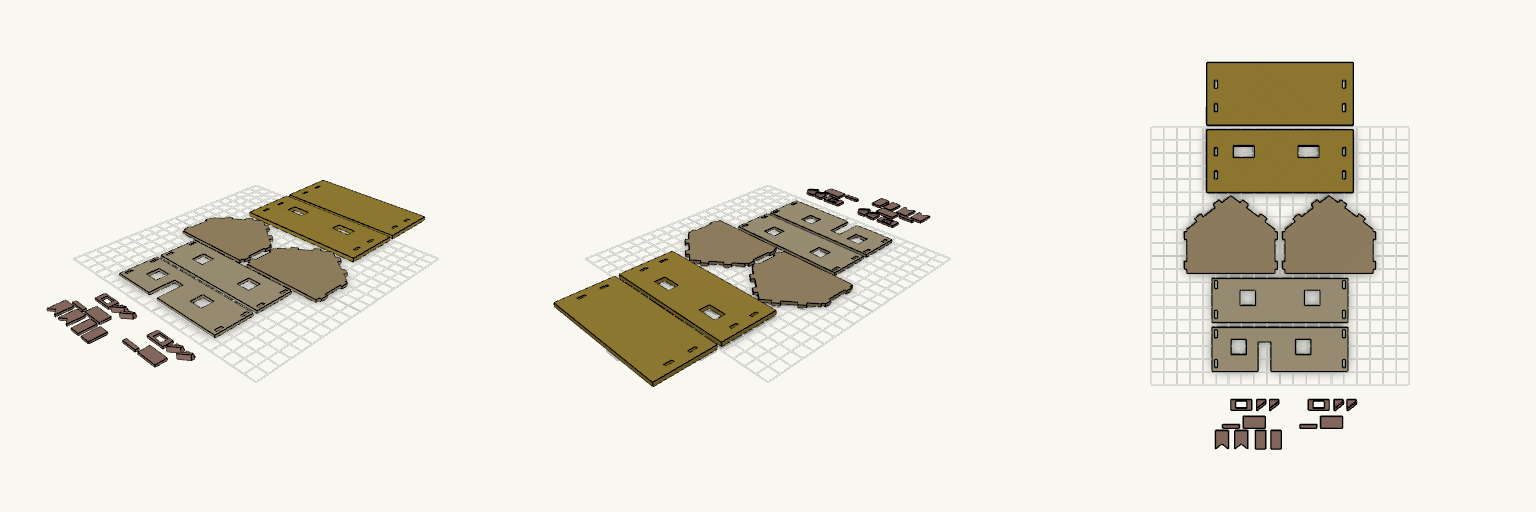
Flat-pack 1:76 (OO gauge) detached cottage with thatched roof panels, dormer windows and a chimney, all printed lying flat. Fit notes Host: OO gauge, 1:76 scale; footprint 105 × 72 mm, 34 mm walls. Wall tabs use 2.4 mm slots for 2 mm tabs; test one tab first. Roof dormer openings are 16.4 × 9.4 mm; check one dormer against them before printing the rest. Each dormer cheek has a 4 mm tall gluing lip along its sloped lower edge, cut to the 37.4° roof pitch, to glue under the roof panel. Not a fit for other scales (N, HO) without resizing.
OO Mill Front and part-tapered Chimney Set
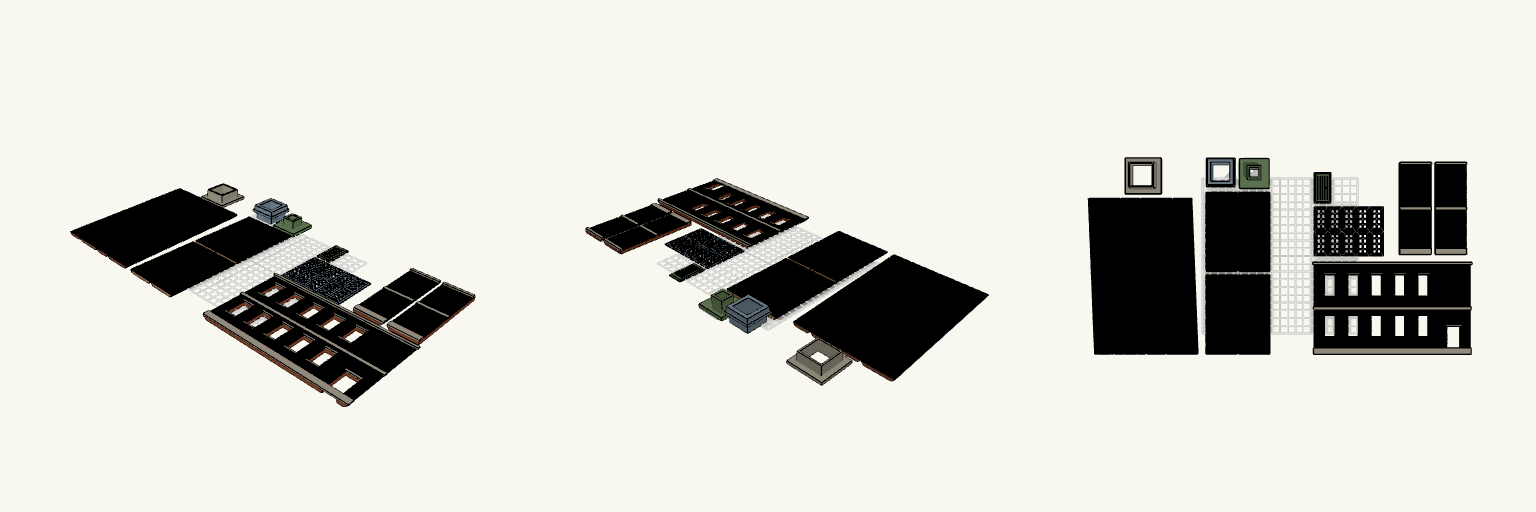
A four-panel tapered chimney with a straight brick base, paired with a half-relief two-storey mill front in OO scale. The wall, ten window frames and plank door all print flat. Each window frame and the door now carries a thin web around its outside edge to hold it down during printing. Remix hooks Web width (webw, 1.8 mm): wider grips better; keep it under half the 4 mm spacing so neighbouring webs stay separate. Web thickness (webt, 0.3 mm): roughly one or two layers. Thinner peels off easier, thicker holds harder. Window grid (14 x 28 mm frames, 4 mm spacing): change the spacing if the web is widened. Pairs with: the chimney set on the same plate layout, and a clear or painted glazing insert behind the frames. Print notes Trim the web with a hobby knife after printing, before fitting frames into the wall openings. Wall is 200 mm long and needs its own print separate from the chimney set.
OO Scale Picket Fences and Brick Walls
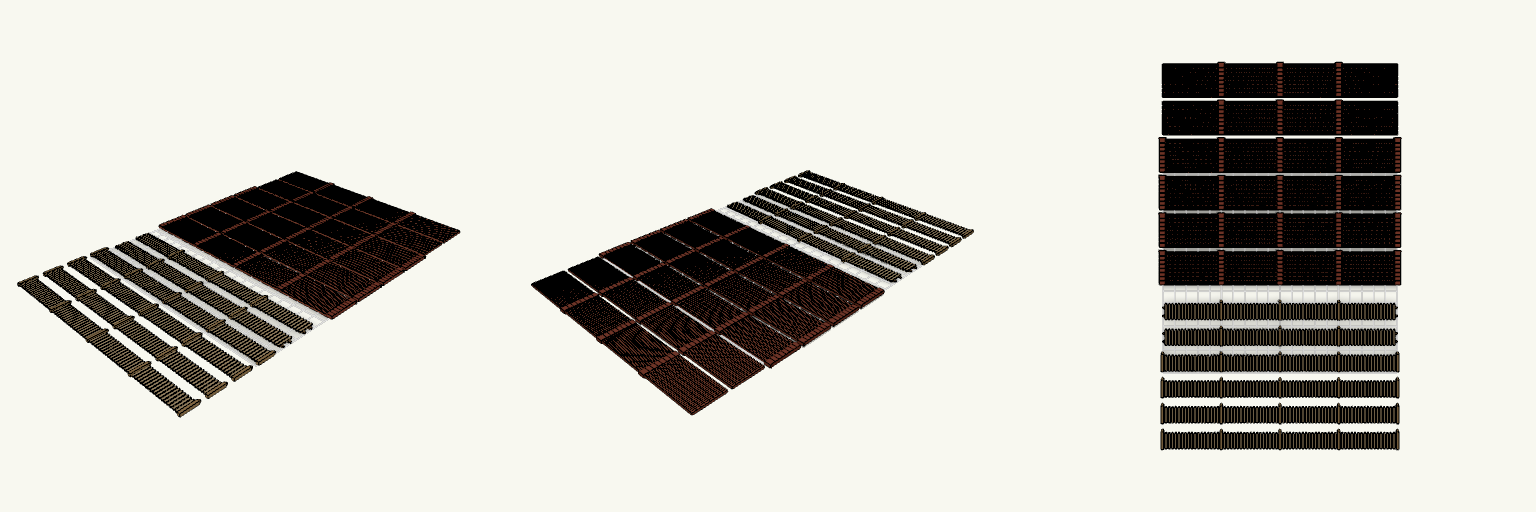
Flat-pack OO scale (1:76) boundary set: six 200 mm wooden picket fence panels and six 200 mm brick wall panels, all printing on one bed in separate rows. Fences: four with five posts, two with only the three centre posts (50, 100, 150 mm). Posts are 17 mm tall with pyramid tips; slats are 1.6 mm wide, 14 mm tall and pointed. Brick walls: 28 mm tall (7 ft), 1.6 mm thick, soldier bond: upright bricks, with 0.4 mm mortar grooves every 1.4 mm and a course line every 3.5 mm. Pillars are 5 mm wide, 2.4 mm thick, with a small cap, spaced 50 mm apart. Two walls have only the three centre pillars. Remix hooks wh (28) sets wall height; crs (3.5) sets course spacing. pitch (1.4) and gw (0.4) set brick width and mortar line; keep gw at or above one nozzle width. pwid (5) widens the pillars; wall wt (1.6) sets thickness. Swap the pillar count or spacing to match the fence posts. Pairs with the fences as a mixed boundary run; glue panels to a base strip for display.
Placa con figura en L y cuadrado blanco
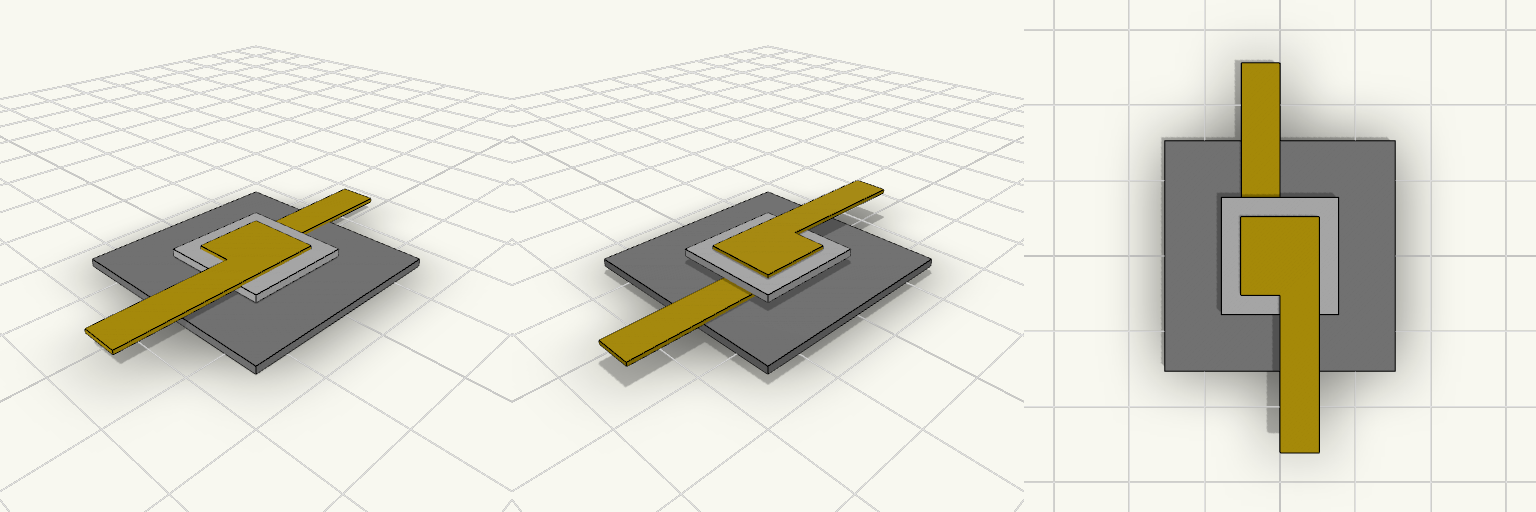
Una placa cuadrada de 30 × 30 mm y 1 mm de espesor sirve de base a tres capas superpuestas: una figura en L amarilla de 0.5 mm de espesor, un cuadrado blanco de 15 × 15 mm y 1 mm centrado sobre ella, y una segunda L amarilla idéntica a la primera, girada 180° sobre el mismo eje central. El conjunto alcanza 3 mm de altura total. Las dos L son iguales: un cuadrado central de 10 × 10 mm centrado en la placa, del que sale un brazo de 5 mm de ancho y 30 mm de largo. El brazo de la L inferior apunta hacia un lado y el de la superior hacia el opuesto, de modo que cada uno sobresale 10 mm del borde de la placa. La pieza ocupa 30 × 50 mm sobre la cama y los dos tramos volados quedan sin apoyo debajo. Placa: 30 × 30 mm, 1 mm de espesor, en gris. Figura en L: dos capas amarillas de 0.5 mm, con el cuadrado de 10 × 10 mm centrado en la placa y brazos de 5 mm de ancho que salen en sentidos opuestos. Cuadrado blanco: 15 × 15 mm, 1 mm de espesor, centrado entre las dos L. Tamaño total: 30 × 50 × 3 mm. Impresión: una sola pieza; los dos extremos de 10 mm que sobresalen necesitan soportes, o bien gira la pieza para evitarlo. Primera capa: al ser la base de 1 mm, cuida la adherencia a la cama para que no se combe en las esquinas.
55كعبة مجزءة
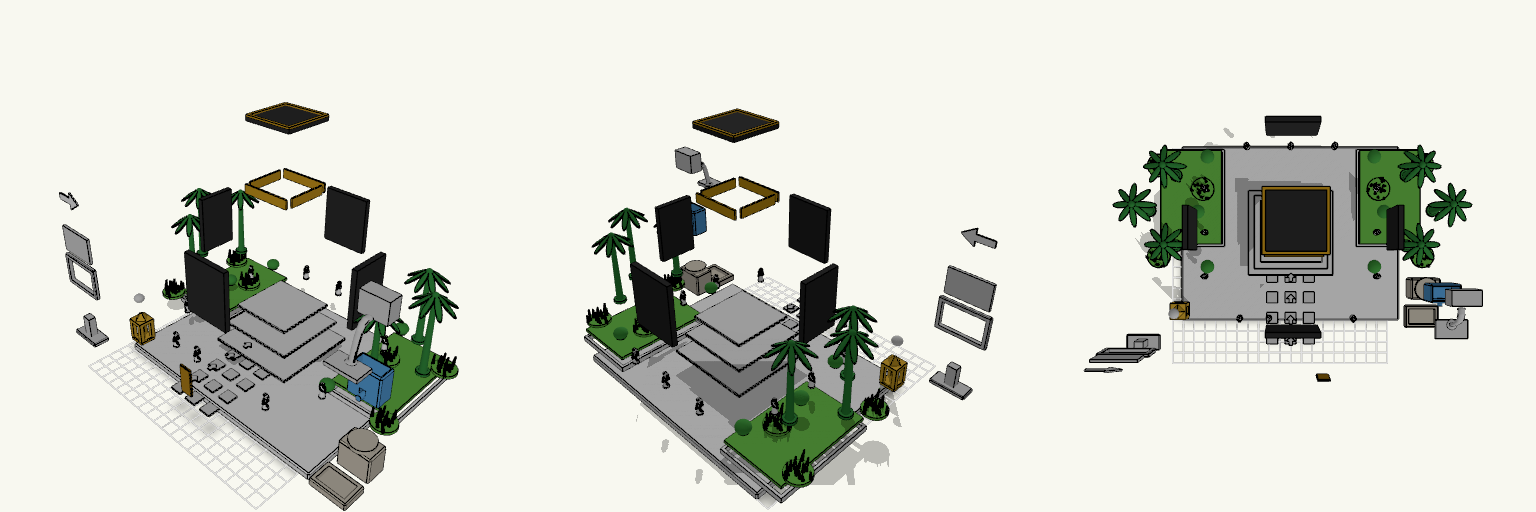
Exploded miniature of a masjid scene with every component spread apart with visible gaps. Parts: white base, platform tiers, four black Kaaba walls, roof, door, gold bands, walkway tiles, arrows, palms, bushes, grass, pilgrims, Zamzam station, Maqam Ibrahim and blue sign parts. Layout: exploded only, no assembled copy. Export: the download is one file; separating individual parts happens outside this model.