3D-printable decor & display pieces
Lithophane shades, planters, trophies, wall art and display models. Browse what makers built, or describe the exact piece you want and Printy makes it.
Need one that fits your exact measurements? Start building →
Newest
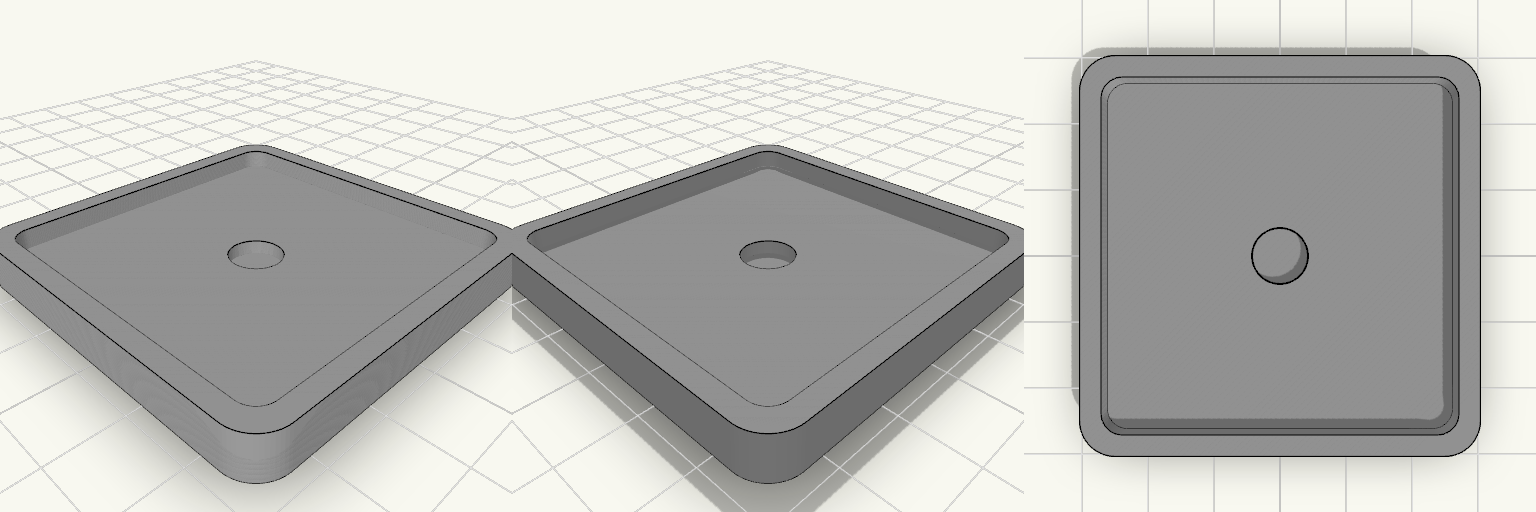
Moldura quadrada para botão com ímã
Moldura quadrada para um botão de 50,1 mm de lado, com encaixe de 3 mm de profundidade e cantos arredondados. A parede ao redor do encaixe tem 3 mm, resultando em 56,1 mm de lado externo e 6,5 mm de altura total. Um furo para ímã de 8×2 mm fica centralizado na face superior; na face inferior há quatro furos para ímãs de 5×2 mm, próximos aos cantos, posicionados a 21 mm do centro em X e em Y. A peça imprime em uma única parte. Encaixe: 50,1 × 50,1 mm, cantos arredondados, 3 mm de profundidade Dimensão externa: 56,1 × 56,1 mm; altura total: 6,5 mm Parede ao redor do encaixe: 3 mm Ímã central: furo de 8,2 mm de diâmetro × 2,1 mm de profundidade na face superior (ímã de 8×2 mm) Quatro furos na face inferior para ímãs de 5×2 mm: 5,2 mm de diâmetro × 2,1 mm de profundidade, a 21 mm do centro em X e em Y Folga dos furos: 0,2 mm no diâmetro e 0,1 mm na profundidade Impressão: uma peça única, sem suportes nos furos
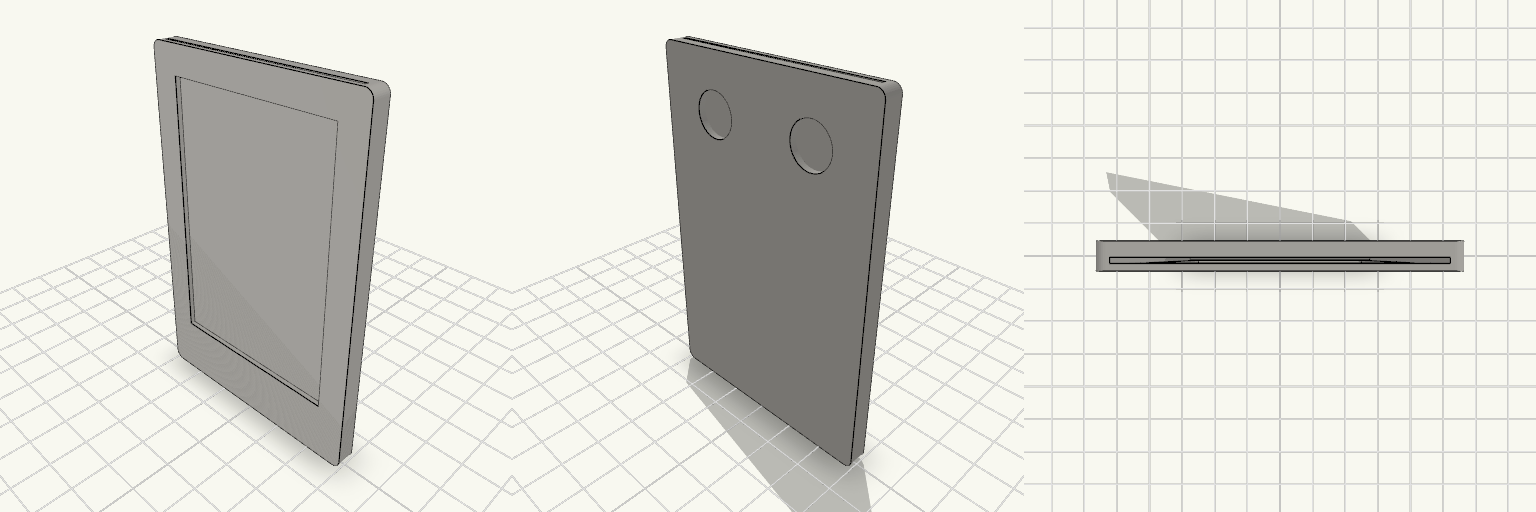
Marco para fotos Instax Mini con imanes
El marco para fotos Instax Mini evita que la foto se caiga de la nevera, se doble por una esquina o acabe pegada con cinta que deja residuo. La foto entra deslizándola por la abertura superior y queda en un bolsillo cerrado por abajo y por los lados; la trasera es una placa sólida, así que la ventana no la atraviesa y no se ve la foto por detrás. Dos imanes de neodimio en la cara trasera, en la parte superior, lo sujetan sin chinchetas ni cinta. El marco va en vertical y mide 60 × 90 mm en total, con 4,8 mm de grosor. La ventana deja un borde frontal inferior de 15 mm y uno superior de 7 mm: el inferior sigue siendo el ancho de una polaroid, pero el de arriba queda corto y la ventana se pasa 6 mm de la zona de imagen de la Instax (62 mm). Por ahí se verá algo más de la foto o de su borde blanco. Medidas que deciden el montaje Marco: 60 × 90 mm, 4,8 mm de grosor. Ventana frontal: 46 × 68 mm, centrada a lo ancho, a 15 mm del borde inferior y a 7 mm del superior. Bolsillo para la foto: cerrado, abierto solo por el borde superior; la foto de 53 × 86 mm entra deslizándola desde arriba. El bolsillo mide 54,6 mm de ancho. Paredes laterales: unos 2,7 mm. Trasera: placa sólida de 2,6 mm; la ventana no la atraviesa. Alojamientos de imán: 11 mm de diámetro y 1,8 mm de profundidad, separados 28 mm entre centros, con el centro a 14 mm del borde superior, en la cara trasera detrás de la zona de la ventana. Dejan 0,8 mm de plástico entre el imán y la foto. Para imprimir Necesitas dos imanes de neodimio de 8 × 1,5 mm y una gota de cianoacrilato para fijarlos. Con alojamientos de 11 mm, cada imán de 8 mm queda con 1,5 mm de holgura por lado; hay que pegarlo para que no se mueva. La holgura del bolsillo está calculada para que la foto entre deslizando; si la impresora aprieta las paredes, puede que entre justa. El marco se imprime como una sola pieza; los imanes se pegan después.
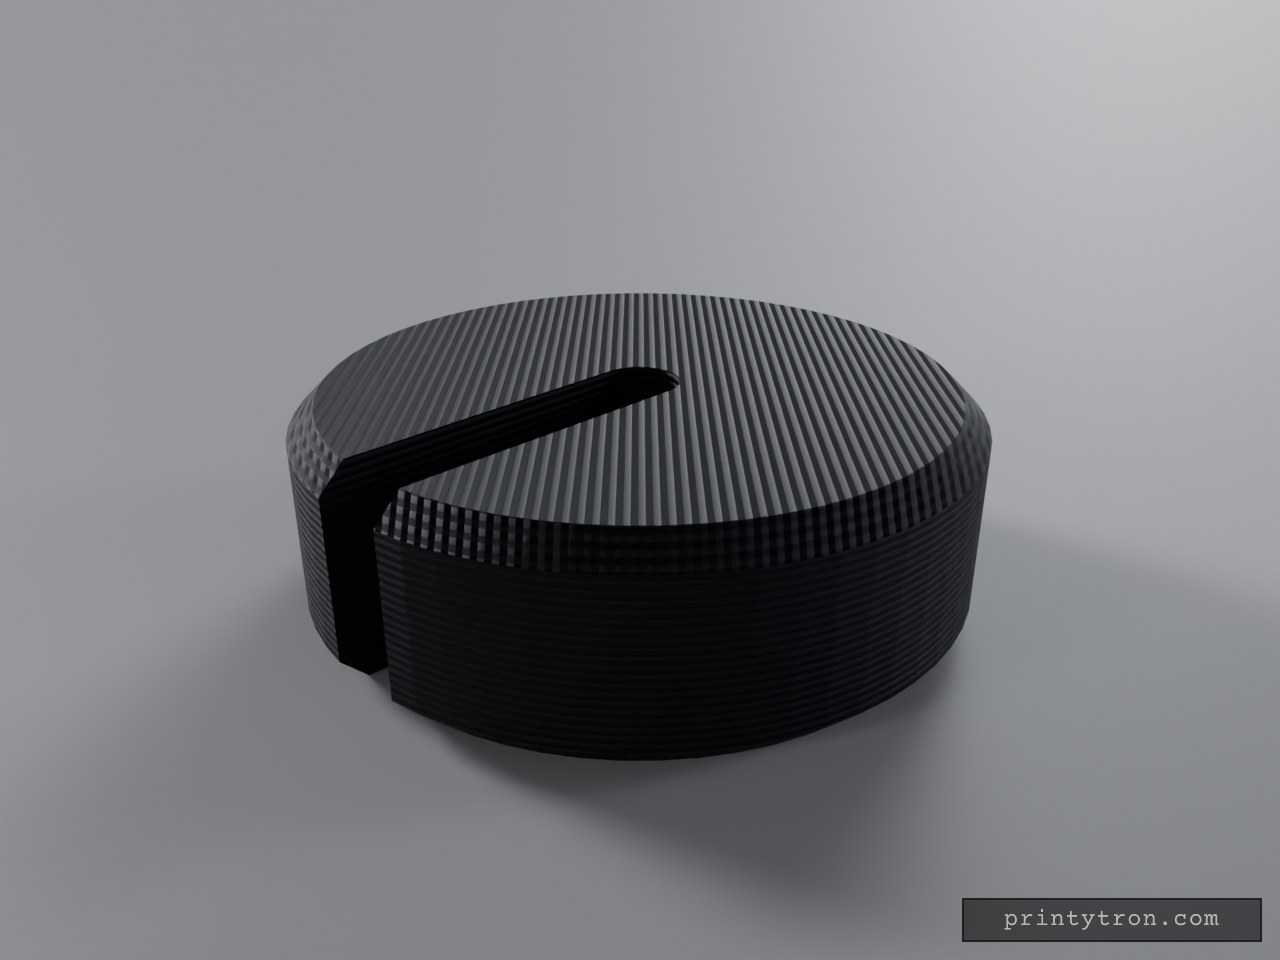
Pebbl — Aquarium Plant Weight
Pebbl is a small slotted disc that holds aquarium plant stems down in the substrate. The stem slides in through the open slot and seats in a rounded pocket at the centre, so the plant stays put without wire, glue or clips. The flat, compact profile sits low and is easy to bury under gravel or sand. Dimensions Diameter: 25 mm Thickness: 8 mm Slot width: 3 mm, running from one edge to the centre Edges: 1 mm chamfer on the top and bottom rims Slot end: rounded at the centre so a stem seats cleanly Print notes Prints flat on the build plate with no supports. PETG at high infill is a good choice for sinking weight. Plastic is light, so larger plants may need a thicker or wider disc. Use an aquarium-safe filament.
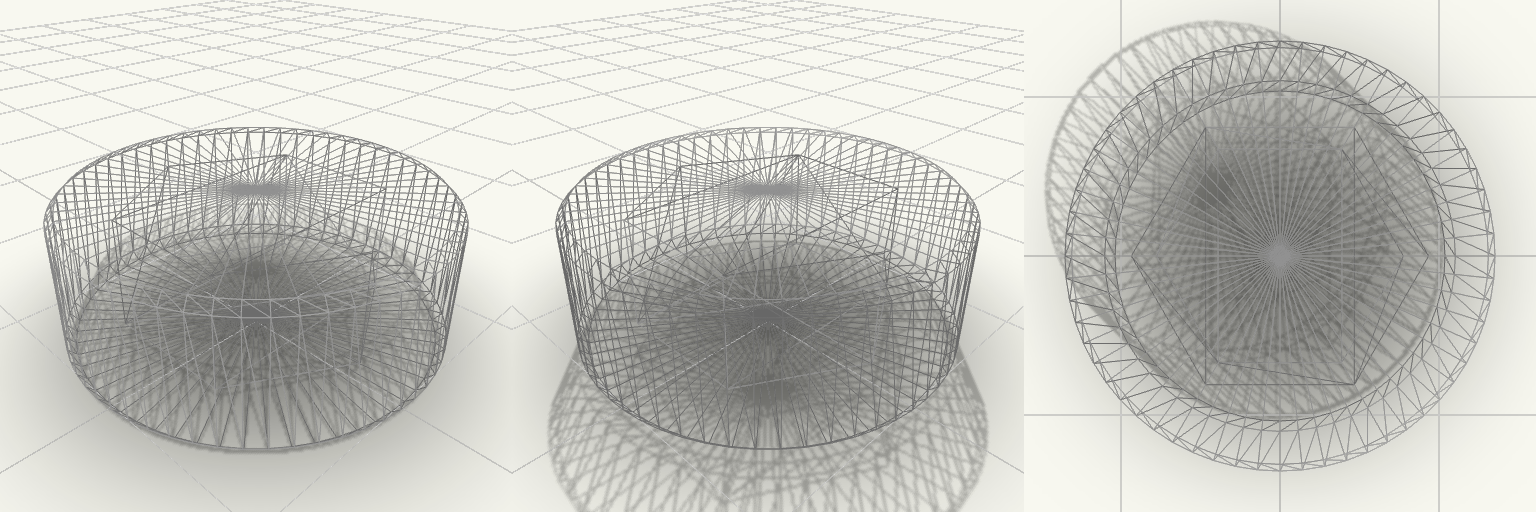
Backgammon Piece with Hidden Hexagon Cavity
What it's for A backgammon checker with a sealed hexagonal cavity hidden inside, suited to holding a small weight or token, or simply to being a hidden-feature piece. Dimensions Outer cylinder: 21.5 mm diameter, 8 mm tall, 0.5 mm edge chamfer Hidden hexagon: 13 mm across flats, 6.4 mm tall Cavity centred vertically, leaving 0.8 mm of material above and below Remix ideas Add a small weight (coin or steel washer) before sealing the cavity by pausing the print Change the cavity to a different shape, such as a star or circle Engrave a number or logo on the top face
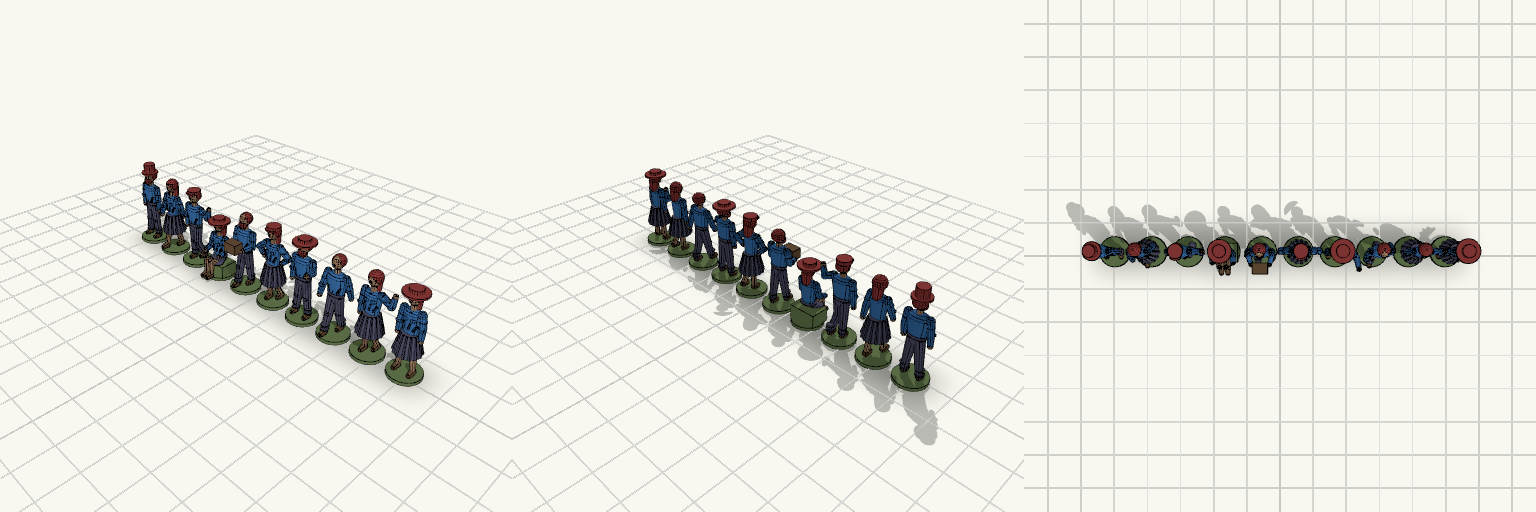
OO Scale Figures, 10 Poses with Folded Clothing
Ten standing, walking, waving, seated, carrying, hands-on-hips and pointing figures at OO scale (about 22 mm tall), each on a round 9 mm base. Clothing carries molded detail, and leg stances differ between figures. Clothing detail: pleated skirts, knee creases and ankle cuffs on trousers, belts, shirt wrinkles and sleeve folds. Stances: feet apart, one foot forward, or weight on one leg, plus walking and seated poses. Headwear and hair: flat cap, top hat, wide brim or bare head; long hair on women; beards on some men. Print notes: features under 1 mm suit resin or very fine FDM; print upright with a 0.1 mm layer height or finer.
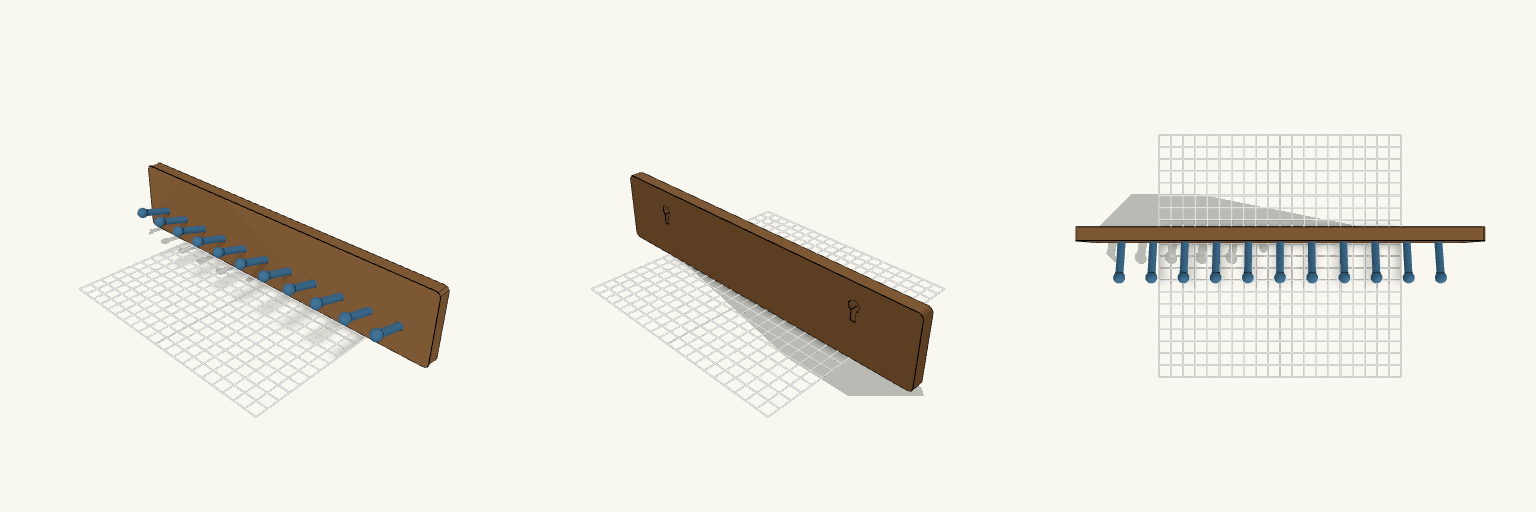
Wall-Mounted Running Medal Holder
What it's for A wall-mounted rack for displaying running medals. Each ribbon slides onto one of eleven angled prongs that project from a flat backboard, so medals hang in a neat row and stay visible instead of ending up in a drawer. The prongs tilt up and finish in a ball tip, which holds the strap in place once it is looped on. The backboard is left plain above the prongs, giving the row of medals a clean edge to hang against and keeping the silhouette simple to print. The front face is completely smooth — the hanging slots are cut only into the back, so no holes or screw heads show through the display side. Dimensions Backboard: 300 mm wide × 60 mm tall × 10 mm deep Medal prongs: 11 prongs at 25 mm spacing, each reaching 30 mm out from the backboard at a 15° upward tilt, with ball tips Hanging slots: two keyhole pockets cut 6 mm into the back, 200 mm apart, leaving 4 mm of solid material at the front Prong spacing is the number worth checking against your own medals — wide straps need more room between prongs, and the spacing can be opened up if yours run thick. Roughly 10 to 15 medals fit across the 300 mm board. Print notes Prints as one piece; no assembly required. Lay the backboard flat on the plate so the prongs build up in front of it. The tilt keeps them self-supporting, so no supports are needed. Because the slots are stopped short of the front, the screw heads sit recessed in the back rather than passing through the board. Two wall screws 200 mm apart carry the holder. Remix ideas Widen the backboard to 400 or 500 mm and add prongs for a larger collection. Add a second row of prongs below the first to stagger medals in two tiers. Add a raised name plate or a finish-line banner along the plain top edge using the same prong layout. Materials Rigid filament is the better choice here; the prongs carry real weight and a soft or flexible material will let them droop.
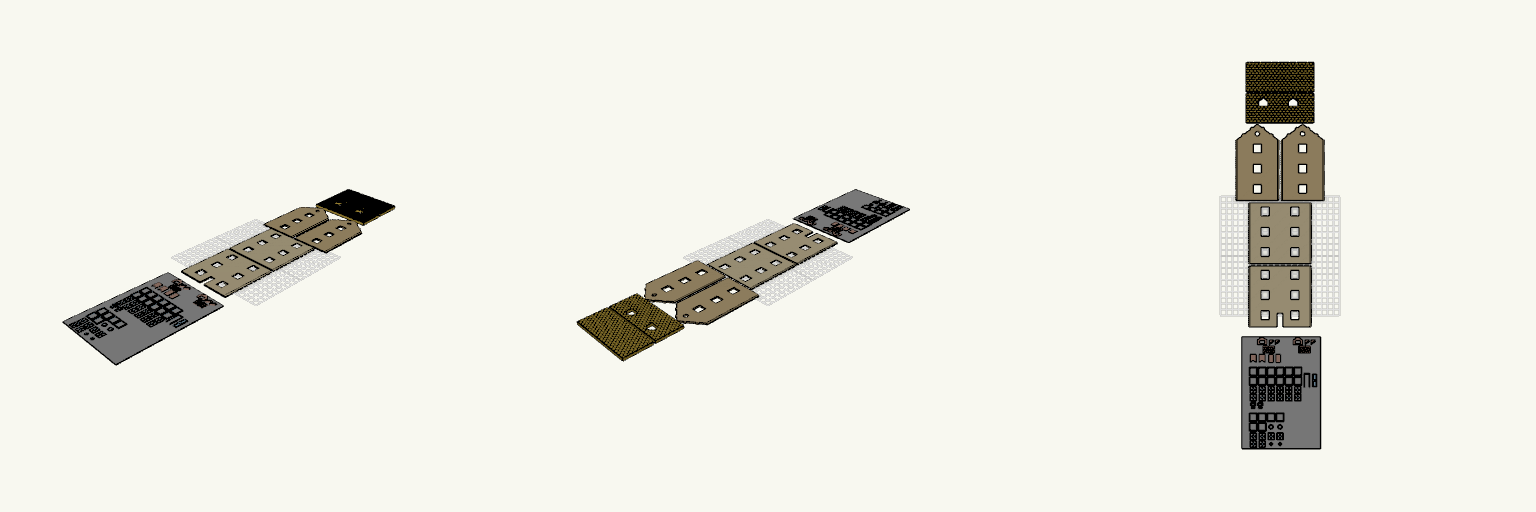
OO Gauge Three-Storey building Flat-Pack Kit
Flat-pack 1:76 (OO gauge) three-storey detached building kit with tiled roof panels, gabled dormers, chimney and separate window and door parts. Fit and dimensions Footprint: 105 × 72 mm, walls 102 mm tall (three 34 mm floors). Windows: 12 mm square openings, two per floor on the front and back walls, aligned vertically at x = ±25 mm. Door: 10 mm opening centred on the front wall. Roof: two tiled panels with 37.4° pitch, tab pockets on the underside. Check before printing Dry-fit one window sash in its frame, and one mitred corner, before gluing the rest. Not compatible with other kits; sized only for this design. Small parts are joined by a 0.4 mm mat that gets peeled away after printing.
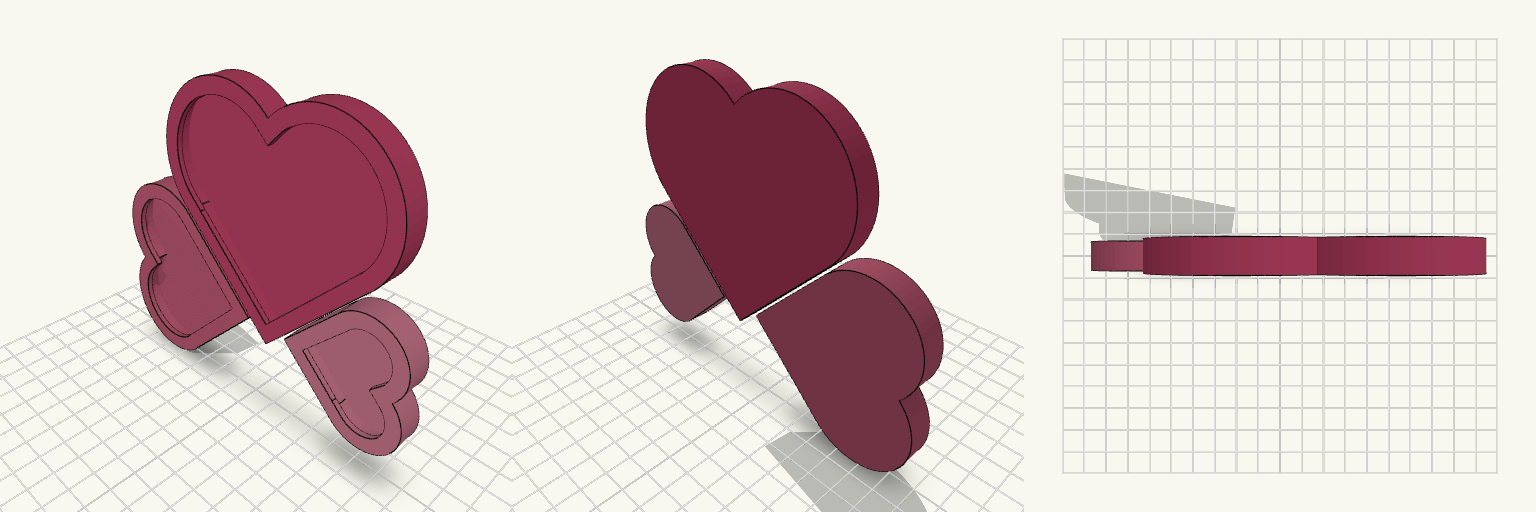
Trilith — Trio de Cadres à Lithophane
Trilith réunit trois cadres en forme de cœur pour présenter des lithophanes. Le grand cœur occupe le centre ; le moyen et le petit sont plaqués contre ses flancs, à l'extérieur, et non logés à l'intérieur. Chacun est couché sur le côté, tourné de 90° pour que son bord de pointe longe le bord incliné du grand cœur, avec 1,5 mm de recouvrement : les parois se fondent en une seule pièce et chaque cœur garde une silhouette complète. Le cadre retient la plaque grâce à un rebord avant de 3 mm, tandis que l'arrière est fermé par une paroi de 2 mm : le lithophane se place par l'avant et vient s'appuyer contre le rebord. Les parois de 3 mm gardent les cadres fins tout en laissant toute la place à l'image. Dimensions Grand cœur : environ 102 mm de large × 94 mm de haut, 10 mm de profondeur Cœur moyen : environ 70 mm × 77 mm, 10 mm de profondeur Petit cœur : environ 50 mm × 55 mm, 10 mm de profondeur Rebord avant : 3 mm ; paroi arrière : 2 mm ; parois latérales : 3 mm ; poche intérieure : 6 mm de profondeur Mise en place du lithophane Découper chaque plaque au format du cœur correspondant. Insérer la plaque par l'avant, face imprimée vers l'extérieur. Coller la plaque contre le rebord de 3 mm pour la maintenir, le dos étant plein. Notes d'impression Les trois cœurs forment une seule pièce : les cœurs latéraux, couchés sur le côté, fusionnent avec les parois du grand. L'ensemble est remonté pour que le plus bas des petits cœurs repose sur le plateau ; la pointe du grand cœur se retrouve alors en l'air. Prévoyez des supports ou une autre orientation. Le dos fermé donne un arrière plein, sans ouverture.
3W Letters on Australia Silhouette Stand
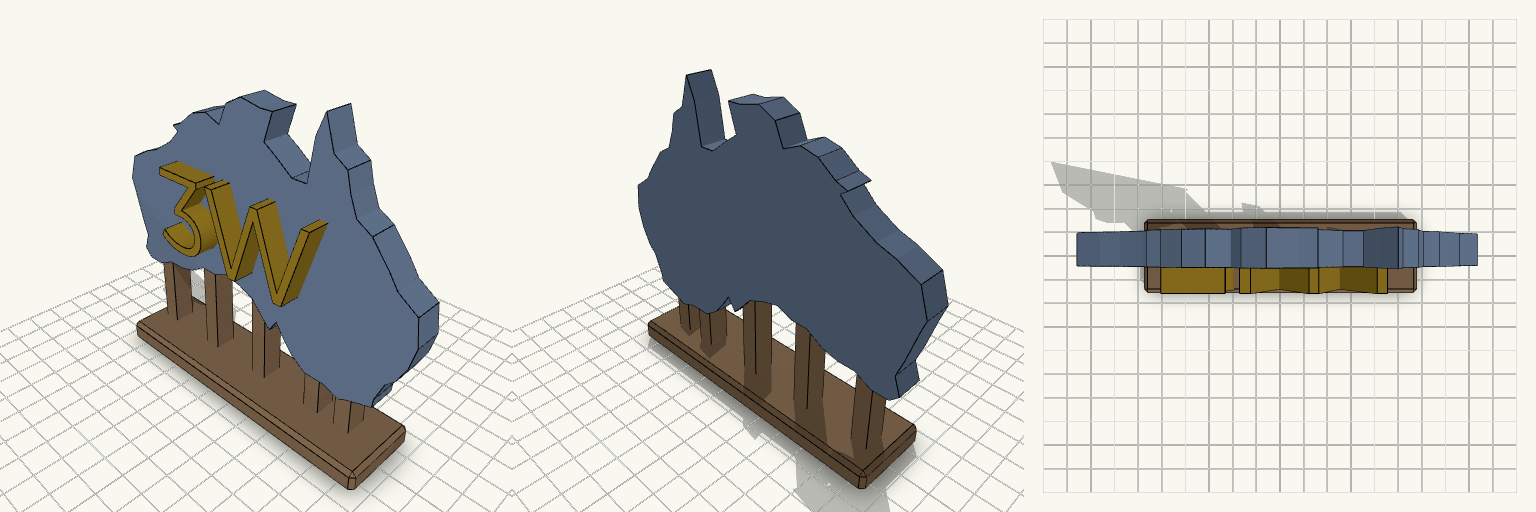
A raised "3W" monogram mounted upright on a stand cut to the silhouette of mainland Australia. Tasmania is gone: where the island used to sit, a short post now rises 18 mm from the base block and runs into the underside of the southeast corner. The map face is 10 mm thick and about 128 × 91 mm; the "3W" letters are roughly 68 × 29 mm and 8 mm deep, centred on the front face. Everything stands on a 112 × 30 mm base block, with five vertical posts — four 45 mm tall plus the 18 mm one at the southeast corner — bridging the gap from the base up into the underside of the map, so the silhouette rides above its foot instead of sitting flush on it. All five posts are now 6 mm wide and 8 mm deep, which is what stops the map feeling like it is floating on pins. Nothing is engraved — the coastline, the monogram and the open gap under the map carry the whole design. The coastline is drawn from about 60 points, so it is a simplified outline: the Gulf of Carpentaria and the southern gulfs are only roughly shaped. That is the first thing worth refining if a more faithful map is the goal. Remix hooks Coastline resolution is the main dial. The outline currently uses about 60 points. Doubling that sharpens the gulfs and the Cape York tip; halving it gives a chunkier, more graphic shape that prints faster and hides small printer artefacts. The support posts are the easiest structural change. Five posts, 6 × 8 mm in section, stand at x = -45, -20, 5 and 30 (45 mm tall) plus x = 43 (18 mm tall) across the 112 mm base. Add more for a wider map, slim them back toward 3 mm if you want a lighter frame, or angle them inward so they read as a bracket. Base size sets the stance. At 112 × 30 mm it is a plain rectangular foot; widen it for stability on a narrow shelf, narrow it for a lighter look, or reshape it into a second outline so the piece stands on a matching map fragment. Letter size is free. The "3W" group is about 68 × 29 × 8 mm, centred on the map face. Scale it up for a bolder centrepiece or down to let more of the coastline read around it. Thickness is a choice, not a constraint. 10 mm for the map and 8 mm for the letters gives a solid, weighty piece; dropping both to 4–5 mm flattens it, while going thicker turns it into a bookend-sized block. Bring the island back, or don't. A separate Tasmania is a small extra part that can be printed alongside or re-added as a second hanging element; leaving it off keeps the mainland edge clean and gives the southeast corner its post. Swap the monogram. The format is any short letter pair, initials or number-and-letter mark raised on a country or region outline, so the same layout works for other maps and other names. Starting values worth keeping in mind: 128 × 91 × 10 mm mainland map, 112 × 30 mm base block with four 45 mm posts and one 18 mm post, all 6 × 8 mm, and 68 × 29 × 8 mm letters.
Antikythera Mechanism Desk Model
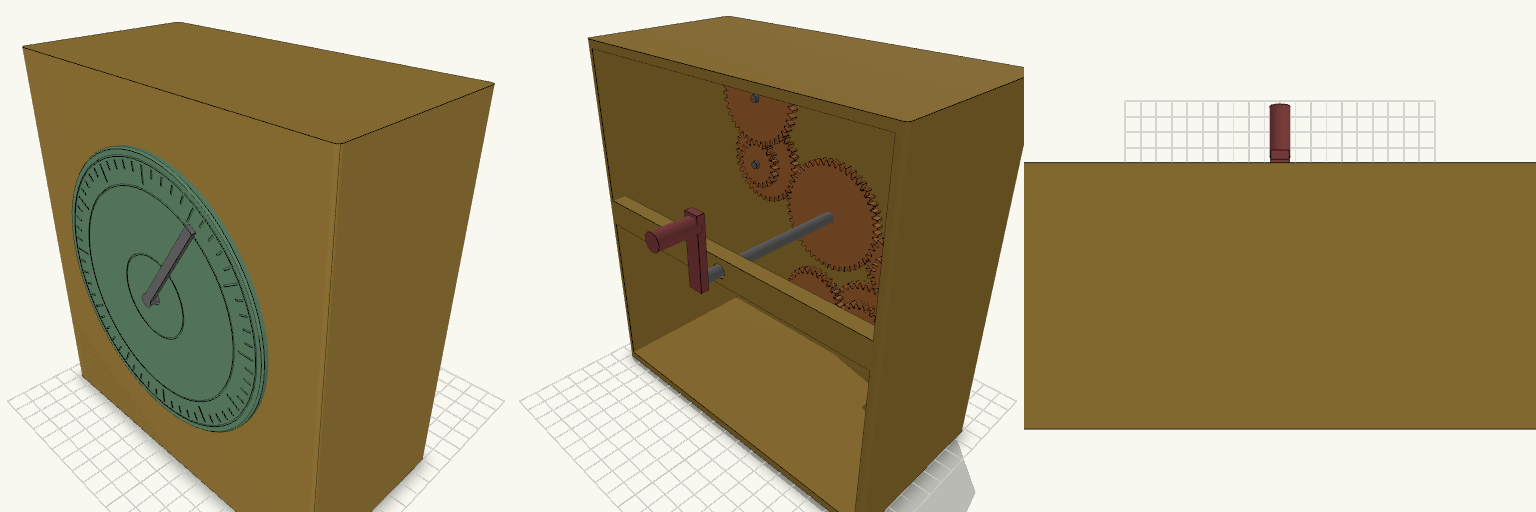
A simplified, life-size-style display model of the Antikythera mechanism: an upright case with a round front dial, a pointer, an open-backed gear train and a rear hand crank. Case 180 x 90 x 190 mm, open at the back to show the gears 130 mm front dial with ring grooves and 60 tick marks Nine spur gears (20 to 48 teeth, module 1.25) arranged in three layers, with phase-matched teeth so they mesh Fixed 4 mm pegs on the front wall carry the compound gears; the main 48-tooth gear is fused to a 6 mm axle that drives the front pointer Rear bearing bar supports the axle, with a crank handle on the back The gear train is a stylised interpretation, not a tooth-accurate copy of the original 30-plus gear mechanism. Print the case, dial, gears, axle and crank separately; the compound gears sit loose on their pegs with 0.3 mm clearance.
OO Mill Front and part-tapered Chimney Set
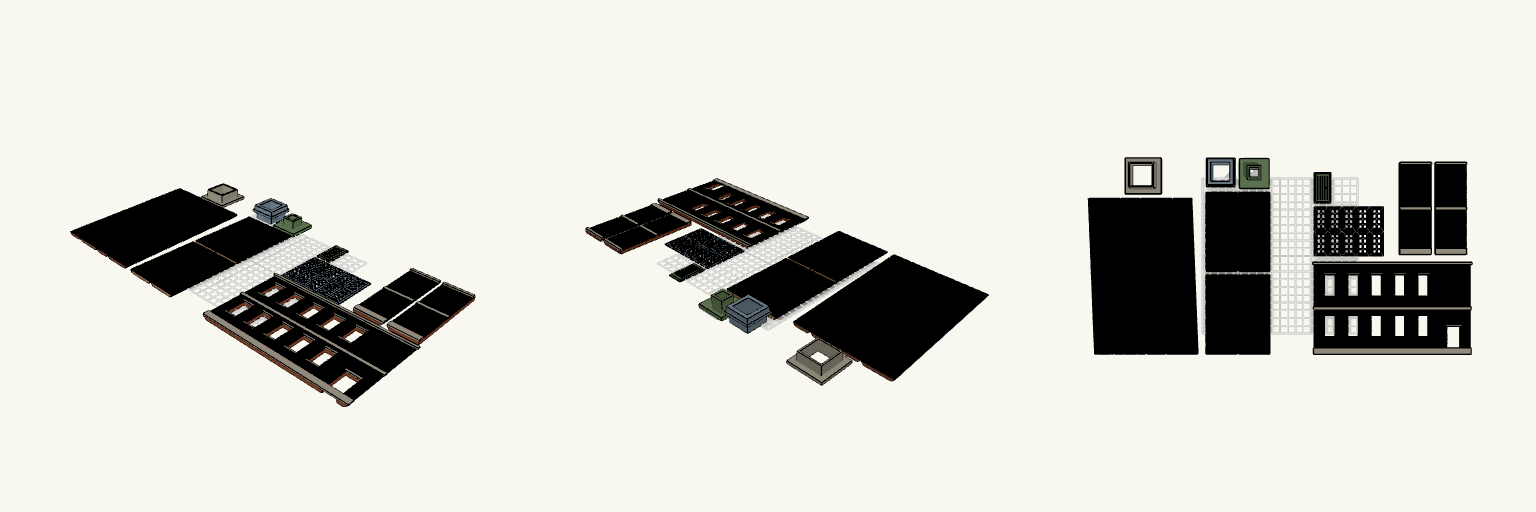
A four-panel tapered chimney with a straight brick base, paired with a half-relief two-storey mill front in OO scale. The wall, ten window frames and plank door all print flat. Each window frame and the door now carries a thin web around its outside edge to hold it down during printing. Remix hooks Web width (webw, 1.8 mm): wider grips better; keep it under half the 4 mm spacing so neighbouring webs stay separate. Web thickness (webt, 0.3 mm): roughly one or two layers. Thinner peels off easier, thicker holds harder. Window grid (14 x 28 mm frames, 4 mm spacing): change the spacing if the web is widened. Pairs with: the chimney set on the same plate layout, and a clear or painted glazing insert behind the frames. Print notes Trim the web with a hobby knife after printing, before fitting frames into the wall openings. Wall is 200 mm long and needs its own print separate from the chimney set.
OO Scale Picket Fences and Brick Walls
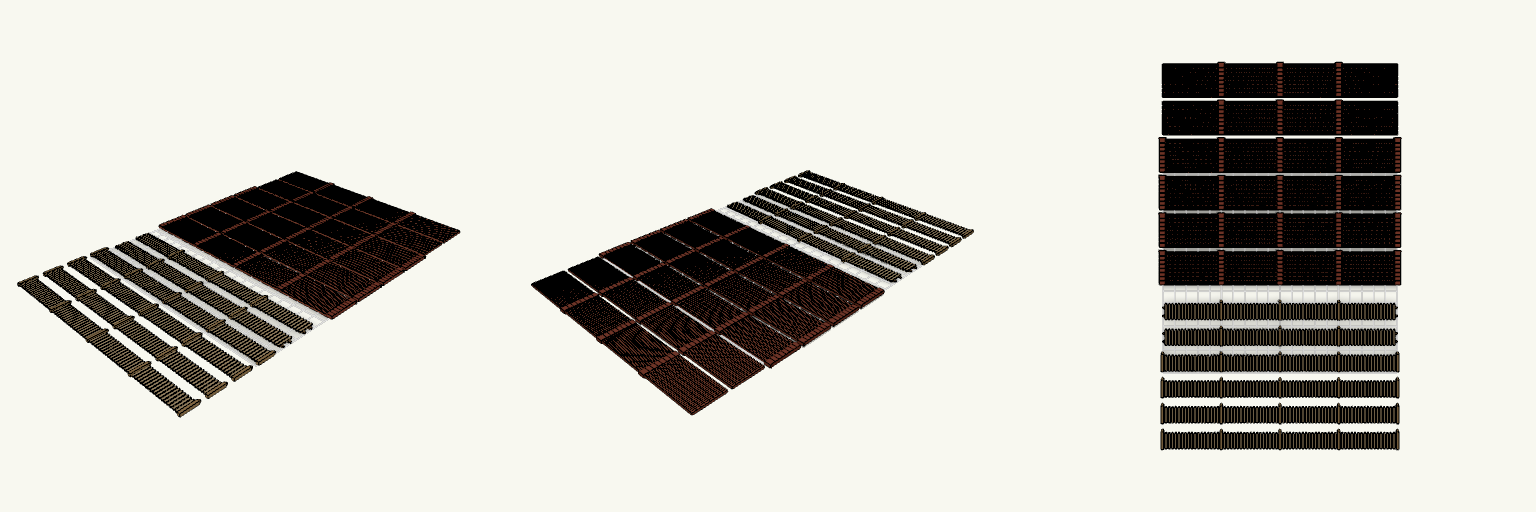
Flat-pack OO scale (1:76) boundary set: six 200 mm wooden picket fence panels and six 200 mm brick wall panels, all printing on one bed in separate rows. Fences: four with five posts, two with only the three centre posts (50, 100, 150 mm). Posts are 17 mm tall with pyramid tips; slats are 1.6 mm wide, 14 mm tall and pointed. Brick walls: 28 mm tall (7 ft), 1.6 mm thick, soldier bond: upright bricks, with 0.4 mm mortar grooves every 1.4 mm and a course line every 3.5 mm. Pillars are 5 mm wide, 2.4 mm thick, with a small cap, spaced 50 mm apart. Two walls have only the three centre pillars. Remix hooks wh (28) sets wall height; crs (3.5) sets course spacing. pitch (1.4) and gw (0.4) set brick width and mortar line; keep gw at or above one nozzle width. pwid (5) widens the pillars; wall wt (1.6) sets thickness. Swap the pillar count or spacing to match the fence posts. Pairs with the fences as a mixed boundary run; glue panels to a base strip for display.
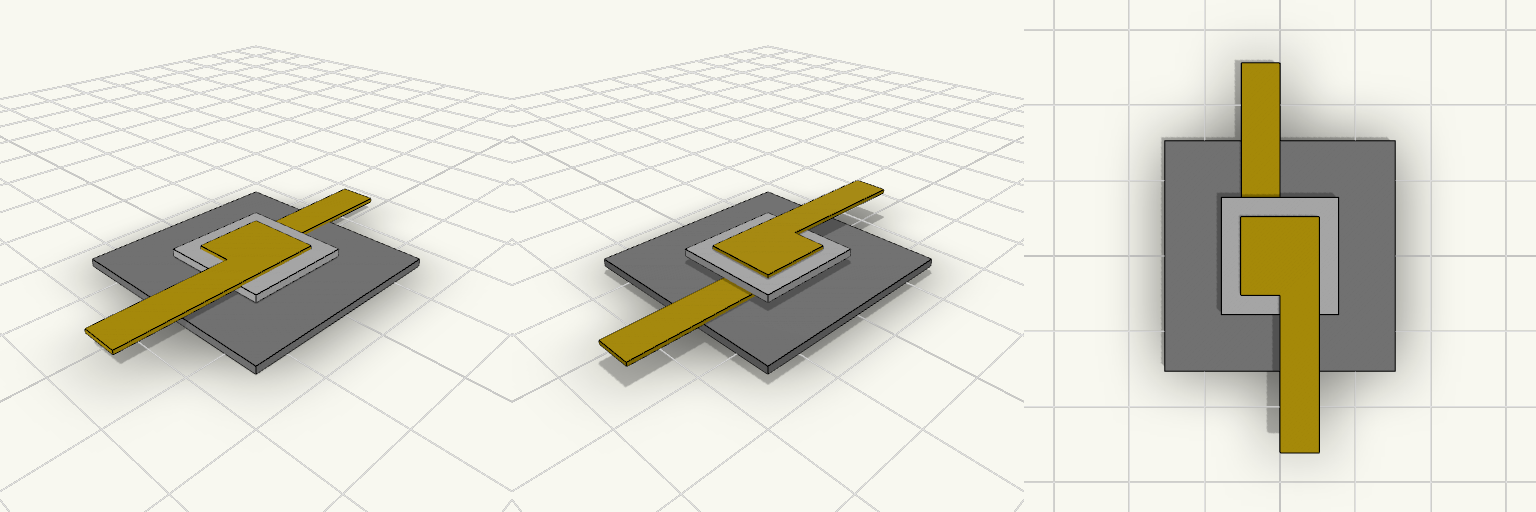
Placa con figura en L y cuadrado blanco
Una placa cuadrada de 30 × 30 mm y 1 mm de espesor sirve de base a tres capas superpuestas: una figura en L amarilla de 0.5 mm de espesor, un cuadrado blanco de 15 × 15 mm y 1 mm centrado sobre ella, y una segunda L amarilla idéntica a la primera, girada 180° sobre el mismo eje central. El conjunto alcanza 3 mm de altura total. Las dos L son iguales: un cuadrado central de 10 × 10 mm centrado en la placa, del que sale un brazo de 5 mm de ancho y 30 mm de largo. El brazo de la L inferior apunta hacia un lado y el de la superior hacia el opuesto, de modo que cada uno sobresale 10 mm del borde de la placa. La pieza ocupa 30 × 50 mm sobre la cama y los dos tramos volados quedan sin apoyo debajo. Placa: 30 × 30 mm, 1 mm de espesor, en gris. Figura en L: dos capas amarillas de 0.5 mm, con el cuadrado de 10 × 10 mm centrado en la placa y brazos de 5 mm de ancho que salen en sentidos opuestos. Cuadrado blanco: 15 × 15 mm, 1 mm de espesor, centrado entre las dos L. Tamaño total: 30 × 50 × 3 mm. Impresión: una sola pieza; los dos extremos de 10 mm que sobresalen necesitan soportes, o bien gira la pieza para evitarlo. Primera capa: al ser la base de 1 mm, cuida la adherencia a la cama para que no se combe en las esquinas.
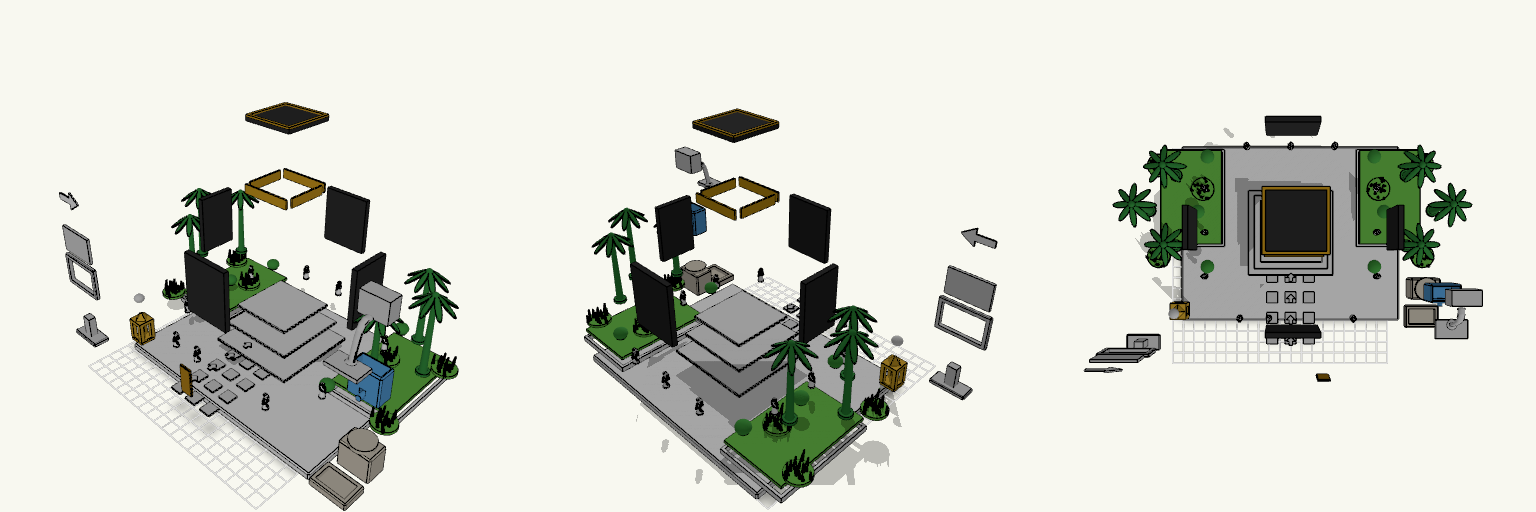
55كعبة مجزءة
Exploded miniature of a masjid scene with every component spread apart with visible gaps. Parts: white base, platform tiers, four black Kaaba walls, roof, door, gold bands, walkway tiles, arrows, palms, bushes, grass, pilgrims, Zamzam station, Maqam Ibrahim and blue sign parts. Layout: exploded only, no assembled copy. Export: the download is one file; separating individual parts happens outside this model.
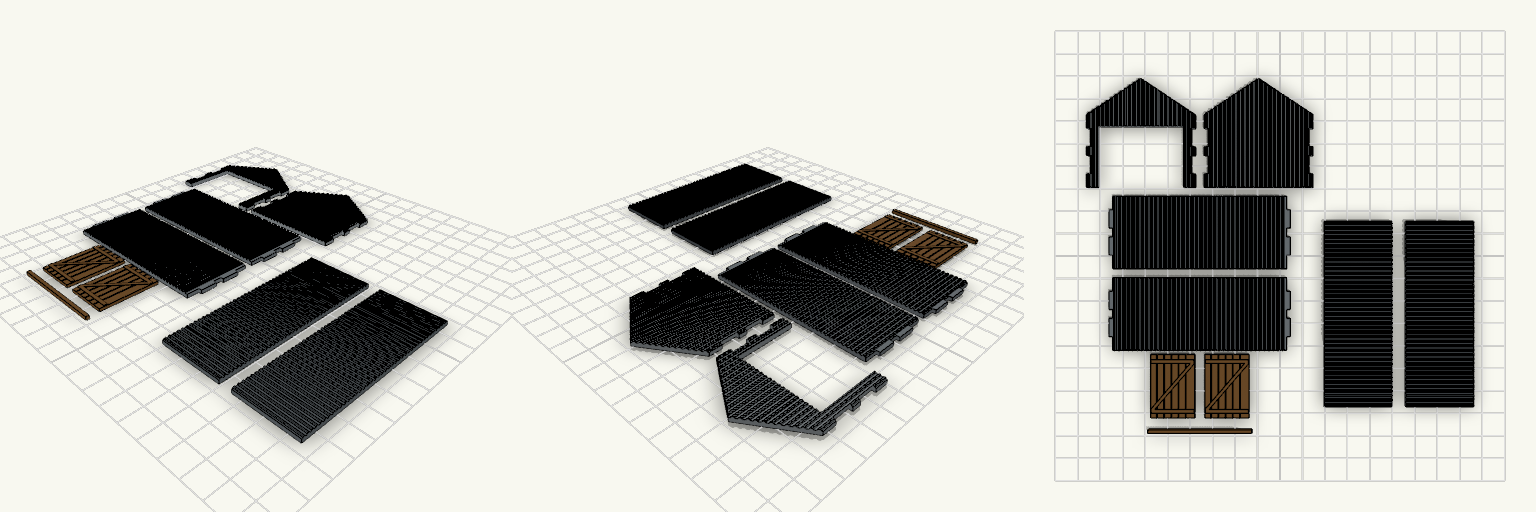
Flat-Pack OO Scale Corrugated Garage
A flat-pack OO scale garage with corrugated iron panels, a gable roof and sliding timber doors. Every piece prints flat on the bed with no supports, then assembles with glue. The side walls carry tabs that pass through slots in the front and back gable ends, with 0.3 mm clearance. The two roof panels sit on the gable slopes. Two plank-and-brace doors hang from a separate rail across the front opening. Footprint: about 48 × 80 mm, ridge height about 48 mm Pieces: 2 side walls, 2 gable ends (front one has the door opening), 2 roof panels, 2 doors, 1 rail Panel thickness 1.6 mm with raised corrugation ribs Print flat, glue the joints, fix the rail above the opening
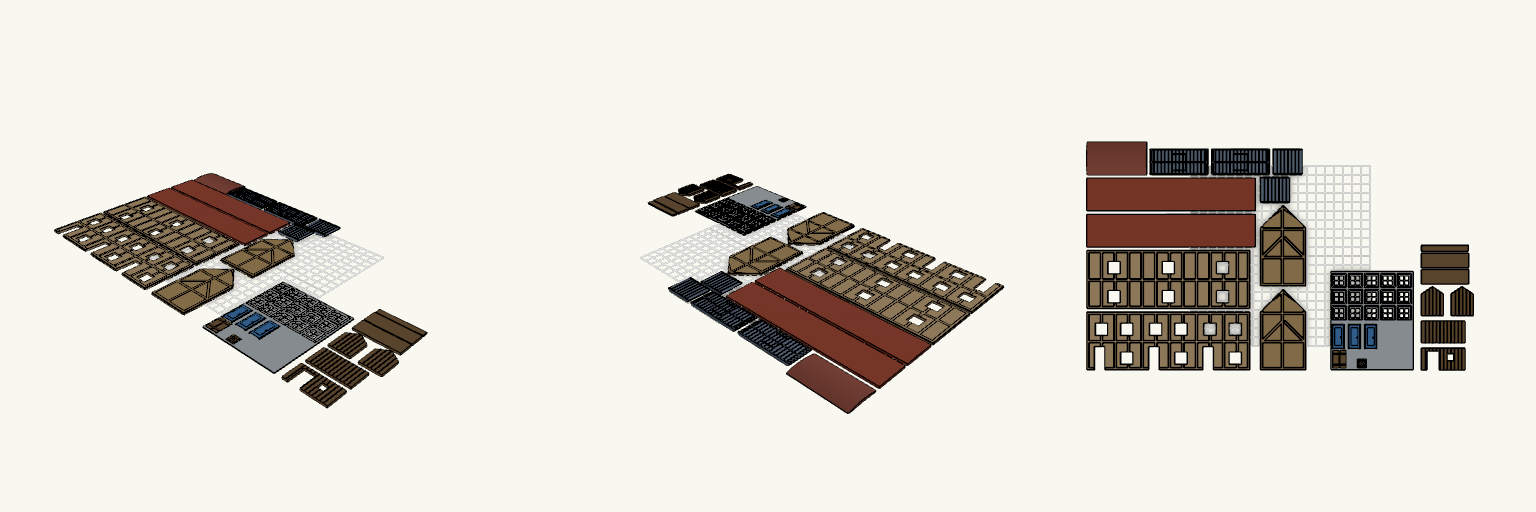
OO Scale Tudor Terrace, Shed and Van
Flat-pack OO scale (1:76.2) kit: a three-cottage Tudor terrace with a garden shed and a grounded UK van, plus loose doors and windows on a thin web sheet. Fit notes Tudor timbers on the front, back and gable panels are flush with the infill, defined by 0.6 mm wide, 0.6 mm deep grooves. Doors and windows are about 0.4 mm under their openings. Check that clearance on your printer before printing. Scale is 1:76.2 only. It does not fit N or HO scale. No floors, chimneys or bases are included.
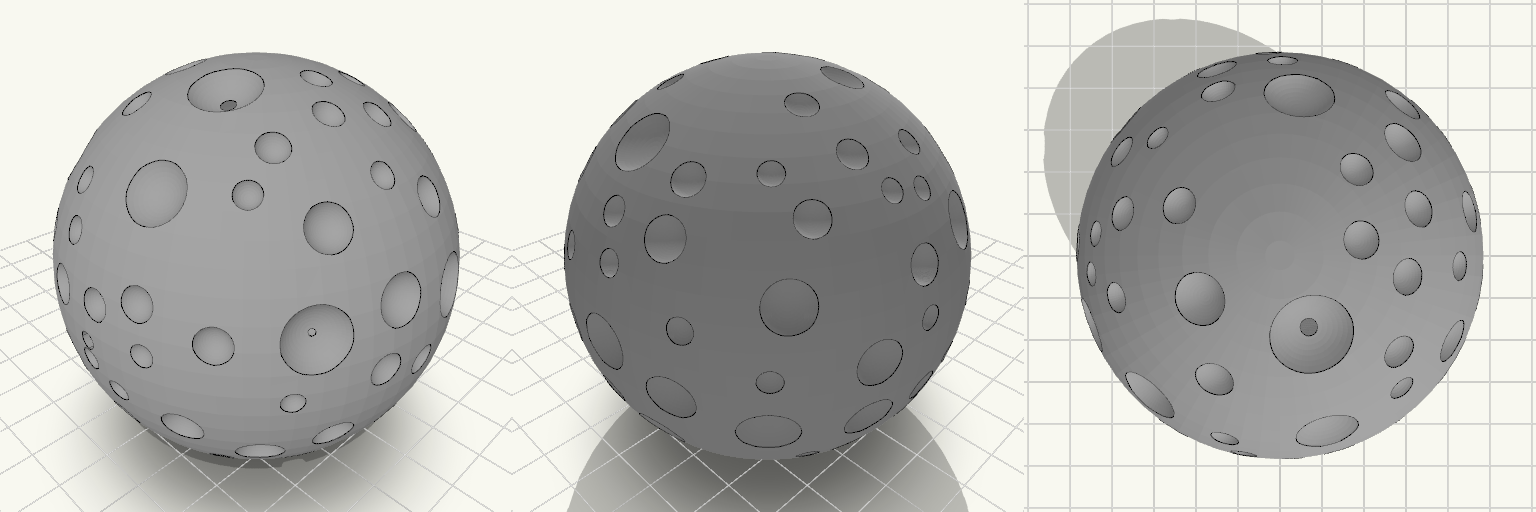
70 mm Cratered Moon Sphere2
A roughly 70 mm ball pitted with 60 craters of uneven size and placement, so it reads as a moon rather than a clean sphere. The craters run from about 4 mm to 14 mm across and 0.5 mm to 1.5 mm deep, scattered across the whole surface — a few sit on the underside, so the face changes as you turn the part. A 3 mm blind hole enters from the front and stops at the centre, leaving the back solid; it runs 35 mm deep and takes a thin wire or cord pushed in from one side. The ball is a hollow shell with a 3 mm wall, so there is no interior to fill — the hole opens into a sealed cavity that is otherwise closed. That keeps the weight and material down, but the top of the cavity is an overhang: it may need supports or it may sag slightly inside, where only you will see it. The outside still touches the build plate at a single point, so print it with supports or a wide brim, or split it at the equator into two hemispheres that each print flat-side down and join afterwards. The crater field is surface detail, so almost nothing here is locked in. Remix hooks Diameter — about 70 mm on all three axes. The crater field and wall thickness scale with it; much past 200 mm and you are into split-and-glue territory on most beds. Wall thickness — 3 mm as it stands. Thinner walls save material but print shakier; thicker walls swallow the crater depth, so deepen the craters if you go up. Crater count and size range — 60 craters from 4 mm to 14 mm across. Raise the count and tighten the range for a finely pocked surface, or drop to a couple of dozen large ones for a few big basins. Crater depth — 0.5 mm to 1.5 mm. Shallower craters print cleaner overhead and read best under a wash; deeper ones catch more shadow but want slower overhangs — and they must stay well under the wall thickness. Minimum gap — a pair or two still meet, which the gap check misses because the cut widens slightly on the curved surface. Widen the spacing and count each crater's true surface width if you want every bowl cleanly separate; expect slightly fewer craters as a result. Wire hole — 3 mm wide, 35 mm deep, blind, entering from the front and ending at the centre. Scale it with the wire you have. Running it all the way through gives a threaded bauble; moving it off-axis gives one that hangs tilted. Cavity openings — the shell is sealed apart from the wire hole. A drain hole or a screw cap turns the hollow into a container. Distribution and split point — bias the scatter toward one hemisphere for a near-side/far-side look; cut at the equator for two support-free halves, or off-centre for a shallow cap and deep bowl, with a locating lip to register the halves. Obvious variants A flat-bottomed version that stands on a shelf or glues to a base without supports. A solid version when weight matters more than material, with the full-depth craters of the earlier build. A scaled-down single-piece print when you want the cratered shape without the support hassle. Pairs with A thin wire or cord pushed into the 3 mm blind hole for a hanging decoration, with a dab of glue to hold it. A socketed ring or base if you add a flat, for a stand-up display.
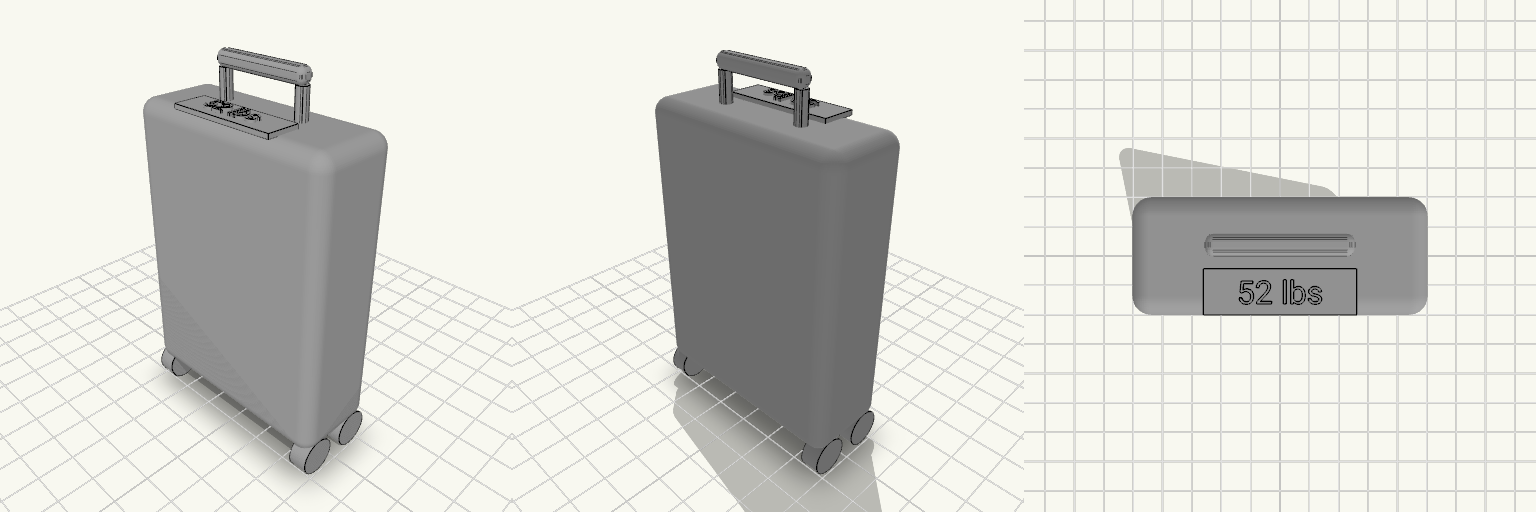
Miniature Suitcase with Handle, Wheels and Weight Display
What it's for A miniature suitcase standing upright on four sideways-mounted wheels, with a pull handle on top and a small thin scale plate set into the top face just in front of the handle. The plate carries a raised readout of 52 lbs, so the piece reads as a luggage scale at a glance. It works as a small desk ornament, a travel-themed display piece, or a scale prop for a dollhouse or diorama. The whole thing is one plain neutral finish, with no colour coding or recessed front screen. Dimensions Overall footprint: 60 × 24 × 100 mm (width × depth × height, as it sits on the print plate) Wheels: mounted sideways, axles running across the width of the case, so the body rests on them Weight plate: a small thin panel on the top face, in front of the handle Readout: raised 52 lbs lettering, picked as a believable airline-limit weight — say if you want a different figure Print notes The model prints as a single piece lying on its wheels, so no supports are needed under the body. The raised readout is small — a 0.4 mm nozzle with fine layer heights keeps the digits and the "lbs" legible, and a 0.25 mm nozzle gives crisper text. The thin top plate is shallow, so check that your bridging over that area is clean. Remix ideas Change the readout to a different weight, or leave the plate blank for a custom label. Swap the handle for a telescoping version, or add corner guards to the body. Scale the case up to hold small items, or down to keyring size. Finish A single neutral colour suits the plain, serious look — the design relies on shape and the raised text rather than colour contrast, so any filament works.
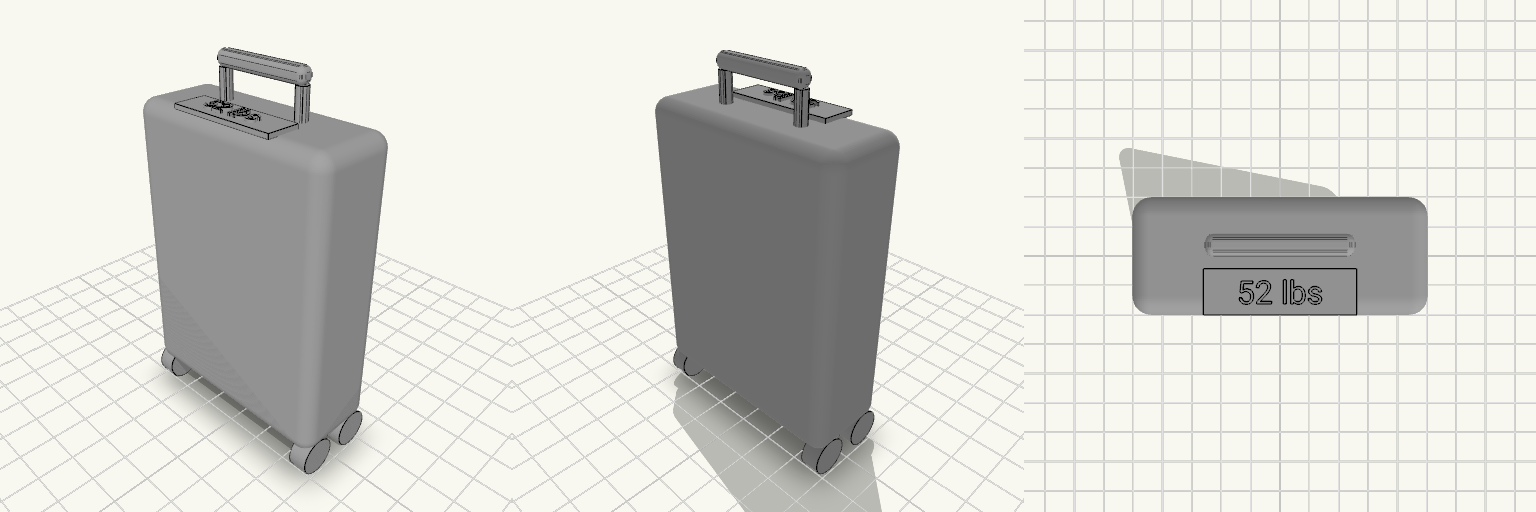
Miniature Suitcase with Handle, Wheels and Weight Display
What it's for A miniature suitcase standing upright on four sideways-mounted wheels, with a pull handle on top and a small thin scale plate set into the top face just in front of the handle. The plate carries a raised readout of 52 lbs, so the piece reads as a luggage scale at a glance. It works as a small desk ornament, a travel-themed display piece, or a scale prop for a dollhouse or diorama. The whole thing is one plain neutral finish, with no colour coding or recessed front screen. Dimensions Overall footprint: 60 × 24 × 100 mm (width × depth × height, as it sits on the print plate) Wheels: mounted sideways, axles running across the width of the case, so the body rests on them Weight plate: a small thin panel on the top face, in front of the handle Readout: raised 52 lbs lettering, picked as a believable airline-limit weight — say if you want a different figure Print notes The model prints as a single piece lying on its wheels, so no supports are needed under the body. The raised readout is small — a 0.4 mm nozzle with fine layer heights keeps the digits and the "lbs" legible, and a 0.25 mm nozzle gives crisper text. The thin top plate is shallow, so check that your bridging over that area is clean. Remix ideas Change the readout to a different weight, or leave the plate blank for a custom label. Swap the handle for a telescoping version, or add corner guards to the body. Scale the case up to hold small items, or down to keyring size. Finish A single neutral colour suits the plain, serious look — the design relies on shape and the raised text rather than colour contrast, so any filament works.
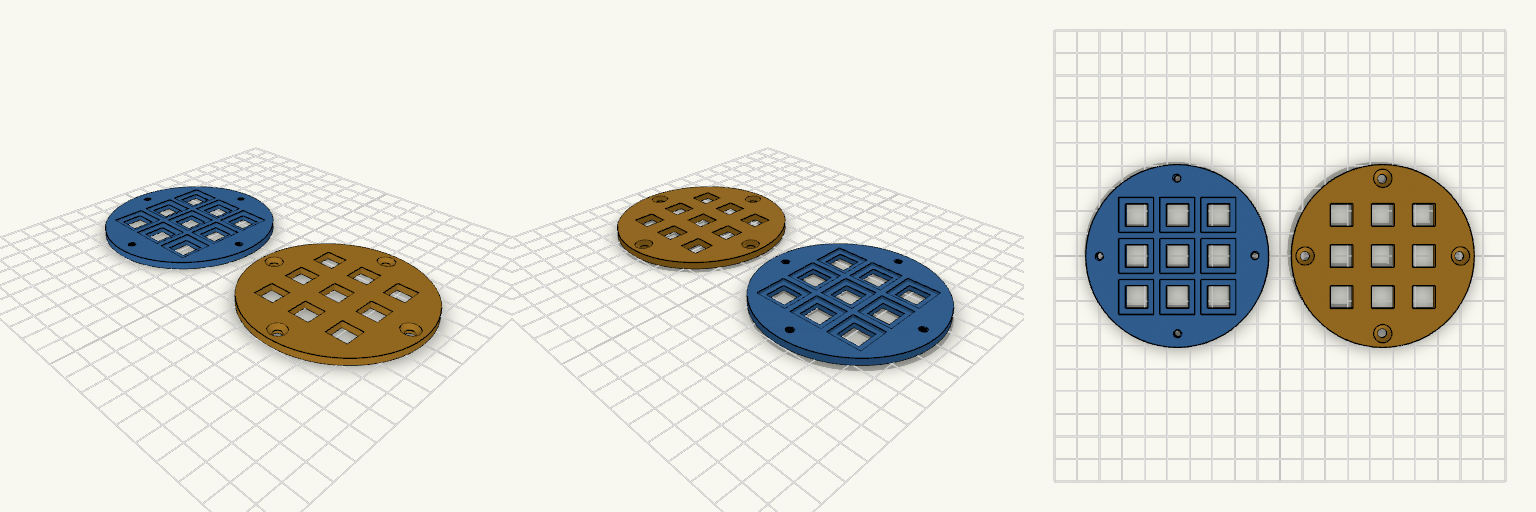
Retícula circular: disco perforado de 80 mm
Dos discos de 80 mm de diámetro y 3 mm de espesor que se leen como el rosetón de una ventana antigua reducido a su esqueleto: nueve ventanas cuadradas en una retícula 3×3 perfectamente uniforme que atraviesan ambas piezas de lado a lado, dejando pasar la luz mientras el material dibuja una cuadrícula regular sobre el círculo. La pieza inferior es la que guarda las membranas: cada ventana tiene encima un rebaje cuadrado de 1 mm de profundidad, centrado con ella, de 15,4 × 15,4 mm, para que una pieza de 15 × 15 mm y 1 mm de espesor quede encajada y enrasada con algo de holgura. Bajo cada rebaje quedan 2 mm de material, y entre rebajes contiguos, 2,6 mm de pared. Cuatro agujeros roscados M4 (paso 0,7 mm) atraviesan los 3 mm de espesor en los extremos de los ejes, a 34 mm del centro, simétricos y opuestos de dos en dos, con unos 4 mm de material hasta el borde. La pieza superior es su gemela en las ventanas: las mismas nueve ventanas en las mismas posiciones, sin rebajes, y cuatro taladros pasantes de 4,4 mm alineados con los roscados de abajo. Cada taladro lleva ahora un avellanado de 8 mm en la cara superior, de unos 1,8 mm de profundidad, que deja alrededor de 1,2 mm de material bajo el cono; así una cabeza M4 avellanada queda embutida y no sobresale. Se apoya encima con la cara plana hacia abajo, de modo que los tornillos M4 la atraviesan y se enroscan en la inferior, atrapando entre ambas las membranas. Detalles de las dos piezas Ambas: 80 mm de diámetro, 3 mm de espesor y caras planas. Ambas: nueve ventanas cuadradas de 10 × 10 mm en matriz 3×3, a 18 mm entre centros en los dos ejes, con 8 mm de material entre ventanas. Inferior: nueve rebajes de 15,4 × 15,4 mm y 1 mm de profundidad en la cara superior, con holgura para alojar las membranas. Inferior: cuatro agujeros roscados M4 sobre los ejes, a 34 mm del centro. Superior: cuatro taladros pasantes de 4,4 mm con avellanado de 8 mm en la cara superior. Tornillería prevista: cuatro tornillos M4 avellanados de 5 mm en total, para que la cabeza quede al ras. Se imprimen como dos piezas separadas que después se apilan y se atornillan. Combinaciones y variantes Membranas translúcidas de colores distintos para convertir el conjunto en un filtro de luz o un vitral de bolsillo. Membranas opacas en unas ventanas y translúcidas en otras, para jugar con el patrón antes de cerrar la tapa. Montaje atornillado a una placa o bastidor mediante los cuatro M4, o sustitución de estos por un saliente roscado si hace falta más agarre en solo 3 mm de espesor. Cada disco se imprime tumbado, sin soportes y con muy poco material; conviene una base bien nivelada para que las caras salgan planas, los rebajes asienten a la misma altura y las roscas queden limpias. Con solo 3 mm de espesor, usa al menos 4 perímetros para que el avellanado tenga material suficiente.
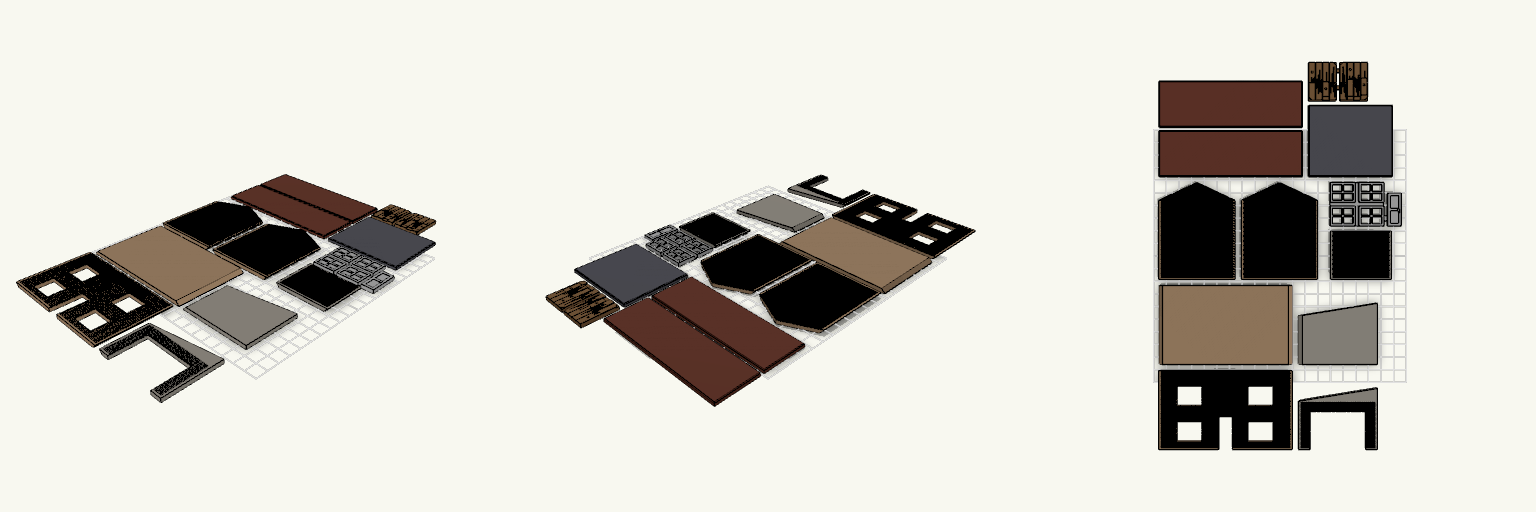
OO Flat-Pack House with Garage
A flat-pack OO scale (1:76) half-relief detached house with an attached garage, printed as face-up panels with English bond brick, mitred edges, gabled house ends and sloping roofs. Separate window inserts, a front door and a pair of dilapidated wooden garage doors are printed joined by thin snap-off webs. Remix hooks Garage doors: each leaf is 21.6 × 29.6 mm and 3 mm thick, sized for the 44 × 30 mm opening with about 0.4 mm clearance per side. Change the plank count, groove depth (0.6 mm) or which planks are missing for a different level of decay. Damage: the left leaf has a missing lower plank, a broken top corner and a crack. The right leaf has a shortened plank, a split and a chipped bottom edge. Delete cutters for tidier doors. Web: the 0.4 mm web layer joins the leaves for printing and snaps off. Brick: 1 mm course pitch with 0.35 mm mortar joints. Coarsen for easier printing. Pairs well with: a base plate, tabs and slots for the joints, or a wood-grain paint wash on the doors.
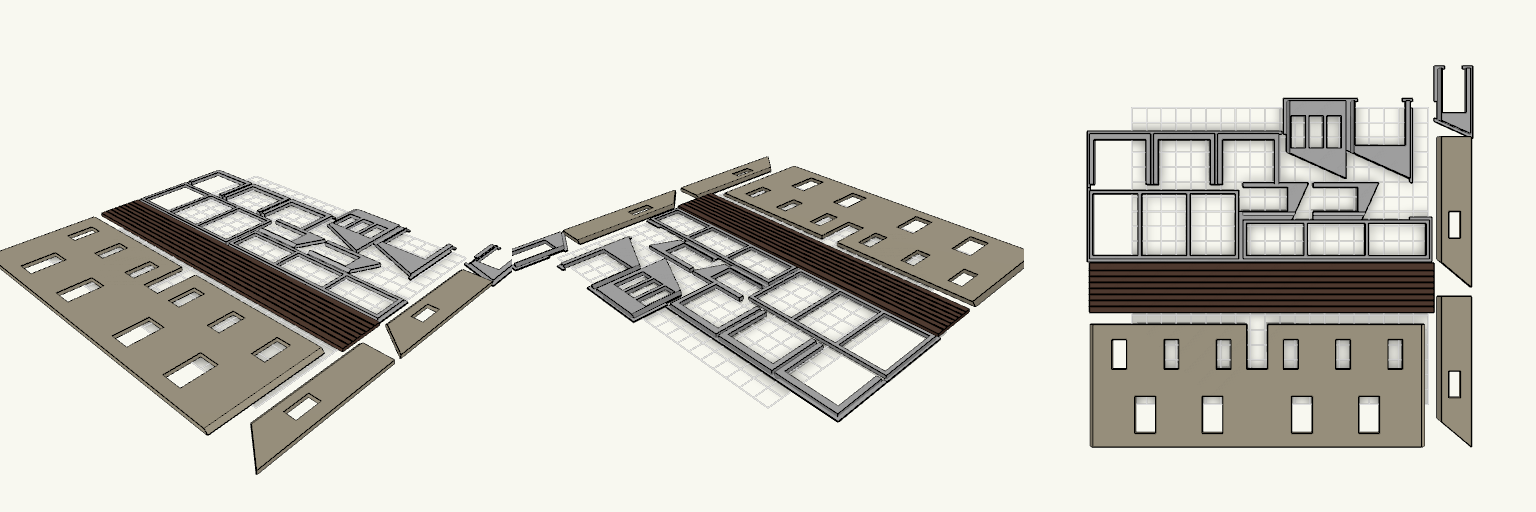
Tearoom Terrace — OO Half-Relief Kit
Tearoom Terrace is a flat-pack, half-relief OO scale (1:76) double-width house with a glazed tearoom conservatory, laid out on a single Bambu A1 plate. All pieces print flat with the outer face down. Features 225 mm wide render-finish frontage with mitred corner edges Single-slope 40° roof panel Conservatory in two parts: a deeper glazed right part and an open-framed left part Conservatory pieces are grouped and joined by thin breakaway webs so they print as one cluster Print notes Snip the thin webs after printing Print the open frames slowly Openings are left empty for glazing
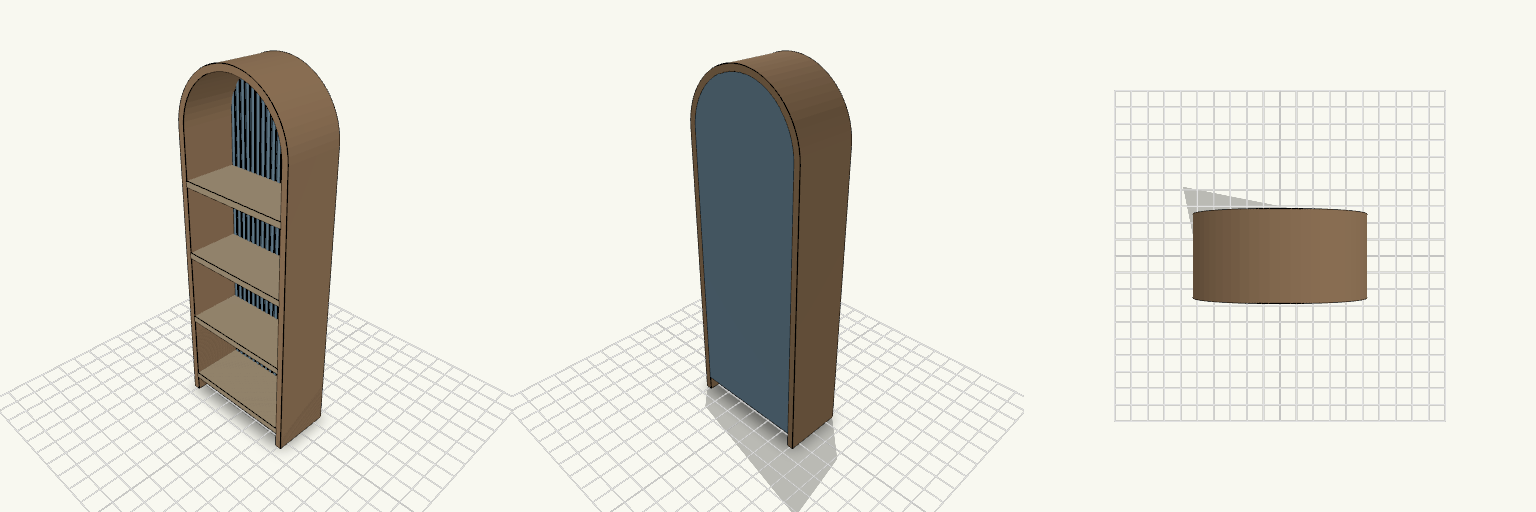
Arched Fluted Bookshelf, 63.5x177.8 mm
Miniature arched-top bookshelf, 7 in tall and 2.5 in wide, with four shelves and a vertically fluted back panel that mimics shiplap. The side walls extend below the bottom shelf to form feet, lifting it off the surface. Overall size: 63.5 mm wide x 30 mm deep x 177.8 mm tall Top: semicircular arch, 31.75 mm radius Back: 18 fine half-round vertical flutes Feet: 8 mm, formed by the side walls Wall and shelf thickness: 3 mm Prints upright as one piece; the arched top and shelf undersides may benefit from supports
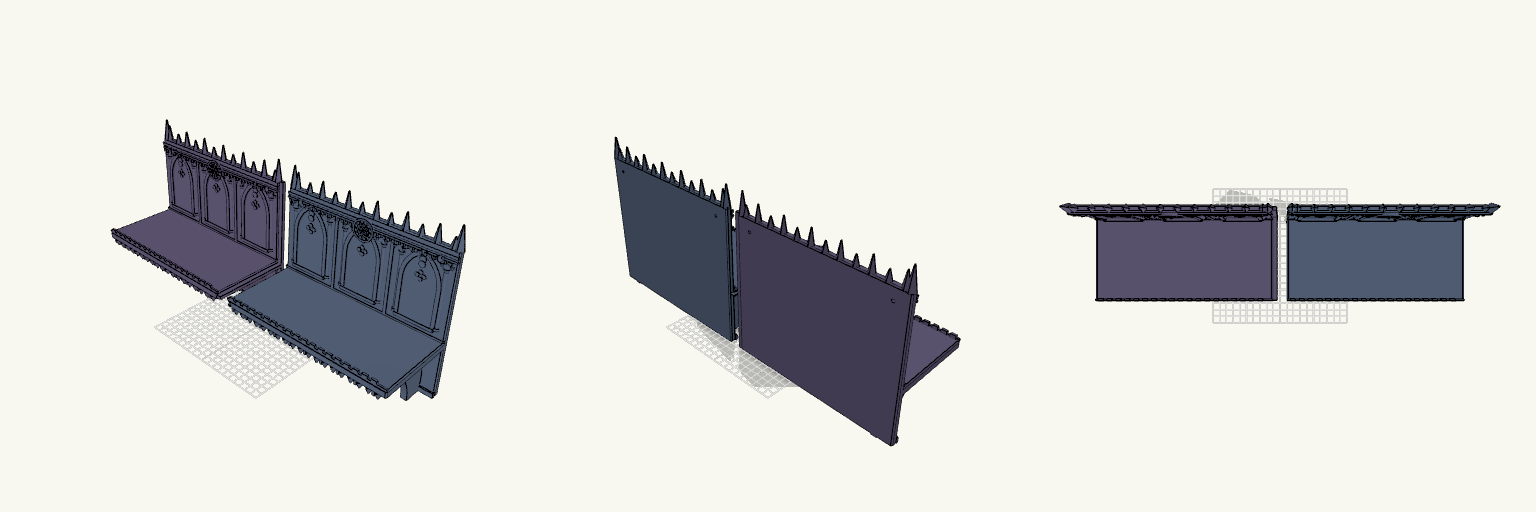
Gothic Rose Window Cathedral Shelf
A cathedral-front wall shelf in two glue-together halves, with blind lancet windows, pinnacles, battlements and a blind arcade below the shelf. Each half now carries layered rose windows in the style of a medieval cathedral facade: stepped rings, twelve radiating spokes, cusped lobes and a domed centre boss. Design notes Large rose window at the top centre of each half, plus two more in the lower arcade Countersunk screw holes for hanging, with clear access pockets Tongue-and-groove seam for super gluing the halves together Each half fits a 250 mm-class print bed
Need a part that doesn't exist yet?
Start building →