Arecson — Base con Pilares de Pulsador
Created yesterday
Description
Arecson es una base de caja de 180 × 180 × 50 mm con una sola esquina redondeada, pensada para un controlador DJ. Cuatro pilares de esquina, uno de ellos cilíndrico en la curva, permiten atornillar la tapa, y una fila de cinco pilares sostiene pulsadores de 6 mm.
Características
- Caja de una pieza, sin tapa, con suelo plano.
- Pilares de esquina de 50 mm con guía de 3 mm y 30 mm de profundidad.
- Cinco pilares de 14 × 14 × 45 mm en fila horizontal en la zona inferior.
- Asiento de 6,1 mm y 2 mm de profundidad en cada pilar.
Notas de impresión
- Si el pulsador entra justo, subir el asiento a 6,2 mm.
Images
More like this
Explore more in Desk & Tech →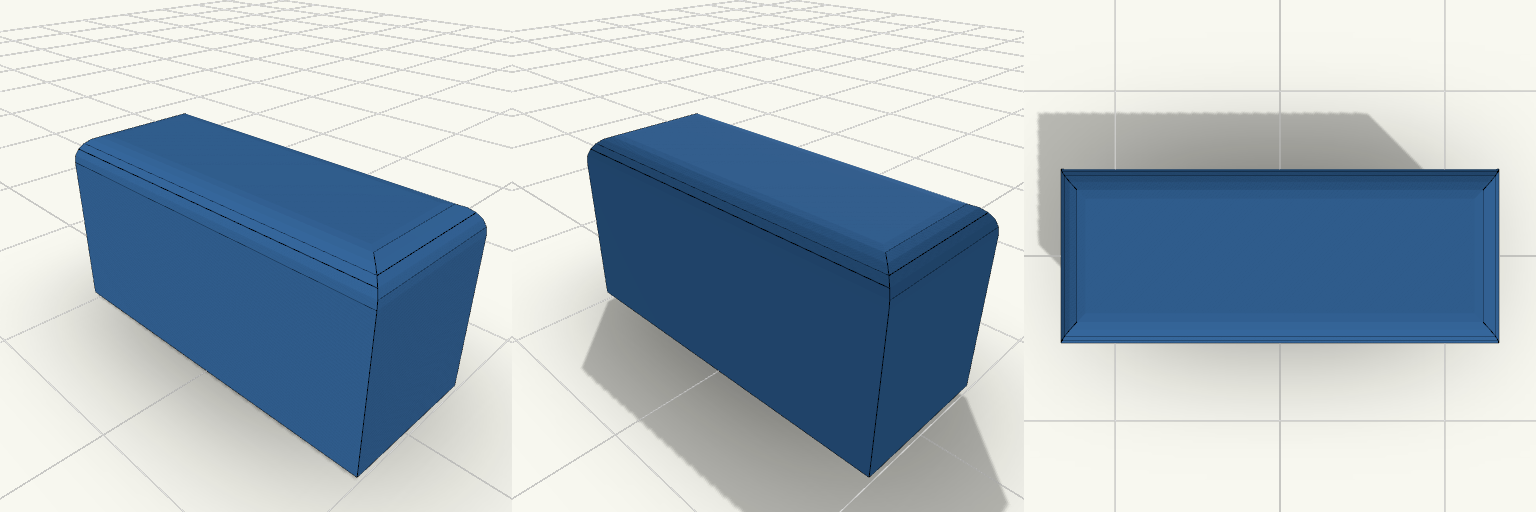
Crossfader Knob 20x8x10 mm
What it's for A solid rectangular crossfader knob for a DJ controller, with a centred socket underneath that fits over the fader stem. The socket's long side now runs across the knob width (Y). Dimensions Knob: 20 × 8 × 10 mm, top edges rounded 1.5 mm. Socket: 1.5 × 4.0 mm stem plus 0.1 mm clearance per side, 6 mm deep, with a small lead-in chamfer. The stem size is a placeholder; adjust stemw and stemt to match the real fader. Remix ideas Swap the socket for a D-shaped or round stem. Add grip ridges on the top face. Increase the height for a taller handle.
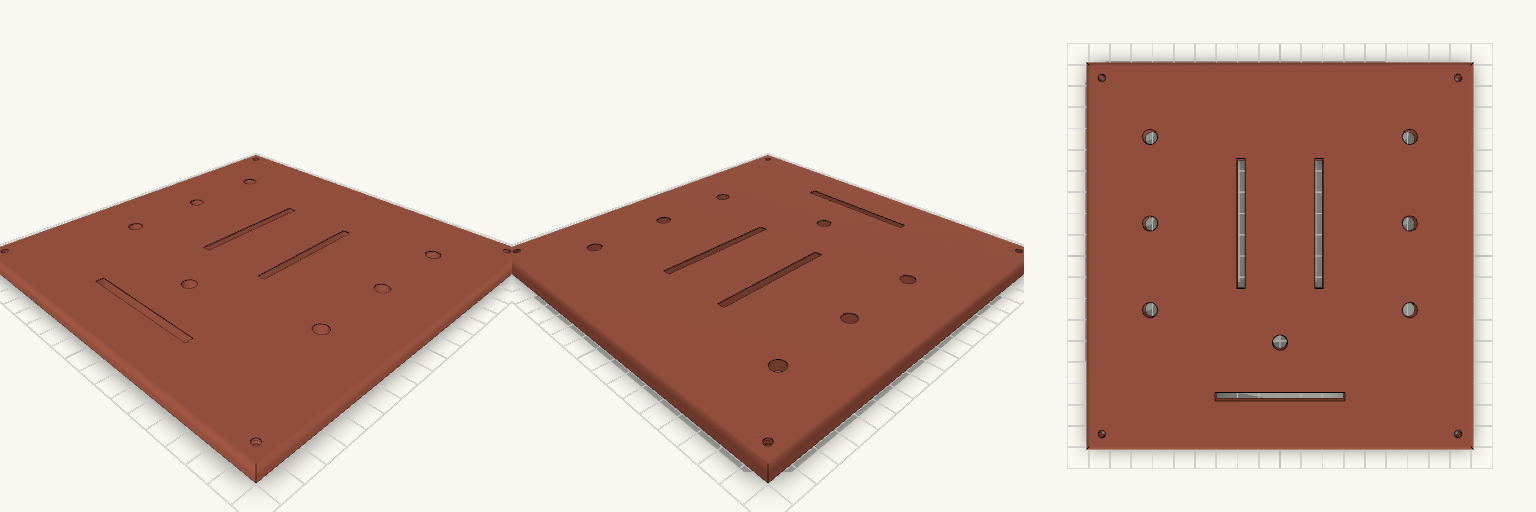
Tapa 180x180 con 3 crossfaders y 7 potenciómetros
Tapa de 180 × 180 × 5 mm para un controlador DJ, con tres ranuras de crossfader y siete agujeros de potenciómetro de 7 mm. Medidas a comprobar Ranuras de crossfader: 60 × 4 mm (el largo total del recorte según la ficha de tu modelo). Agujeros de potenciómetro: 7 mm, seis a ±60 mm en X y uno central en X = 0, Y = −40 mm. Cuatro tornillos M3 avellanados en las esquinas. No incluye Taladros de fijación de los crossfaders ni de los potenciómetros.
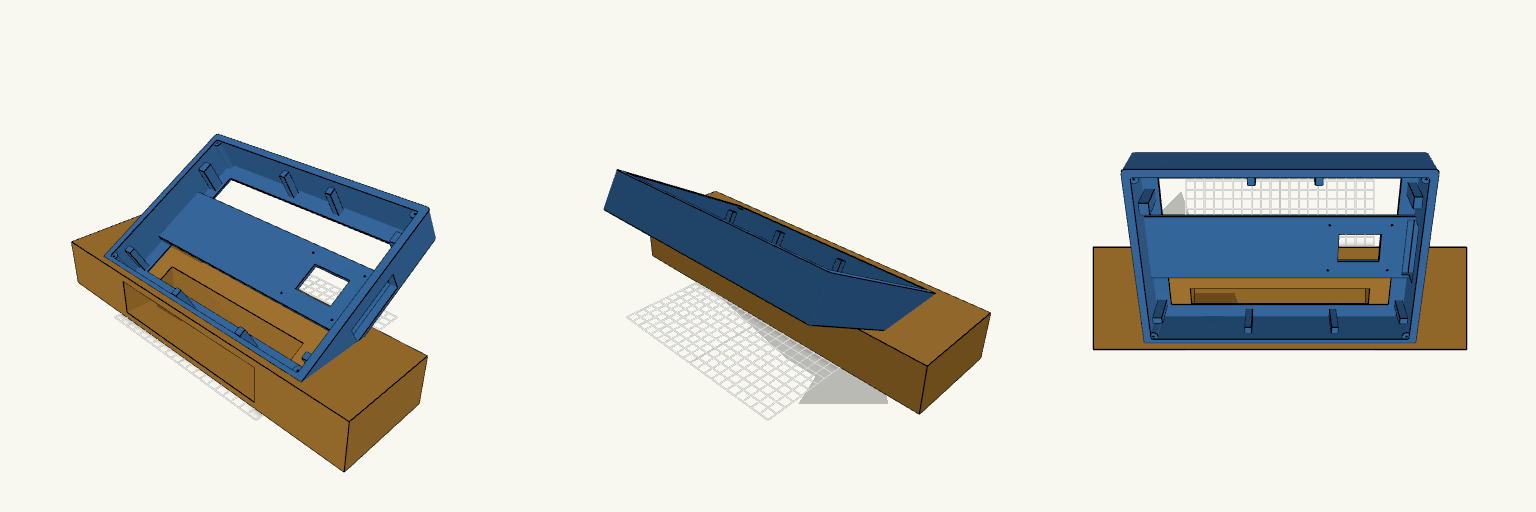
Bisel frontal para pantalla táctil de 10,1"
Bisel frontal para una pantalla táctil de 10,1 pulgadas (tipo Raspberry Pi Touch Display 2), en horizontal, inclinado 30° respecto a la horizontal y montado sobre una base de bloque. El bisel tiene sección en L: una placa frontal de 1,6 mm con la ventana de visión y una pared perimetral de 7 mm que baja hacia atrás, con la parte trasera abierta para alojar el panel. La ventana es recta, sin chaflán, y está descentrada respecto al contorno exterior. Detrás de la zona de la pantalla va un soporte para atornillar la Raspberry Pi, bajado 4 mm hacia la placa frontal, de modo que los postes apoyan en la cara interior de la placa; la barra del soporte tiene una abertura de 40 × 30 mm y la pared lateral +X tiene una ranura abierta de 60 × 20 mm para USB y Ethernet. Los cuatro agujeros guía de los postes siguen abiertos. El modelo consta de dos volúmenes, Bisel y Base. El bisel es una pieza entera, sin recortar contra el bloque, y va hundido en la base: su borde inferior queda por debajo de la cara superior del bloque. La base tiene un hueco posterior con la forma exterior del bisel, de modo que la pieza encaja dentro, y conserva la abertura frontal para el paso de los cables. Cotas del bisel Exterior: 265,05 × 183,75 mm, con 40 mm de profundidad total y esquinas exteriores redondeadas (~3,5 mm); borde frontal redondeado (~1,5 mm). Placa frontal: 1,6 mm de grosor; pared perimetral de 7 mm. Ventana de visión: 220,5 × 138,65 mm, recta, sin chaflán y descentrada. Cavidad interior para la pantalla: 251,05 × 169,75 mm. Base e inclinación Bloque de 365 × 100 mm de planta y 50 mm de alto, unos 5 cm más ancho por cada lado que el bisel. Inclinación del bisel: 30° respecto a la horizontal. La base conserva un hueco posterior con la forma del cuerpo del bisel; solo queda maciza alrededor de ese hueco. Abertura para cables de la controladora en la cara frontal de la base: rectángulo de 180 × 37 mm, centrado en horizontal, que arranca a 6 mm de la cara inferior y penetra 9 mm en el bloque. Medidas en la placa de impresión: Bisel 265 × 177,1 × 126 mm; Base 365 × 100 × 50 mm. Comprueba que ambas caben en el volumen de impresión disponible. Verifica en la vista previa que la cara frontal y la ventana quedan despejadas y que el bisel encaja en el hueco de la base sin dejar escalón. Soporte de Raspberry Pi y cables Barra transversal de 3 mm, de pared a pared, situada justo detrás de la zona de la pantalla, con su cara posterior a unos 6,6–9,6 mm de la cara frontal; no llega al borde trasero. Cuatro postes de 5 mm que apoyan en la cara interior de la placa frontal, con agujero guía de 2,2 mm para tornillos M2,5 pasante hasta la placa; separación de 58 × 49 mm. La placa queda desplazada hacia +X, con centro en X=75 mm. La barra del soporte tiene una abertura de 40 × 30 mm centrada en X=75 mm. La ranura lateral para USB y Ethernet está abierta en la pared +X, de 60 × 20 mm, a la altura de la barra, y se desplaza con el soporte. El soporte se dimensionó sin un modelo concreto de Raspberry Pi: comprueba la separación de los postes y la posición de los agujeros guía antes de imprimir. Detalles interiores Cuatro torretas cilíndricas macizas de Ø8,2 mm en las esquinas interiores, con centro a ±123,25 mm en horizontal y ±82,7 mm en vertical respecto al centro del marco. Recorren la pared desde la cara interior de la placa hasta 2 mm antes del borde trasero, y quedan recortadas por el contorno exterior. Agujero pasante en cada torreta, de delante hacia atrás: apertura redonda de Ø5 mm en la cara frontal, cono de 45° que baja de Ø5 a Ø2 en 1,5 mm y tramo de Ø2 mm hasta salir abierto por detrás. Admite tornillos autorroscantes de hasta Ø2 mm. Profundidad del tramo de Ø5 mm, distinta por esquina: 5,75 mm en las dos inferiores, 4,55 mm en una superior y 3,15 mm en la otra. Canto de la pared perimetral nivelado, sin muesca ni rebaje: el borde trasero queda liso y a una sola altura en todo el perímetro. Ocho tacos de apoyo sobre la cara interior de la placa, de reparto asimétrico: dos arriba, dos abajo y dos en cada lateral. Llegan hasta 7 mm del borde trasero, de modo que con la pared de 40 mm son mucho más altos que los 2 mm del diseño de partida; mantienen esa distancia al borde trasero, no la altura. Impresión Dos volúmenes independientes: bisel y base. La pared perimetral de 7 mm se resuelve con perímetros múltiples con boquilla de 0,4 mm. Torretas y tacos llegan casi hasta el borde trasero: al imprimir con la cara frontal sobre la cama son columnas altas, conviene revisar que no vuelquen. Revisa que la barra y los postes del soporte de la Pi no interfieran con el panel y que la separación de 58 × 49 mm coincida con tu placa. La ventana coincide con la zona activa del panel (220,5 × 138,65 mm), por lo que el ajuste es ceñido; verifica las cotas antes de imprimir.
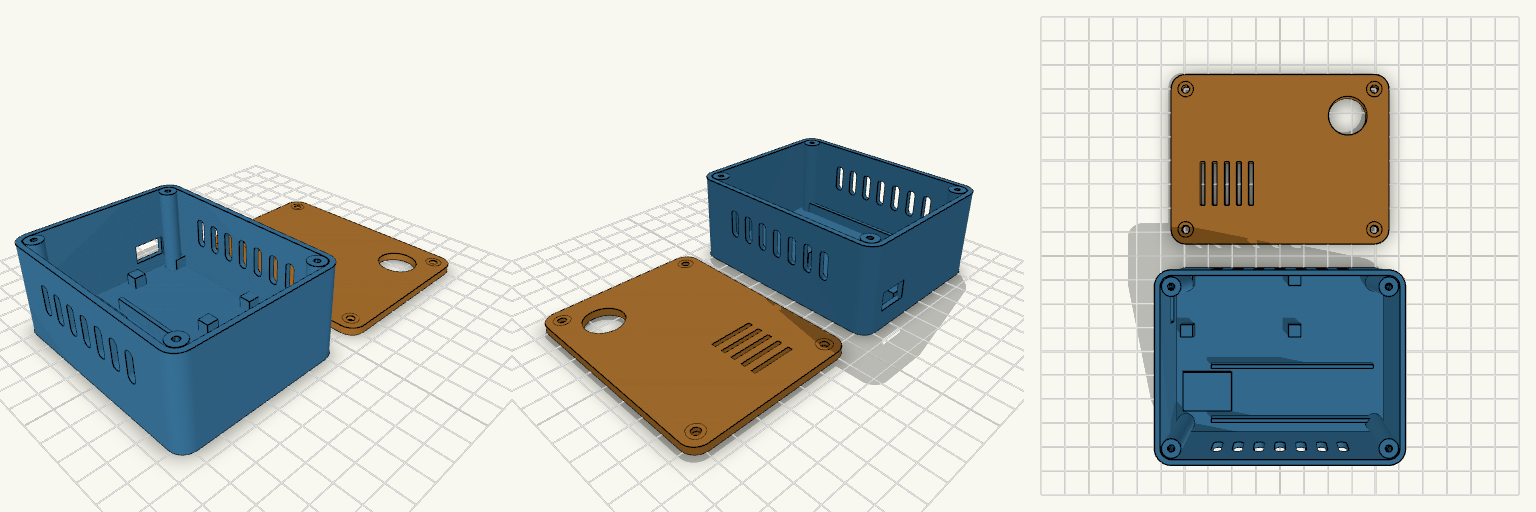
SilentSOS Two-Piece Electronics Enclosure
A 90 × 70 × 40 mm two-piece enclosure for an ESP8266 NodeMCU SOS alert device: a 37 mm tall base with 2 mm walls and a separate 3 mm lid, with 6 mm rounded vertical corners. The lid is printed flat and fastens with four M3 screws into corner bosses. Remix hooks Component mounting: no hole positions were guessed. The NodeMCU sits on four 5 mm locating pads at the board corners (49 × 26 mm area, nb, nbc). Once measured, add real standoffs in extraposts as [x, y] pairs and set post_pilot. Battery bay: two 1.5 mm rails 22 mm apart hold a cell of about 18 mm diameter, 65 mm long. Move or space them for other cells. DC-DC zone: a low 20 × 16 mm pad, free to move or resize. USB opening: 13 × 8 mm in the short wall, aligned to the NodeMCU position. SOS button: 16 mm hole in the lid (btnd, btnpos). Ventilation: seven slots in each long wall plus five slots in the lid. Screws: 2.6 mm pilots in the bosses, 3.4 mm countersunk lid holes. Pairs well with heat-set inserts in the bosses, or a gasket strip for a dust-resistant fit. Export base and lid as separate STLs by rendering each module alone.
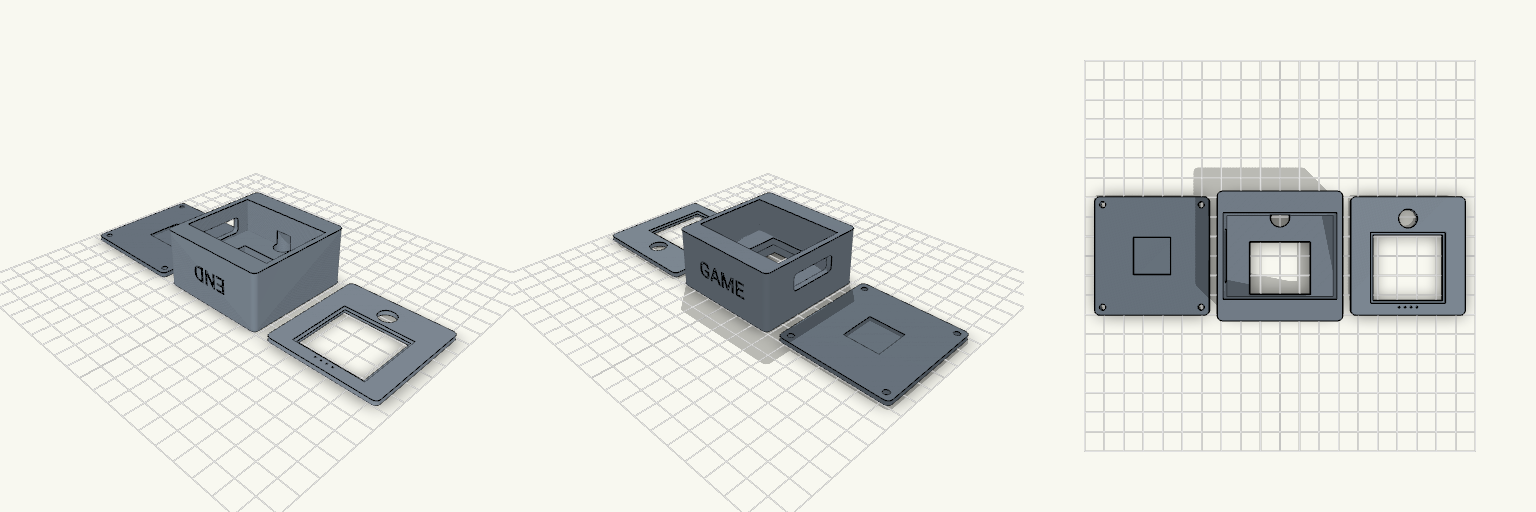
Lockdown — Dev Board Case With Camera Eye
Lockdown is a three-part enclosure for a Freenove ESP32-S3 WROOM CAM board with a 35.5 × 33.5 mm display. The front bezel turns the screen into a face, with a 9.6 mm camera eye above the window. The side wall carries one wide cable opening, so USB-C plugs and cables pass straight through the housing. Features 58 × 60 mm footprint across chassis, back cover and bezel Screen pocket with a support ledge and a flex-cable opening 9.6 mm camera bore lined up with the bezel eye Single 26 × 9 mm cable pass-through on the +X wall, raised for a high-mounted board Four M3 screws from the back Embossed-in END and GAME text on the end walls Print notes Print the three parts flat on their backs. PETG works well.
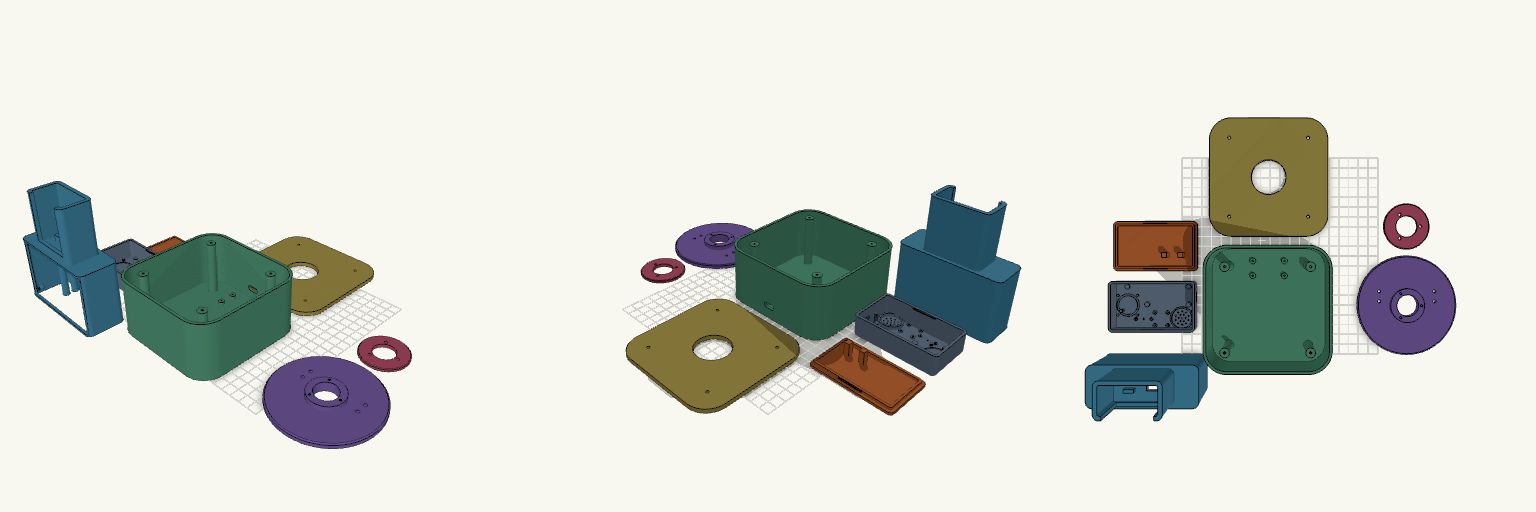
Modular Voice Assistant Enclosure with Rotating Desk Dock
A two-part enclosure system for a modular AI voice assistant: a pocket-sized "Brain" that works on its own, and a desktop station that docks it, swivels a full 360° and carries a 3.5-inch touchscreen behind a removable bezel. Both halves share the same matte-black design language — rounded corners, smooth surfaces and 2–2.5 mm walls — and print as eight separate pieces. What it's for Brain — houses an ESP32-S3 N16R8 board, an INMP441 I2S microphone, a MAX98357A amplifier and a 20 mm speaker behind a grille. A circular LED ring glows through a 0.8 mm front skin for listening, thinking and speaking states; there is no display of its own. A USB-C port sits on the short end, and the unit runs standalone once lifted off the dock. Desk station — a weighted base with a bolted lid carries a swivel plate and the dock tower. The Brain drops into the tower pocket from above with its face still visible, and a USB-C plug cradle in the pocket floor lines up with the port. Display — the tower front takes a standard 98 × 56 mm touchscreen module in landscape, held on four M2 bosses and framed by a bezel that drops into a recess in the front face. Removing four screws frees the display for replacement, and a flat-cable slot below the opening routes the ribbon into the cavity. Rotation — the swivel plate's hollow stem passes through the lid, a retaining ring screws on underneath, and the cable runs down the centre of the stem, so the tower turns 360° without twisting the lead. Dimensions Brain: 85 × 50 × 25 mm overall, with a snap-fit rear cover. Desk base: 120 × 120 mm with 22 mm corner radii; base, lid and swivel plate stack to 65 mm. Dock tower: 104 × 40 × 119 mm, docking the Brain vertically above the display section. It overhangs the 100 mm swivel plate slightly at the front and rear corners. Display opening: 84 × 54 mm, with mounting bosses behind the wall at ±46 × ±25 mm and M2 pilot holes; bezel 100 × 60 × 2.5 mm. Walls: 2–2.5 mm throughout hollow cavities. Print notes Print the Brain shell face-down for a smooth front skin; the LED ring, microphone port and speaker grille all sit in that face. The rear cover snaps on with two bump-and-groove pairs along the long sides; pads on its inside hold the ESP32 down. The tower's internal floor and the display window bridge wide spans, so expect a little support in the dock tower only. Everything else is oriented to print without it. Print the bezel flat; it is a thin frame and needs no supports. PLA or PETG both work; four rubber-foot recesses under the base are worth filling. All eight pieces — Brain shell, rear cover, desk base, base lid, swivel plate, retaining ring, dock tower and display bezel — are separate. The lid bolts on at four corners and the display bezel screws in from the front. Compatibility The display bosses use M2 pilot holes; check your module's hole spacing before driving screws, since pinouts vary between boards. The dock pocket is sized for the Brain as drawn — if you change the Brain's shell, adjust the pocket in step. Remix ideas Lean the dock back a few degrees for a more natural viewing angle if you can accept the extra support. Swap the removable bezel for a blank panel or a vent if your build has no screen. Scale the docking pocket to fit a different companion device while keeping the same swivel mechanism.