Compact Smiling Skull Pin
Created today
Description
Un pin de calavera frontal, compacto y de aire gótico de cuento: cráneo redondeado y ancho arriba, mandíbula que se estrecha hasta un mentón corto y redondeado, y dorso plano. Los ojos son dos óvalos negros grandes e inclinados hacia afuera, hundidos y bien separados del borde. Entre ellos y por debajo, la nariz reproduce la cavidad nasal de un cráneo real: un corazón invertido de unos 4,4 mm de ancho por 4,5 mm de alto, con la punta arriba y dos lóbulos redondeados abajo separados por una pequeña muesca. La boca es una sonrisa cosida —una línea negra curva atravesada por puntadas verticales— que se mantiene libre del borde exterior. Un borde gris plateado continuo recorre toda la silueta y sobresale de la cara blanca, y cada zona negra queda separada del blanco por contornos hundidos, no solo por color plano.
Mide 25 mm de ancho por 30 mm de alto, con unos 3 mm de grosor total y la parte trasera plana, así que apoya bien sobre tela, un imán o una superficie de exposición. A este tamaño, lo que decide si el personaje se lee son las cuencas y las puntadas de la boca, así que conviene imprimir despacio para que esos huecos queden nítidos. Se imprime en una sola pieza.
Puntos de partida para remezclar
- Huella: 25 × 30 mm es el límite a respetar si quieres que siga siendo un pin; escalar la pieza entera es la forma más simple de cambiar su presencia.
- Expresión: la sonrisa cosida es la decisión que define este diseño. Cambiarla por cinco o seis dientes redondeados y separados da una lectura de calavera clásica más amable, y el paso de las puntadas se puede cerrar o abrir libremente.
- Nariz: el corazón invertido mide 4,4 × 4,5 mm; variar el ancho de los lóbulos o la profundidad de la muesca central cambia mucho el gesto de la cara sin tocar nada más.
- Ojos: la inclinación hacia afuera y el tamaño del óvalo son las dos perillas que controlan el aire Burton; cuencas más cuadradas, más rectas o más hundidas llevan a territorios distintos.
- Profundidad del relieve: la cara blanca sobresale de la base de 2 mm y los detalles negros van hundidos en ella. Esa diferencia de altura es el control principal de la legibilidad de ojos, nariz y puntadas a tamaño pequeño.
- Borde: conviene mantenerlo continuo y gris plata; su grosor es libre, así que un canto más grueso o un filo más fino funcionan igual.
- Montaje: combina de forma natural con un cierre de pin, un disco magnético o un pequeño soporte, según si se lleva puesto, se pega o se exhibe.
Images
More like this
Explore more in Decor & Display →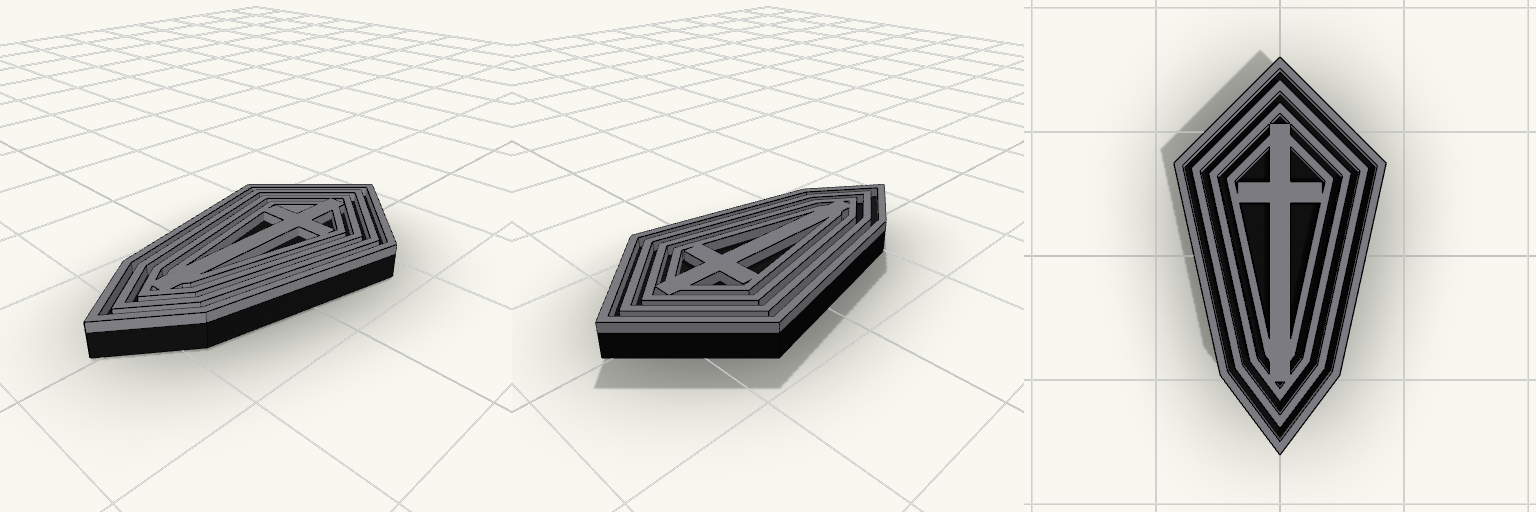
Pin de ataúd gótico con cruz central
Pin vertical con silueta de ataúd y acabado metálico plateado y negro. Mide 30 × 16 mm, con base negra de 2 mm, relieves plateados de 0,8 mm y un grosor total de 2,8 mm; la parte posterior es plana. Cuatro contornos plateados concéntricos siguen la silueta exterior y quedan separados por canales negros. En el centro hay una cruz plateada con el brazo inferior alargado, que ocupa casi todo el largo del ataúd, y el travesaño en la parte alta. Todo el relieve se apoya directamente sobre la base, así que ninguna línea decorativa queda suelta. Medidas: 30 mm de alto × 16 mm de ancho, 2,8 mm de grosor total. Capas: base negra de 2 mm y relieves plateados de 0,8 mm. Contornos: cuatro anillos plateados concéntricos con canales negros entre ellos. Centro: cruz plateada con brazo inferior alargado y travesaño alto. Acabado: fondo negro, contornos y cruz plateados, parte posterior plana. Impresión: FDM en PLA multicolor, geometría cerrada y sin piezas sueltas.
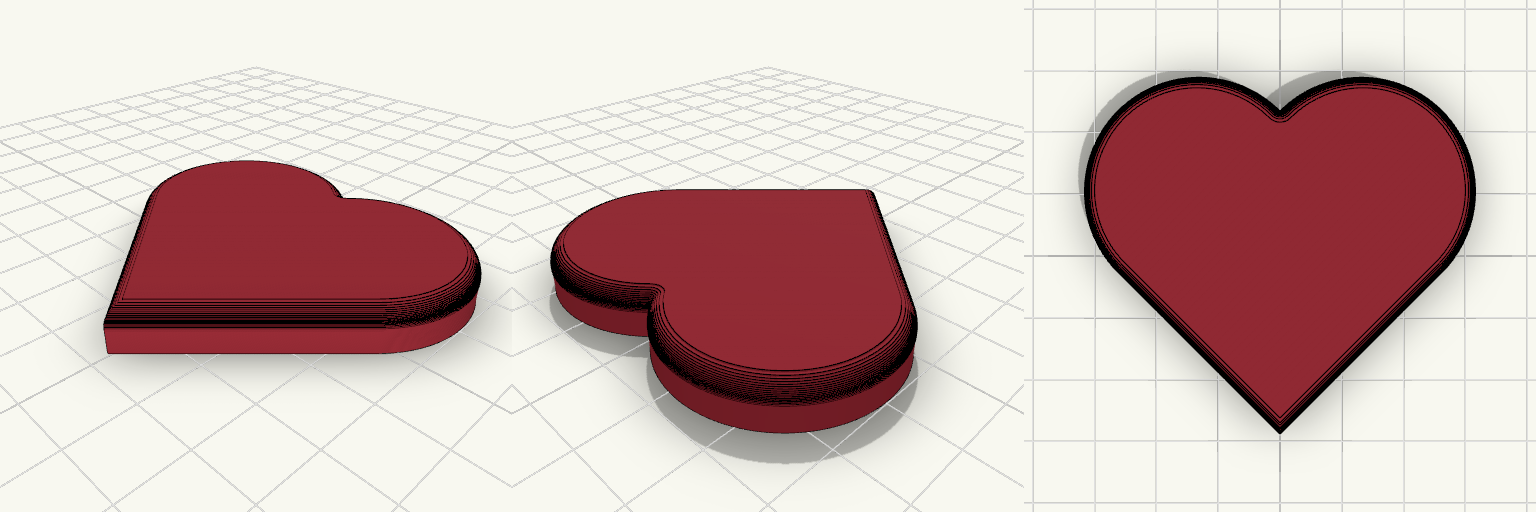
Classic Heart Shape, 7 mm Thick
What it's for A plain, symmetrical traditional Valentine's heart that prints flat on the plate as a single solid piece. Use it as a decorative shape, a gift topper, or a starting point for ornaments and hanging decorations. Classic rounded-lobe heart silhouette with a V-shaped notch at the top and a point at the bottom Each lobe is a true smooth arc, so the outline reads as a continuous curve from above with no flat facets The sides running down from the widest point to the bottom tip stay straight, as intended Front edges rounded all the way around, including both lobes Back face completely flat, with no edge rounding, giving a clean surface to glue against or to cut a mounting interface into Prints without supports Dimensions Width: 60 mm Height: about 55 mm (54.9 mm as measured on the plate) Thickness: 7 mm Edge rounding: 3 mm radius, on the front face only 60 mm is the largest direction, so the heart sits at the size limit rather than under it Print notes Lay the heart flat on the build plate so the 7 mm thickness forms the height and the flat back becomes the bed contact face. At this size it prints quickly and needs no supports or rafts. Any common filament works; a glossy or silk finish suits the smooth faces, and the rounded edge catches light along the outline. Remix ideas Add a small hole near the top lobe for hanging Emboss a name, date, or short message on the front face Cut a keyhole slot or a knob interface into the flat back for wall mounting or a stand Change the front edge radius for a puffier heart or more flat side wall
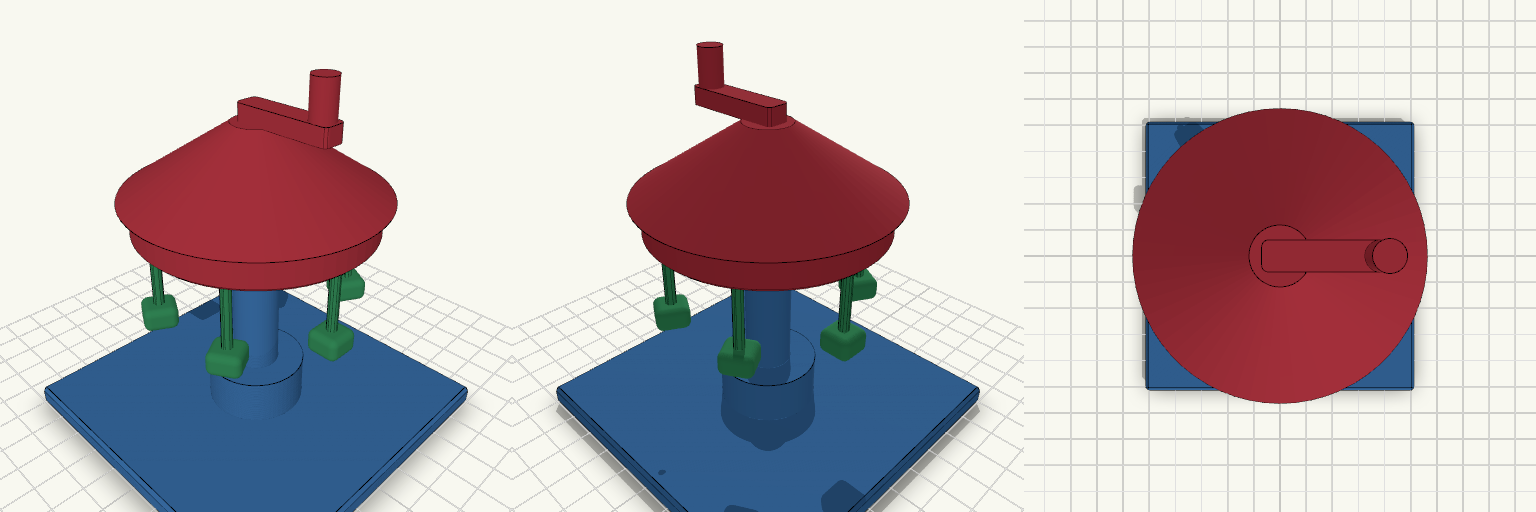
Funfair Swing Ride with Crank, 100 mm Base
Funfair swing ride with a hand crank on top. Turning the crank spins the canopy and seat ring around a fixed central pin, and each of the six seats hangs from a captive ball joint so it swings outward as the ride turns. Base: 100 x 100 x 6 mm plate with a 30 mm column and 14 mm mast Spinning top: 70 mm seat ring and cone canopy on a 8 mm pin, 0.3 mm bearing clearance Seats: six, each on a 7 mm captive ball with a 3 mm rod, printed in place Crank: 30 mm arm with a 7 mm handle on top of the canopy Print in place, no supports needed for the base; the ring cavities bridge over the balls Overall height about 112 mm
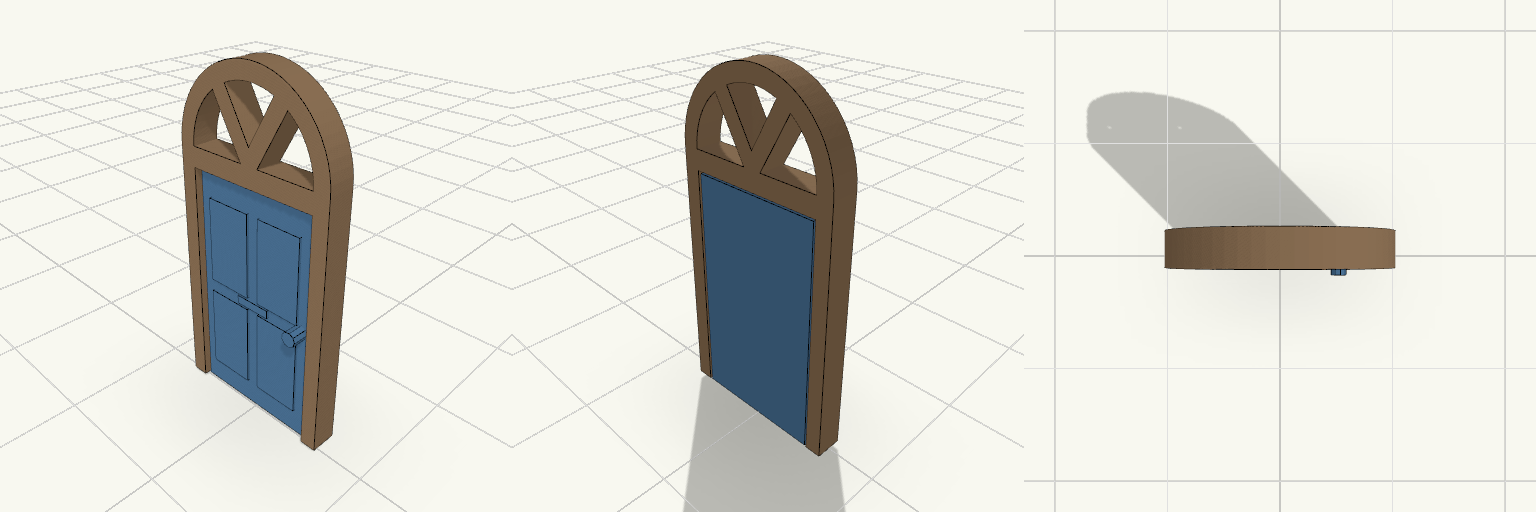
OO Scale Arched Door Frame 13x26mm
Arched door frame and separate door for an OO scale (1:76) house, sized for a 13 x 26 mm wall opening with a semicircular top. The frame is 2 mm deep and continues around the inside of the arch, leaving a semicircular glass gap above the door. Frame: 12.8 mm wide, 25.9 mm tall, 2 mm deep Glass gap: semicircle, 8.8 mm across Door: 8.4 x 17.8 mm, printed as a separate piece Door detail: four raised panels, round handle, letterbox plate Fit: 0.1 mm clearance per side in the wall opening Print with a fine layer height; panel relief is 0.4 mm
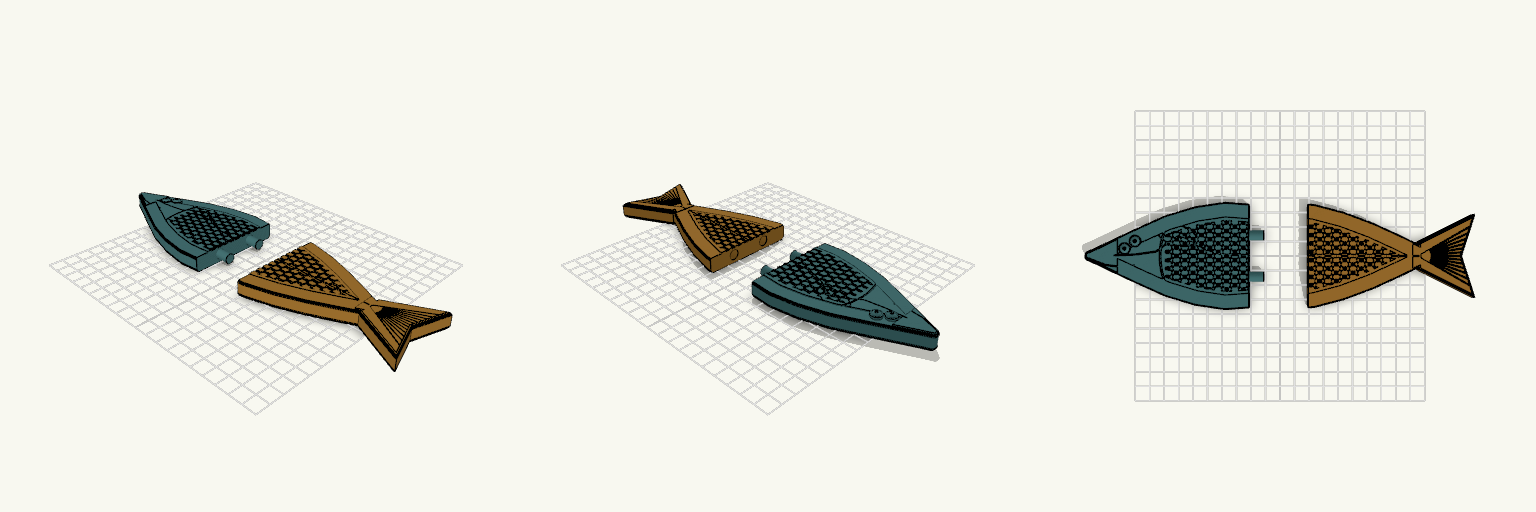
heilbutt kopf
Wofür es ist Ein zweiteiliger Heilbutt in gestreckter Rautenform mit spitzem Kopf: kleine, flache Augen dicht beieinander oben am Kopf, ein großes, bis unter die Augen gezogenes Maul und eine kleine, gerade abgeschnittene Schwanzflosse. Die Kopfhälfte trägt zwei Zapfen, die Schwanzhälfte zwei passende Bohrungen; zusammengesteckt ergibt sich wieder ein vollständiger Fisch. Beide Hälften liegen als getrennte Stücke mit deutlichem Abstand zueinander auf der Druckplatte und lassen sich einzeln drucken. Kopfhälfte mit beiden Augen oben am Kopf und zwei Zapfen Schwanzhälfte mit kleiner Schwanzflosse und zwei Aufnahmebohrungen Das Spiel zwischen Zapfen und Bohrung ist bewusst großzügig gewählt, damit die Hälften nach dem Druck leicht zusammenpassen Details Die Haut trägt ein eingraviertes Schuppenmuster aus überlappenden Bögen, das versetzt hinter den Kiemen sitzt und zum Rand hin aufhört, damit Rücken- und Afterflosse frei bleiben. Dazu kommen eine feine Seitenlinie und ein Bogen über der Brustflosse. Rücken- und Afterflosse sind mit Linien angedeutet, die Kanten sind am ganzen Umriss oben und unten mit etwa 2,4 mm Radius abgerundet. Maße Kopfhälfte: 120 × 71,9 × 13,8 mm Schwanzhälfte: 112 × 69,6 × 12 mm Zapfen: 7 mm Durchmesser; Bohrungen: 7,6 mm Beide Hälften liegen flach und lassen sich ohne Stützen drucken. Druckhinweise Das Schuppenmuster ist 0,8 mm tief graviert; eine 0,4-mm-Düse gibt die Linien sauber wieder. Die abgerundeten Kanten sind Teil des Modells und nicht nachträglich zu bearbeiten. Für die Zapfen und Bohrungen ist etwas Spiel vorgesehen; das erleichtert das Zusammenstecken nach dem Druck. Beide Hälften flach auf dem Druckbett ausrichten. Ideen für Varianten Statt der Steckzapfen ist eine Schwalbenschwanzverbindung denkbar, wenn die Verbindung formschlüssiger sein soll. Andere Gesamtgrößen oder ein anderes Seitenverhältnis sind möglich, solange Zapfen und Bohrungen zueinander passen. Eine farbige Bemalung kann die realistische Form zusätzlich betonen; eine dunkle Oberseite und helle Unterseite folgen dem echten Heilbutt.
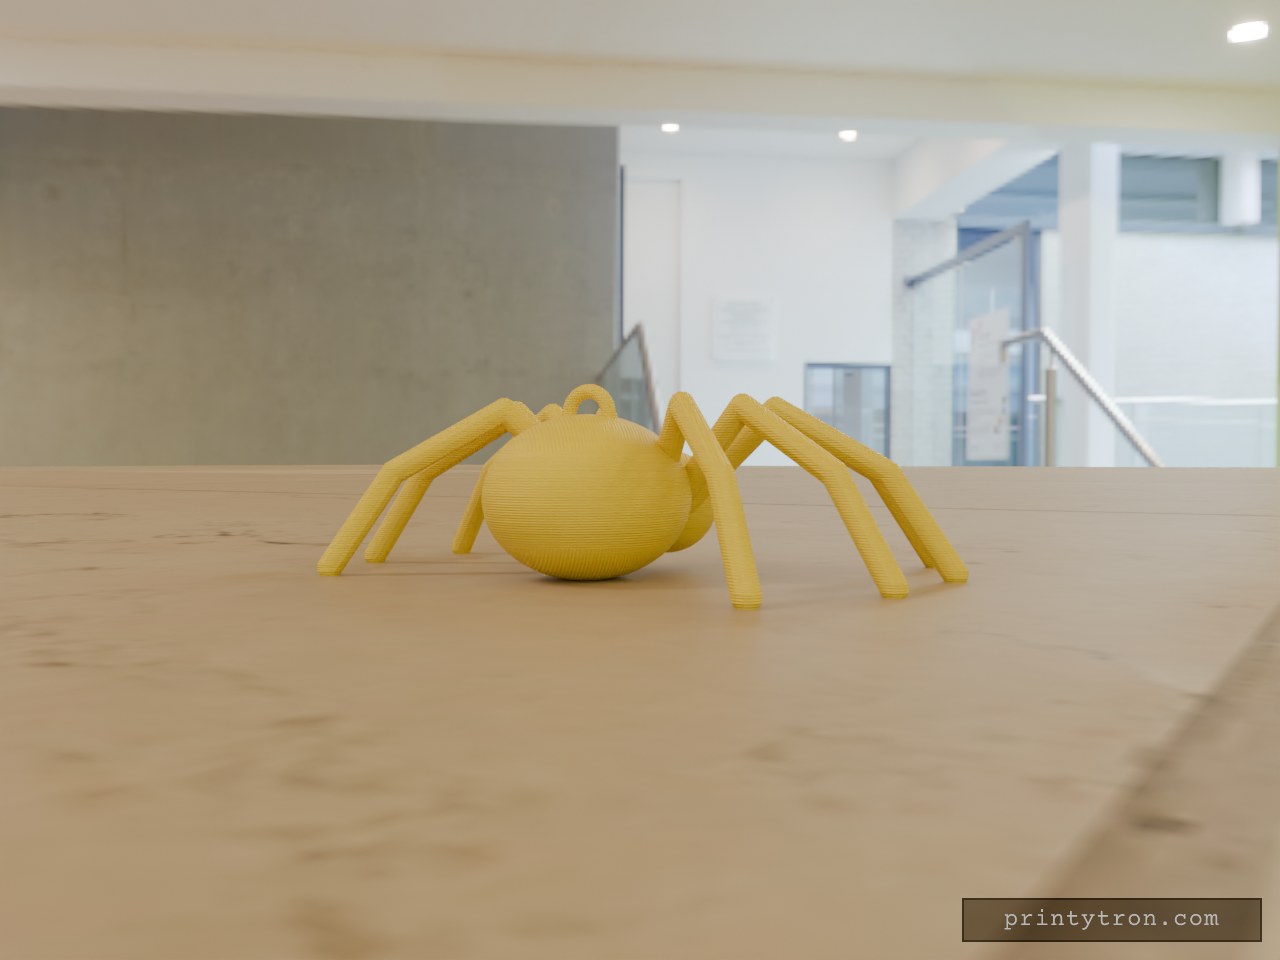
Halloween Spider Decoration for Shelves
A Halloween spider decoration that stays put on a shelf or mantel, instead of a flat cutout that falls over. Eight bent legs spread out as a stable base. Key numbers Body: about 24 mm abdomen, 14 mm head Leg span: roughly 80 mm across Print: no brim needed; supports under the legs and head may help Material: any PLA works; multicolour optional