Square-to-Round Fan Duct With Spout
Made by a Guest
Created 3 days ago
Description
A fan-shroud adapter in the spirit of a classic blower nozzle: a flat square flange that funnels up into a round outlet, then runs straight like a spout.
- 92.5 mm square flange, 4 mm thick, with four M3 clearance holes on an 82.5 mm pitch (5 mm from each edge)
- 75 mm square inlet
- 50 mm square-to-round transition
- 30 mm straight round tube, 32 mm inner diameter, 36 mm outer
- 2 mm walls, no chamfers, prints flange-down in PLA without supports
Photos
Technical views
More like this
Explore more in Desk & Tech →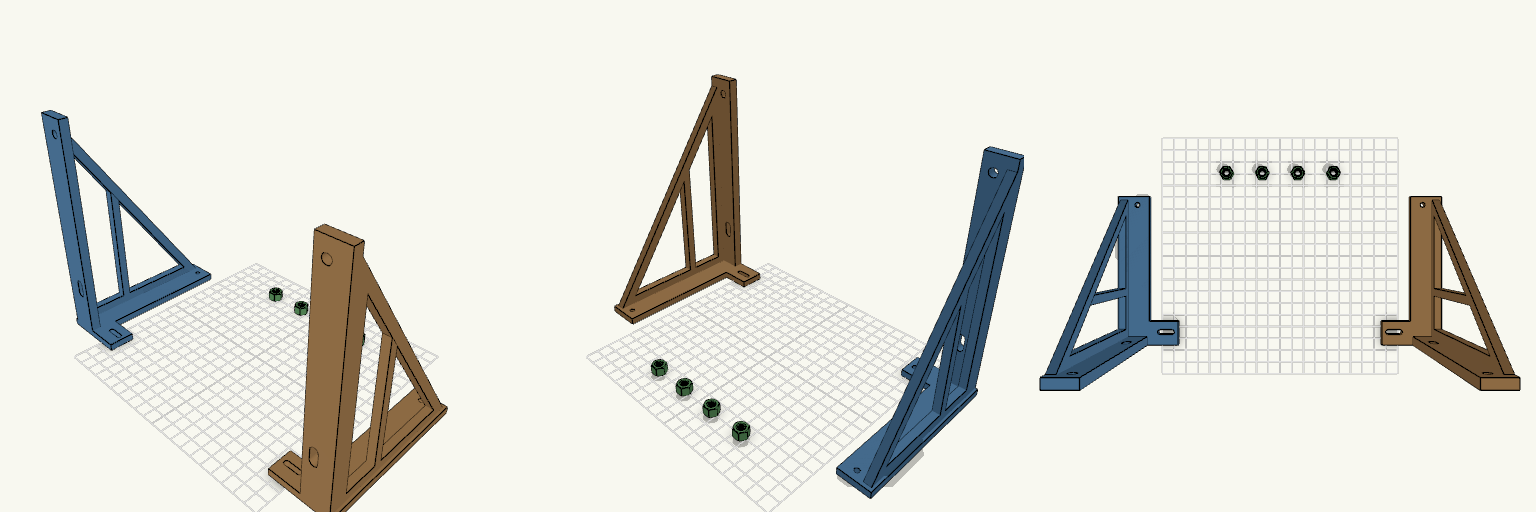
Tromba Perch — Due Staffe Laterali
Tromba Perch è una coppia di staffe laterali indipendenti per una tromba 220x160 mm con interasse fori di 240 mm. Senza traversa centrale, ogni staffa si avvita sul monitor con la propria base e regge un lato della tromba. Si risparmia materiale e ogni pezzo entra facilmente nel piatto di stampa. Features Interasse fori tromba invariato: 240 mm in orizzontale, 126 mm in verticale Pilastro allargato verso l'esterno fino a filo del triangolo Triangolo a telaio con montante di irrigidimento Base da 125 mm con fori di fissaggio anteriori (asole regolabili) e posteriori Fori tromba da 6,4 mm per perni M6, foro basso asolato per regolare l'inclinazione In the box Staffa sinistra Staffa destra 4 dadi M6 da 7 mm, stampati a parte Print notes Le due staffe sono pezzi separati, senza giunto Filettatura stampata in PLA fragile: per carichi veri meglio dadi metallici
Mini-Server-Box with Feet, Lid and Fan
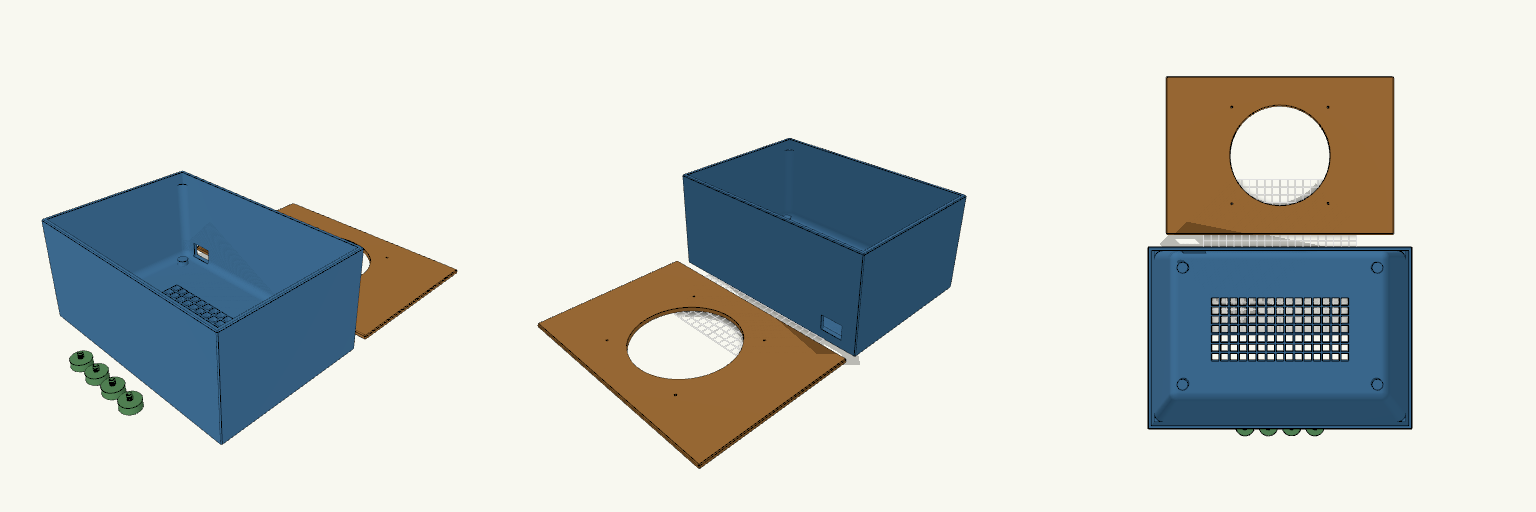
What it's for A solid-walled enclosure for hiding and cooling equipment. Every side wall is closed, and the only airflow path is a sturdy grid cut into the floor, so the box stays dark and quiet from the sides. A 30 × 20 mm cable hole in the lower rear corner lets wiring in and out, and the flat lid lifts off for access. The model prints as separate pieces: the box, the lid and four feet. The lid is a flat plate with a locating lip underneath, slightly larger than the box on every side so it overhangs and can never drop inside. Each foot carries its own coarse threaded stud, so the feet screw directly into matching threaded holes in the floor bosses with no separate fasteners. Dimensions Box: 290 × 200 × 130 mm, with 4 mm walls, solid on all four sides, an 8 mm floor, and a 50 mm solid border around the floor grid. The floor grid is centred on the narrower floor. The thicker floor makes the mesh bars deeper, so airflow per opening drops slightly. Inside fillets: 10 mm radius on the vertical corners and the floor-to-wall edges, stopping 15 mm below the rim. The top 15 mm stays square so the lid and its lip fit without changes. Lid: 294 × 204 mm, 9 mm overall with a 5 mm plate and underside lip; overhangs the box by 2 mm on all sides; 140 mm fan opening and four 3 mm fan screw holes at 124.5 mm center-to-center. Cable hole: 30 × 20 mm in the rear wall, set 20 mm from the left edge and 12 mm above the bottom, inside the solid section so it doesn't weaken the corners. Feet: four solid 24 mm discs, 10 mm tall, each with a 6 mm thick, 8 mm long threaded stud on top; 18 mm overall. The studs use a 1.5 mm pitch. Foot sockets: four corner bosses widened to 14 mm, with threaded holes 6.6 mm across and 11 mm deep at the same 1.5 mm pitch, giving about 0.6 mm clearance on diameter. Print notes Print the box, lid and feet separately. Print the lid lip-side up so its flat face sits on the bed and the lip rises clear of the plate. The floor grid benefits from enough perimeters to keep the bars sturdy. The threads have not been test-fitted; if the feet bind, raise the socket diameter slightly, and if they wobble, lower it. Test-fit the fan and check its screw-hole spacing before committing to a full print. Remix ideas Add a removable filter frame behind the fan opening. Add internal standoffs or a shallow tray for mounting equipment inside. Resize or duplicate the rear cable port for thicker cable bundles. Swap the floor grid for a denser or more open pattern to change the airflow.
NEXUS Desk Pen Holder
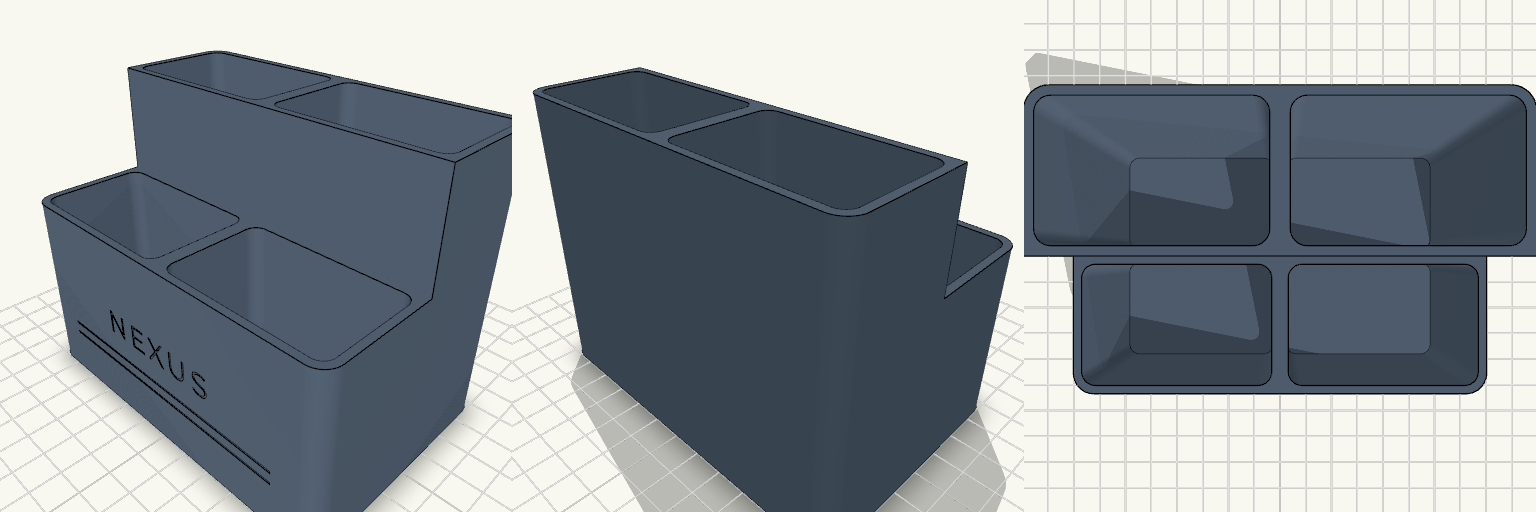
What it's for A minimalist desk organizer with four open-top compartments for pens, pencils, markers and small stationery. A stepped front lowers the front pair for easy reach to small items, and a small NEXUS logo is engraved on the front face. Dimensions Footprint: 120 × 80 mm Height: 95 mm rear, 60 mm front Wall thickness: about 2.4 mm Flat base, rounded vertical corners, chamfered base edge Remix ideas Change the logo text to a name or initials. Make the front compartments deeper for scissors or rulers. Add a non-slip pad under the base.
手机支架
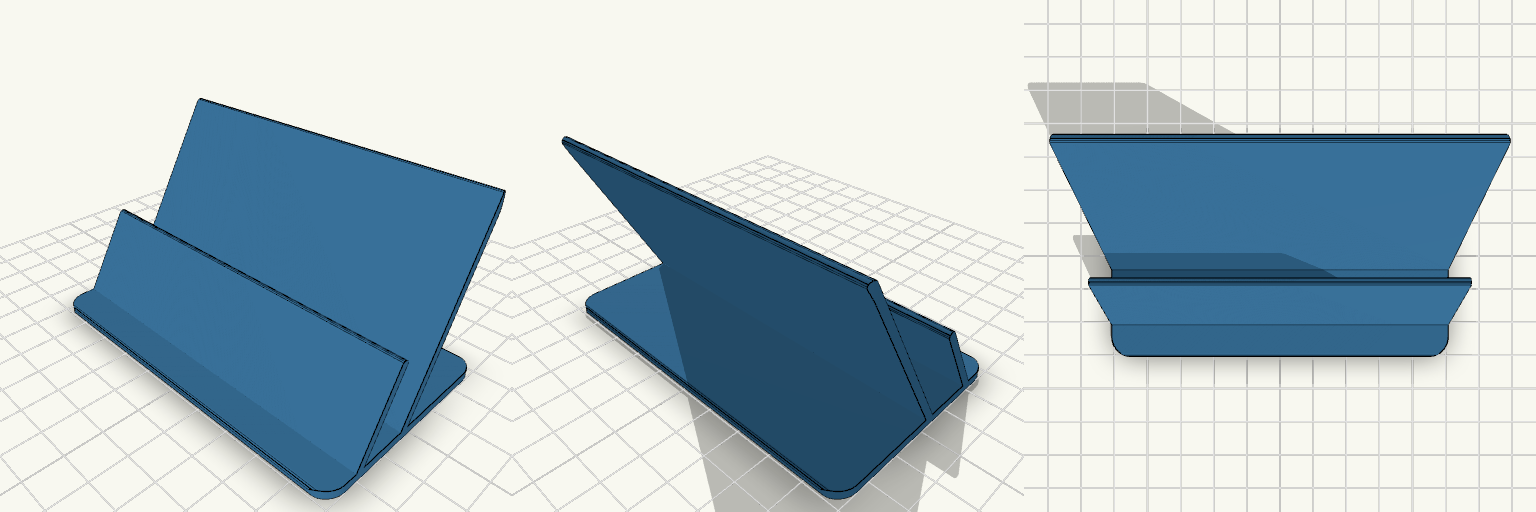
A phone stand for a phone that keeps sliding flat or tipping over: a 60° backrest holds it upright, and a front lip stops it sliding out. Key numbers Base: 100 × 60 mm, 2.2 mm thick Backrest tilt: 60° from the table Slot: 12 mm wide, measured between backrest and front lip Walls: 2.2 mm throughout Corners: rounded in plan and along the profile edges Printing Print with the base flat on the bed. No supports needed: the backrest leans back at 60°, which stays within a typical overhang limit. Phones with thick cases may need a wider slot.
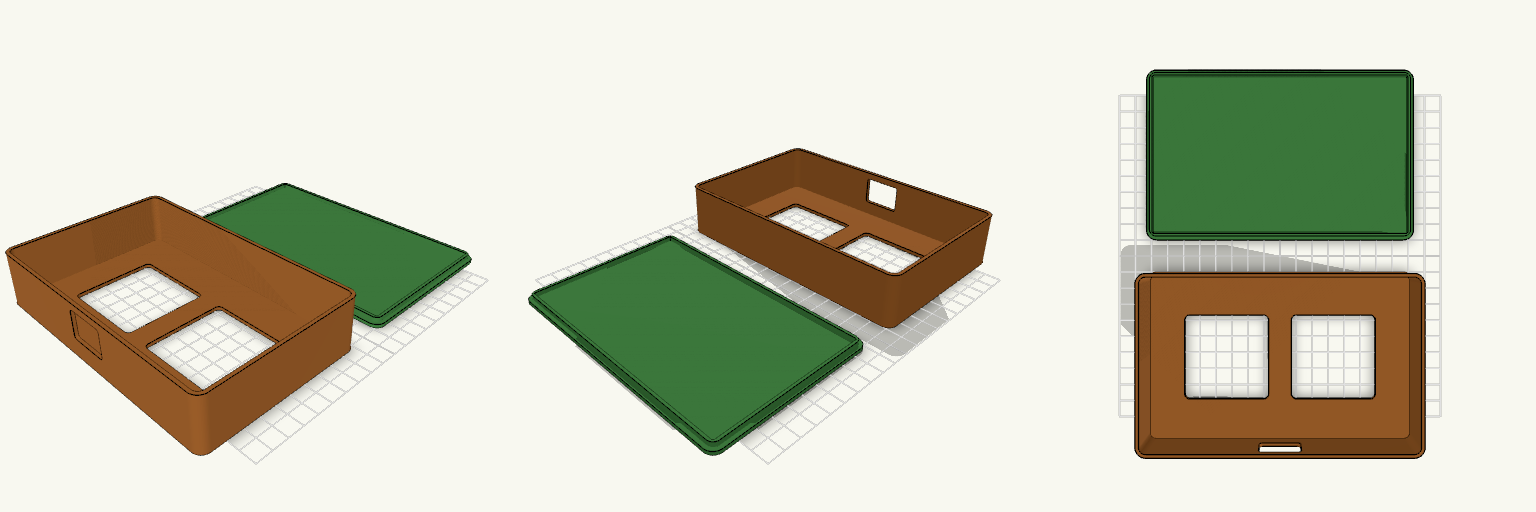
Joystick Controller Enclosure With Bottom Cover
A dual-joystick controller enclosure that can't be wired or soldered through the top, because the two 52 × 52 mm joystick openings are too small for the board. This version splits the floor off as a removable bottom cover, so the board and joysticks go in from below. Key numbers Outer size when assembled: 165 × 105 × 35 mm (shell 33 mm + cover 2 mm) Walls and top panel: 2 mm; corner radius R6 Joystick openings: two at 52 × 52 mm, R3 corners, 14 mm apart RJ45 window: 25 × 18 mm, centred on the rear wall, 6 mm up from the open edge (provisional) Cover lip: 0.3 mm clearance inside the walls, 3 mm tall Printing Shell: print top panel down, open side up, no supports. Cover: print flat with the lip pointing up. Check the 25 mm bridge over the RJ45 window in the slicer preview. The cover is held by friction or a dab of adhesive; there are no screws.
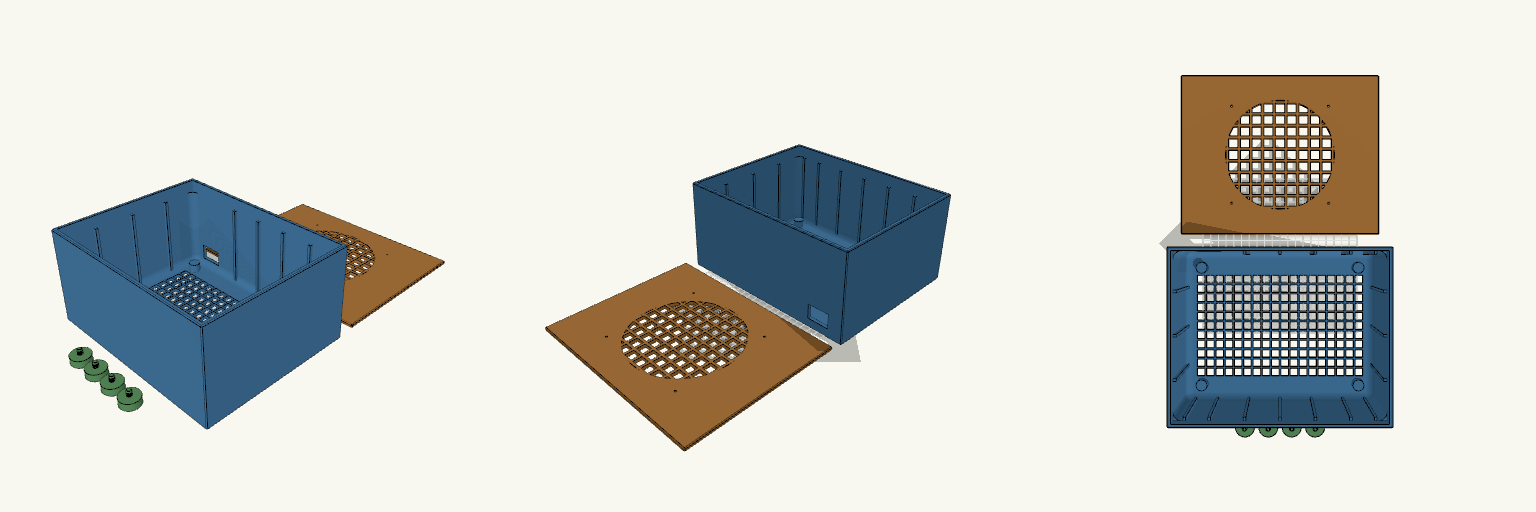
Mini-Server-Box with Feet, Lid and Fan (more stable)
What it's for A closed-side enclosure for hiding and cooling equipment. All four side walls are solid, so the box stays dark and quiet from the sides. Airflow passes through the mesh grid in the floor and the mesh fan opening in the lid. A 30 × 20 mm cable hole in the lower rear corner lets wiring in and out, and the flat lid lifts off for access. The model prints as separate pieces: the box, the lid and four feet. The lid is a plate with a locating lip underneath that sits well inside the box, and it overhangs the walls slightly so it can never drop in. The 140 mm fan opening is filled with a square-hole grid, keeping the full opening size while adding stiffness. Each foot carries its own coarse threaded stud, so the feet screw directly into threaded holes in the floor bosses with no separate fasteners. Dimensions Box: 250 × 200 × 120 mm outside, with 4 mm walls and floor and a 242 × 192 mm cavity. Solid on all four sides, with a 30 × 20 mm cable opening in the rear wall kept clear of ribs. Wall ribs: vertical ribs on the inside faces, 3 mm thick and standing about 4 mm proud of the walls, running from the floor up to the lid recess. They are spaced about every 40 mm on the long walls and every 50–60 mm on the short walls, and stop clear of the cable opening and the foot posts. Floor mesh: sized to the narrower floor and ending where the foot posts and screw holes begin. The openings are 10 mm on a 12 mm pitch. Lid: 254 × 204 × 9 mm overall, with a 4 mm plate. Underneath, two lengthwise and two crosswise ribs, each 3 mm wide and 3 mm high, sit inside the lip so the lid still seats the same way. The locating lip follows the inner wall with roughly 5.5 mm of play per side and is 5 mm tall so it reaches into the box; its lower edge is chamfered to guide it in. Fan opening: 140 mm across, filled with a grid of 12 mm square holes on a 15 mm pitch, leaving 3 mm bars. The four fan screw holes are on a 124.5 mm square and cut through the lid plate. Check this against your actual fan before printing. Feet: four 24 mm discs, 18 mm tall including a 6 mm thick, 8 mm long threaded stud; 1.5 mm pitch, matching the threaded floor bosses. The set measures 114 × 24 × 18 mm laid out. Print notes Print the box, lid and feet separately. The wall ribs are straight verticals, so they need no supports or overhangs. The lid ribs are shallow and bridge cleanly. Print the lid lip-side up so its flat face sits on the bed and the lip rises clear of the plate. The 4 mm walls, floor and lid plate rely on perimeter count and the ribs for stiffness, so wall count matters more than infill. With walls this thin, flex will go up a little; the wall ribs matter more now. Give the floor mesh and fan grid enough perimeters to keep the bars sturdy. The threads have not been test-fitted; if the feet bind, raise the socket diameter slightly, and if they wobble, lower it. Suggested PETG settings (0.4 mm nozzle) Layer height: 0.2 mm for a clean surface, 0.3 mm to cut print time substantially; keep the first layer at 0.25–0.3 mm for adhesion. Print the feet at 0.16–0.2 mm so the threads come out clean. Wall lines: 3 lines for the box and lid with the 4 mm walls; 3 for the feet. Ribs and grid bars: 3 mm thick, so enable thin-wall detection so they print solid rather than with gaps. Top/bottom layers: 4 each at 0.3 mm layer height; 4–5 each at finer layer heights. Infill: 12–15% gyroid or cubic is enough given the nearly solid walls; raise it only if the box still feels soft. Speed: outer walls around 35–40 mm/s, inner walls 50–60 mm/s, infill 60–80 mm/s. Temperatures: 235–245 °C nozzle, 70–80 °C bed, part fan at 30–50% for good layer bonding. Use a brim on the box if corners lift. Remix ideas Add a removable filter frame behind the fan grid. Add internal standoffs or a shallow tray for mounting equipment inside. Resize or duplicate the rear cable port for thicker cable bundles. Add a second row of wall ribs for even stiffer walls with the 4 mm walls. Change the fan grid bar thickness or hole pitch to trade airflow for stiffness. Swap the floor grid for a denser or more open pattern to change the airflow.