Terrace Door Pull Handle
Created 3 months ago
Remixed once
Description
A compact, sturdy pull handle designed specifically for terrace and screen doors that just need to be pulled shut. Sized to fit exactly into an 80x20mm footprint with a rigid center bridge.
Design Notes
- Precision Spacing: The mounting holes are placed exactly 48mm apart (center-to-center).
- Tool Access: Features 9.5mm access channels through the top grip—drop your screws right through the top and drive them straight into the base with a standard screwdriver.
- Countersunk Base: The base holes include a countersink to ensure screw heads sit flush and don't catch your fingers.
Photos
Technical views
More like this
Explore more in Home & Fixtures →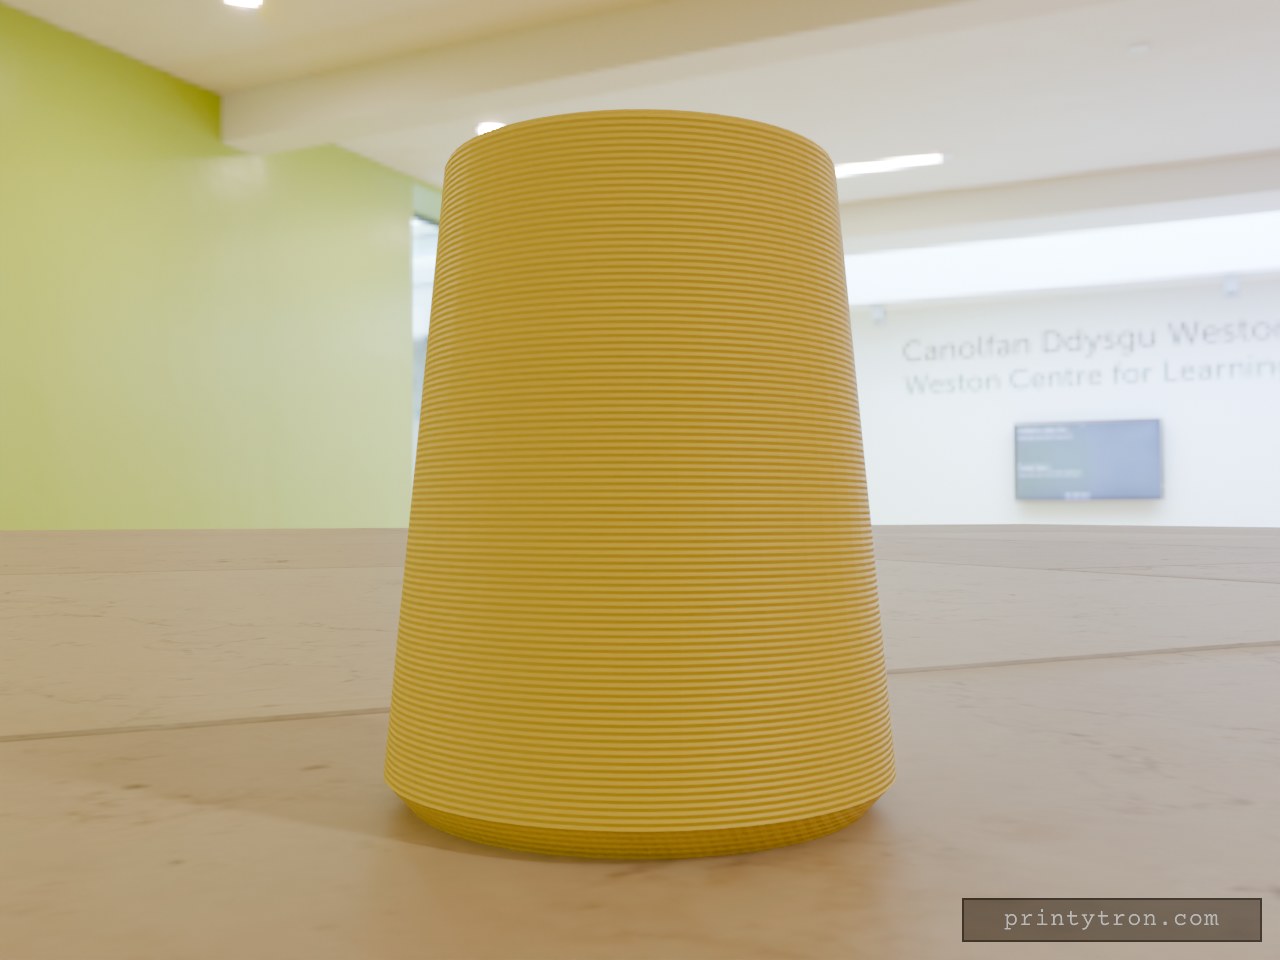
Cabinet Handl Bumper
A cabinet handle end that slams into the door or wall now has a cone-shaped TPU bumper to take the hit. The bumper slides over the handle end and stays put on an 11.8 mm blind hole. Key numbers Height: 32 mm Base diameter: 26 mm, with a 1.5 mm 45° chamfer on the bottom edge Narrow end diameter: 20 mm Hole: 11.8 mm diameter, 24 mm deep, opening at the narrow end Print: TPU, base down, no supports needed
Charging Station Marker Nail
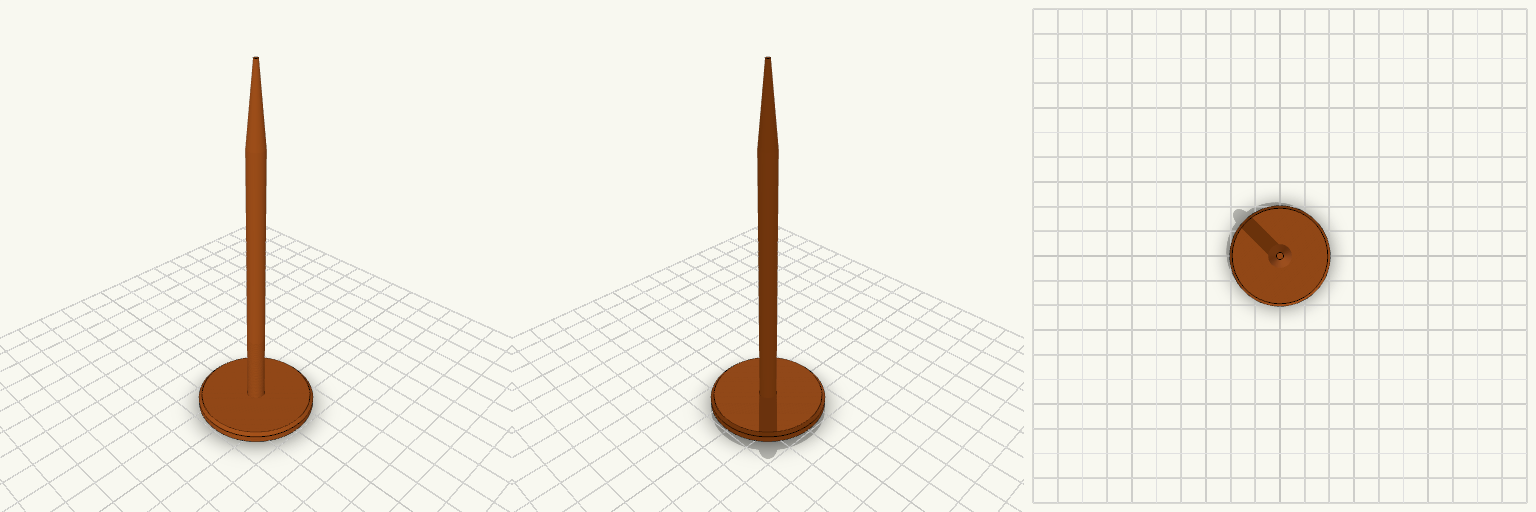
A ground marker nail for holding the position of a robot mower charging station while the charger is stored for the season. It is pushed into the soil where the charger's screw sits in summer. The nail has a wide, flat 40 mm head that stays visible at ground level, a slim 6 mm round shaft, and a tapered point for easy insertion. It prints head-down, so no supports are needed. Head: 40 mm diameter, 4 mm thick, chamfered edge Shaft: 6 mm diameter, about 90 mm long Tip: tapers to a point over 25 mm Overall length: about 119 mm Prints without supports
Perilla de estufa de repuesto con vástago reforzado
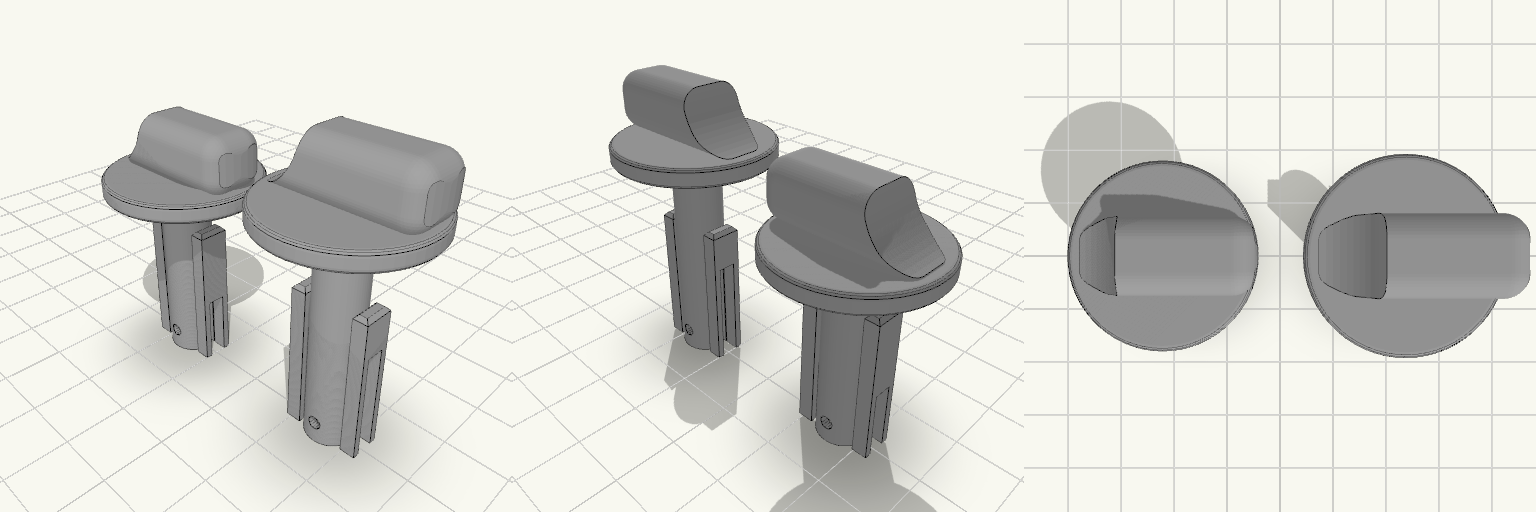
La perilla de la estufa que gira en falso o se parte deja el fuego sin control; esta perilla de repuesto se calza sobre el caño de gas y se traba con pasador, con el pulgar recortado al contorno del collar y todos los bordes del agarre redondeados para girar sin engancharse. La placa trae dos perillas: la original y una copia con vástago de 35 mm para cambiar el largo según la estufa. Cotas que deciden el calce Dos perillas en la misma placa: la original mide 41,5 mm de alto total (12 mm de cabeza + 29,5 mm de vástago); la copia mide 47 mm de alto total (12 mm de cabeza + 35 mm de vástago). En la placa ocupan 58 × 26 × 47 mm. Vástago: 8 mm de diámetro exterior, con dos aletas planas de refuerzo de 24 mm a los lados; en la copia, las aletas quedan en la zona de la punta. Vástago hueco: orificio de 5,5 mm de diámetro, abierto en la punta. En la original llega a 26 mm de profundidad y queda ciego en los últimos 3,5 mm hacia la cabeza, con paredes de aproximadamente 1,25 mm; la copia mantiene el mismo orificio de 5,5 mm. Agujero pasante: 2,2 mm de diámetro, horizontal, con el centro a 3,5 mm del extremo inferior; cruza la cavidad del vástago, así que la chaveta atraviesa el caño de gas. Endija: 3 mm de ancho, abierta en la punta; va a 90° del agujero del pasador, atraviesa el vástago y corta también las aletas laterales, dejando el extremo dividido en dos mitades flexibles. En la original llega a 11 mm; en la copia llega a 17,5 mm, la mitad de su vástago. Cabeza: collar de 26 mm de diámetro por 3 mm de alto; el pulgar mide 26 mm de ancho, 10 mm de grosor y 9 mm de alto sobre el collar, ya no pasa el contorno del collar, es plano de un lado y baja curvo del otro. Todas las aristas del pulgar tienen 3 mm de radio; los bordes del collar tienen 0,8 mm. Cada perilla se imprime de una sola pieza; la endija no separa el modelo, solo deja flexibles las dos mitades del extremo. El acabado negro mate sale del filamento que elijas, no de la geometría. Antes de imprimir, mide el diámetro del caño de gas y el del pasador: el hueco del vástago y el agujero pasante son las dos cotas que no perdonan, y si no coinciden es mejor ajustarlas antes de gastar material.
Draining Sleeve Foot for a Laundry Hamper Leg
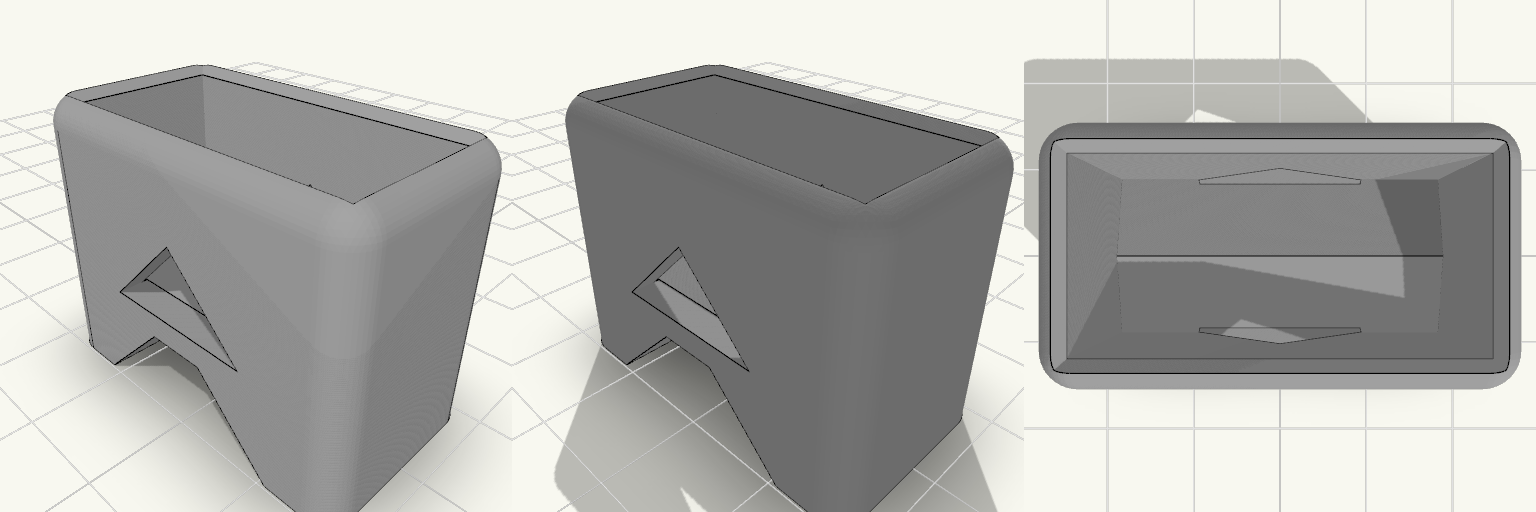
The wood at the bottom of a hamper leg is the first thing to go: it stands in whatever puddle the bathroom floor collects, drinks it up, and goes soft until the basket slumps and rocks. This sleeve slides onto the end of one rectangular wooden leg, holds the wood about 9 mm clear of the floor, and slopes its pocket floor so splash water runs out the sides instead of sitting in there against the wood. What it does Pocket: 31 × 15 mm inside, sized exactly to the leg with no added play — that measurement already accounts for clearance. 15 mm deep at its shallowest point, the centre ridge, and deeper toward the sides where the floor falls away. Stand-off: a single arched cut runs the full depth of the underside, leaving two flat feet that hold the leg about 9 mm off the floor. Overall height is about 27 mm. Drainage: the pocket floor is a shallow ridge sloping down to both long sides, with one 16 mm slot through each long wall at the low edge. Water leaves sideways, and the slot bottoms sit 10.5 mm above the floor, so no opening rests in the wet. Each slot is pointed at the top rather than flat-roofed, which is what lets it print clean. Shape: 1.2 mm chamfer at the opening to get it started over the wood, 3 mm rounding on the vertical and top edges so it doesn't snag a mop or a bare toe. The bottom edges are left sharp so they sit flat on the bed. Printing it Print in PETG with the sleeve opening facing up and the two feet on the bed — no supports anywhere. The arch sides are 45°, so the only bridge is the flat strip about 6 mm across the roof of the arch. The finished part measures roughly 36 × 20 × 27.2 mm, walls 2.5 mm thick. A plain matte finish in white, grey or black sits well in a bathroom. A zero-clearance pocket is tight in PETG. Check the leg with calipers before printing if the wood looks swollen or tapered — if it won't slide on, the pocket wants a few tenths opening up.
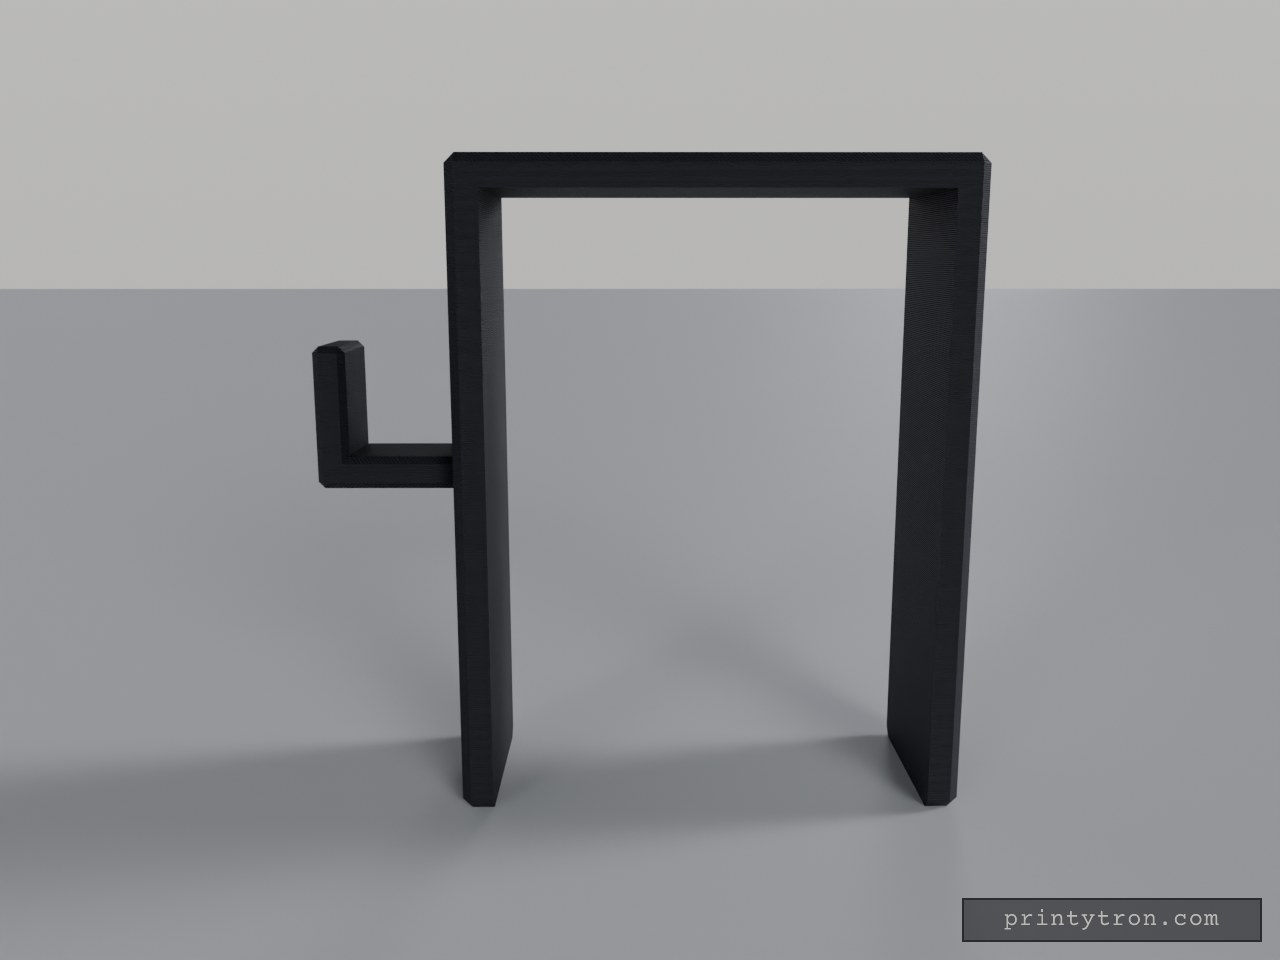
Beam Clamp Clothes Hanger with Side Hook
What it's for A saddle that drops over the top of a support beam and turns it into a place to hang clothes. The inverted U-shaped channel grips the beam from above, and a hook projects from one side with an upturned tip so hangers and garments stay put. Beam Saddle — the U-shaped body that slides down over the beam Hook — the side arm with an upward tip for hangers or coats, set at mid-height of the saddle Both areas print as a single piece; nothing needs assembling. Dimensions Saddle opening: 68 mm inner width, sized for a beam of that width Overall saddle: 78 × 30 mm footprint, 100 mm tall Channel: 95 mm deep, with 5 mm thick walls Hook: 22 × 15 × 22 mm, mounted at mid-height so its tip stays inside the 100 mm envelope The 95 mm channel is generous for a shallow beam — the saddle simply sits lower on it, and the hook rides down with it. Print notes Print the saddle opening facing up so the channel needs no supports A few extra perimeters on the hook help when it carries heavy coats Scale the opening slightly if your beam measures over 68 mm Remix ideas Lengthen the hook for bulky winter coats Shorten the legs for a shallower beam and keep the height with a taller top plate Add a second hook on the opposite side for more hanging room Add a small lip or screw hole at the bottom of the saddle to stop it shifting sideways
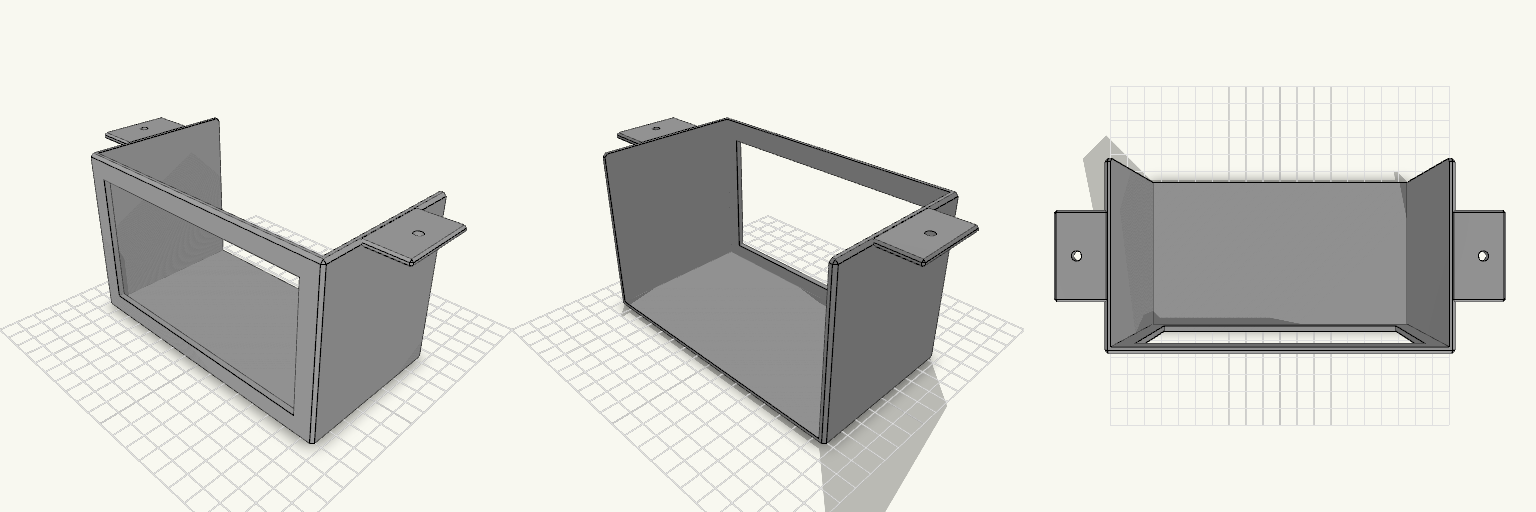
Unterbauhalterung für Echo Show 5 mit offener Rückseite
Die Halterung ist eine Schale für den Echo Show 5, die unter einen Schrank geschraubt wird. Die Rückseite bleibt offen, sodass das Kabel austreten kann; vorn sitzt ein Ausschnitt für das Display. Zwei seitliche Laschen mit je einem 4,5-mm-Loch nehmen die Befestigungsschrauben auf. Die Innenmaße liegen bei 148,6 mm Breite und 90 mm Höhe – bei 148 mm Gerätebreite bleibt so rund 0,3 mm Spiel je Seite. Im Ganzen misst die Halterung 198,6 × 86 × 93 mm, wobei die 86 mm Tiefe den Platzbedarf unter dem Schrank bestimmen. Der Rahmen um das Display ist oben und unten gleich breit: Der obere Rand misst 11 mm (3 mm Boden plus 8 mm Steg), genau wie der untere; der Display-Ausschnitt ist entsprechend oben 5 mm niedriger gehalten. Die Maße sind am Gerät nicht nachgemessen – vor dem Druck die Innenmaße am eigenen Echo Show 5 prüfen. Remix-Hooks Innenbreite: 148,6 mm bei 148 mm Gerätebreite ist bewusst eng gewählt; wer mehr Luft zum Einlegen will, geht auf 150 mm zurück und erhält etwa 1 mm Spiel je Seite. Innenhöhe: 90 mm sind der zweite echte Freiheitsgrad – mehr Höhe schützt das Gerät besser, weniger macht die Schale flacher unter dem Schrank. Tiefe: Die 86 mm Gesamttiefe (rund 80 mm innen) sind die knappste Stelle; eine flachere Schale passt unter niedrige Schrankböden. Displayausschnitt: Der obere Rand ist auf 11 mm gesetzt und entspricht dem unteren; wer mehr Sichtfläche will, kann den oberen Rand schmaler machen, muss dann aber die Rahmenstabilität prüfen. Schraublaschen: Die 4,5-mm-Löcher und ihr Abstand passen sich vorhandenen Schrauben oder einer Bohrschablone an; sie wandern mit der Höhe nach oben mit. Kabelauslass: Die offene Rückseite kann breiter werden oder eine zusätzliche Kabelklemme bekommen. Befestigung: Statt der Laschen ist eine Variante mit Klebefläche oder Klemme denkbar. Als Basis passt die Halterung unter Küchen- oder Regalschränke; Kabelclips und passende Holzschrauben ergänzen sie.