1/4-20 Tripod Spring Phone Clamp, 60–85mm
Created yesterday
Description
This is a spring-loaded phone clamp for a standard 1/4-20 tripod mount. It has a fixed jaw, a sliding jaw and a screw-on end cap. The base has a hex pocket that holds a 7/16 in across-flats 1/4-20 nut, with a 6.8 mm bore above it for the tripod screw.
What it fits
- Phones 60–85 mm wide, measured across the body including any case, in portrait orientation.
- Tripod heads with a 1/4-20 UNC male stud. This is the common camera and phone tripod standard.
- Jaw faces are chamfered on the inner edges so they don't mar the phone.
Check before printing
Measure your nut across the flats. The pocket is sized for a 7/16 in (11.1 mm) hex 1/4-20 nut. A nut with a different flat size will rattle or won't seat.
Hardware you supply
- 1 × 1/4-20 hex nut, 7/16 in across flats.
- 1 × compression spring, about 6 mm OD and 45 mm free length, over the slider's 3 mm guide rod.
- 2 × M3 screws for the end cap. The pilot holes are 2.6 mm.
Does not fit
- Phones narrower than 60 mm or wider than 85 mm.
- Metric tripod studs such as 3/8 in or M6. The bore is sized only for 1/4-20.
- Landscape use on very heavy phones. Spring force is untested, and it is lowest near the 85 mm end. A heavy phone in a thick case may be loose there.
Parts
- Base and fixed jaw
- Sliding jaw
- End cap
Photos
Technical views
More like this
Explore more in Desk & Tech →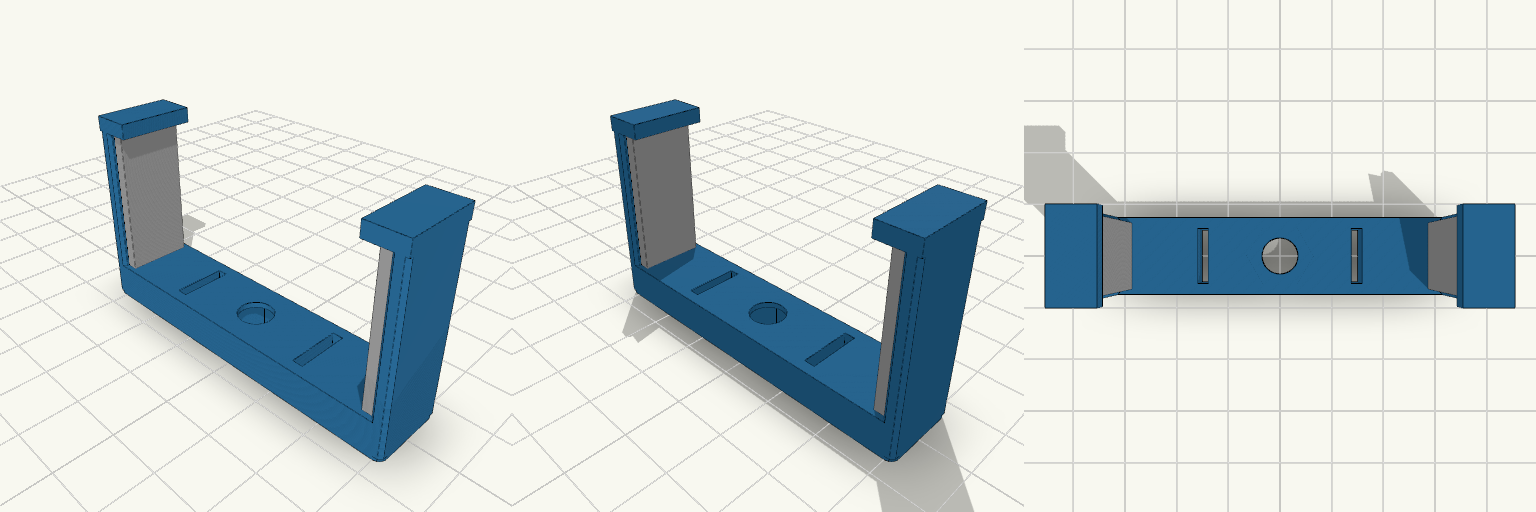
Phone Clamp 60-85mm with 1/4-20 Socket
U-shaped spring clamp that holds a phone across its back and bolts to the centre screw of a ring light. The two jaws grip the phone's long edges. The rest opening is 58 mm and the jaws flex to about 85 mm. Separate soft pads sit on the inner faces to protect the phone's edges. The base has a 1/4-20 through hole with a hex nut pocket on the underside. Two slots cut into the base give the jaws room to spring. Each jaw ends in a retaining lip that stops the phone from lifting out. Specs Opening: 60-85 mm, 58 mm at rest Mount: 1/4-20 through hole (6.6 mm) with a 12.2 mm hex nut pocket Jaw thickness: 2.6 mm Jaw width: 22 mm Overall size: about 63 x 14 x 36 mm Clamp body material: PETG suggested, for spring flex Pad material: TPU suggested, printed as separate pieces Spring travel: not tested, so check the flex before loading a phone Use cases: ring light phone mount, filming, content creation setups
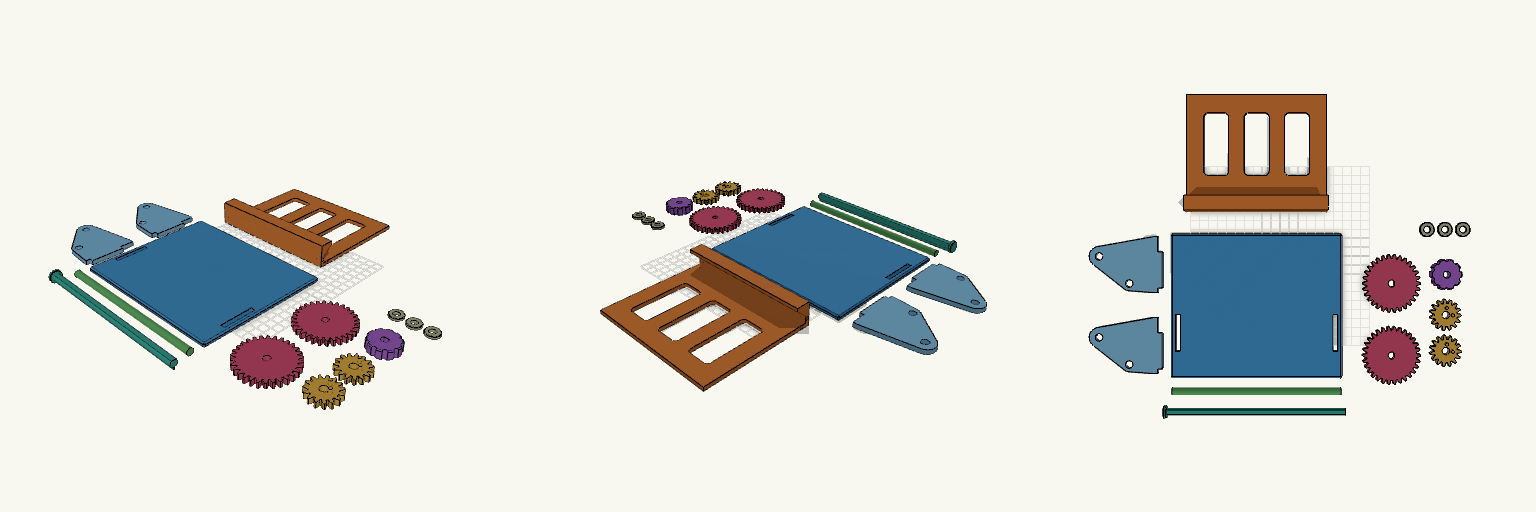
Slot-Together Geared Tablet Stand, Doogee U11
Geared tilting tablet stand for the Doogee U11, laid out as 14 separate flat pieces for printing and assembled by hand after printing. A knob on a drive shaft turns two 30-tooth gears that mesh with 15-tooth gears on the cradle, so a small knob twist tilts the cradle forward or back. Pieces Base plate: 1 Side plates: 2, with tabs that drop into slots in the base Tablet cradle: 1 15-tooth cradle gears: 2, peg into the cradle ends 30-tooth drive gears: 2, keyed to the drive shaft Knob: 1 Axle: 1, 8 mm round Drive shaft: 1, D-profile Friction-fit caps: 3 Print notes Every piece is laid flat on the build plate with no overlap. Gear pegs face up and the shaft flat faces down, so no supports are needed for the main bodies. Clearances are about 0.2-0.4 mm; adjust for your printer. Gear mesh and fit are untested; friction alone holds the tilt angle.
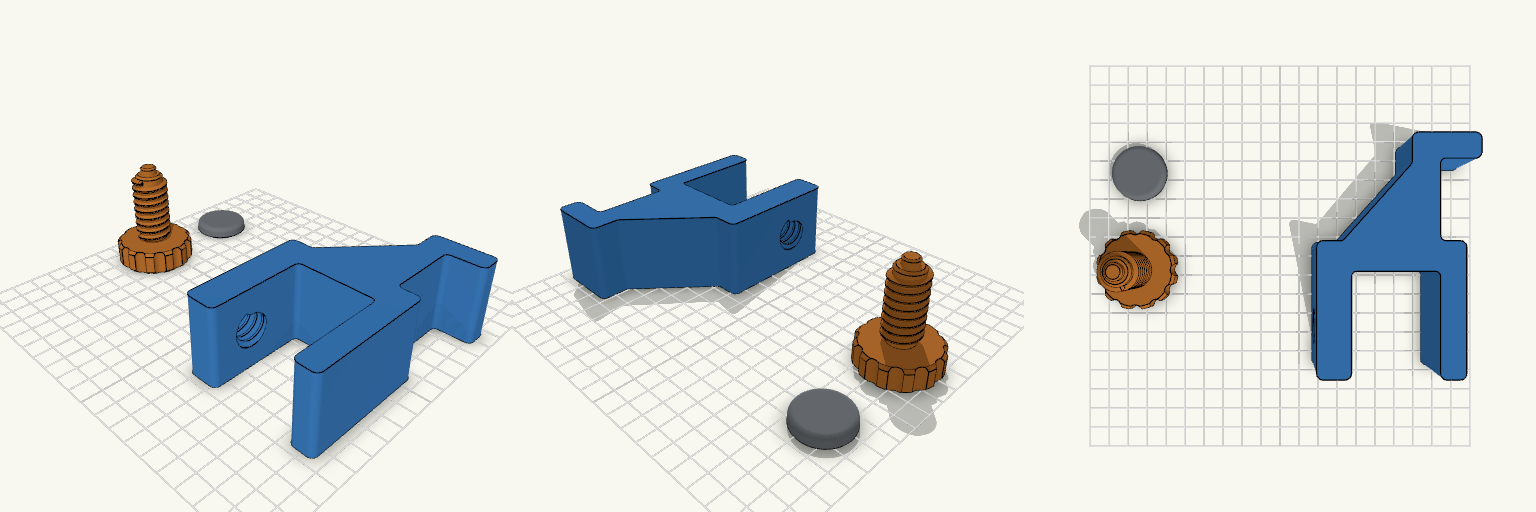
Perch — Clamp-On Headphone Holder
Perch is a three-piece desk-edge headphone holder: a main body with hook and clamp jaws, a separate threaded adjustment screw with a large scalloped knob, and a loose pressure pad. Nothing is joined or printed in place, so the parts are laid out separately and assembled by hand after printing. Features Clamp range of 15–35 mm, suited to a 20 mm desk Internal thread in the lower jaw with 0.4 mm radial clearance for the 18 mm, 4 mm-pitch screw 40 mm knob with scalloped grip Pad snaps onto an 8 mm peg at the screw tip and spins freely Reinforced hook with gusset and rounded lip Print notes Body on its side, screw knob-down, pad flat PLA, 0.4 mm nozzle, 0.20 mm layers, 4 walls No supports expected Assembly Thread the screw up through the lower jaw from below, then press the pad onto the peg. Set the source's mode value to 1, 2 or 3 to export each part individually.
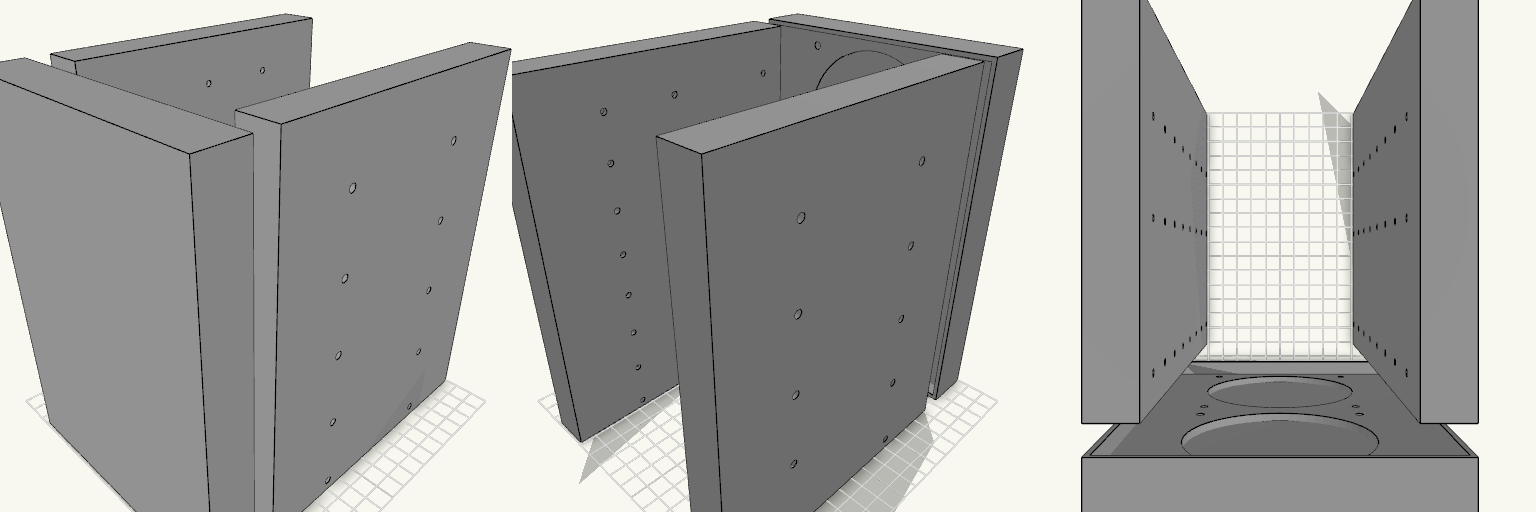
Octobay — 5.25" to 3.5" Drive Cage
Octobay turns a five-bay stack of half-height 5.25" slots into room for eight 3.5" drives, and adds a 25 mm front cage that carries two 92 mm fans. The outer side faces take M3 heat-set inserts, so the whole cage screws into the case's 5.25" rails instead of resting on them. Everything is one printed part: the drive stack, the side mounting blocks and the fan cage print as a single body. Because the fans close off the front, drives now load from the back. The fan cavity behind the grille is hollow, so air still passes through to the drive stack. Dimensions Overall: 145 mm wide × 197.5 mm deep × 205.5 mm tall Fits: five half-height 5.25" bays Holds: eight 3.5" drives, stacked vertically Drive channel: 102.6 mm wide — 1 mm of play around a 101.6 mm drive Mounting 20 insert holes, 10 per side, for M3 heat-set inserts — 4.2 mm across and 6 mm deep Two insert holes per bay, at 41.3 and 117.5 mm from the front, 6.35 mm above each bay floor Solid blocks sit behind each hole to give the inserts something to bite into Three M3 screw holes per side per drive, at 14, 76.6 and 117.6 mm from the front Cross ribs sit clear of the screw holes so a screwdriver can reach every fastener Fan cage Two 92 mm fans, stacked vertically on the 25 mm front section 88 mm fan openings with 4.4 mm screw holes on the standard 82.5 mm square pattern Hollow cavity behind the fans feeds air to the drive channels Print notes Drive channels are open at the back, top and bottom, and the gaps between the inner and outer side walls are open for cable routing. Screw and insert positions and the 205.5 mm height follow common 5.25" bay standards; they have not been checked against a specific case, so measure your bay rails and drives before printing.
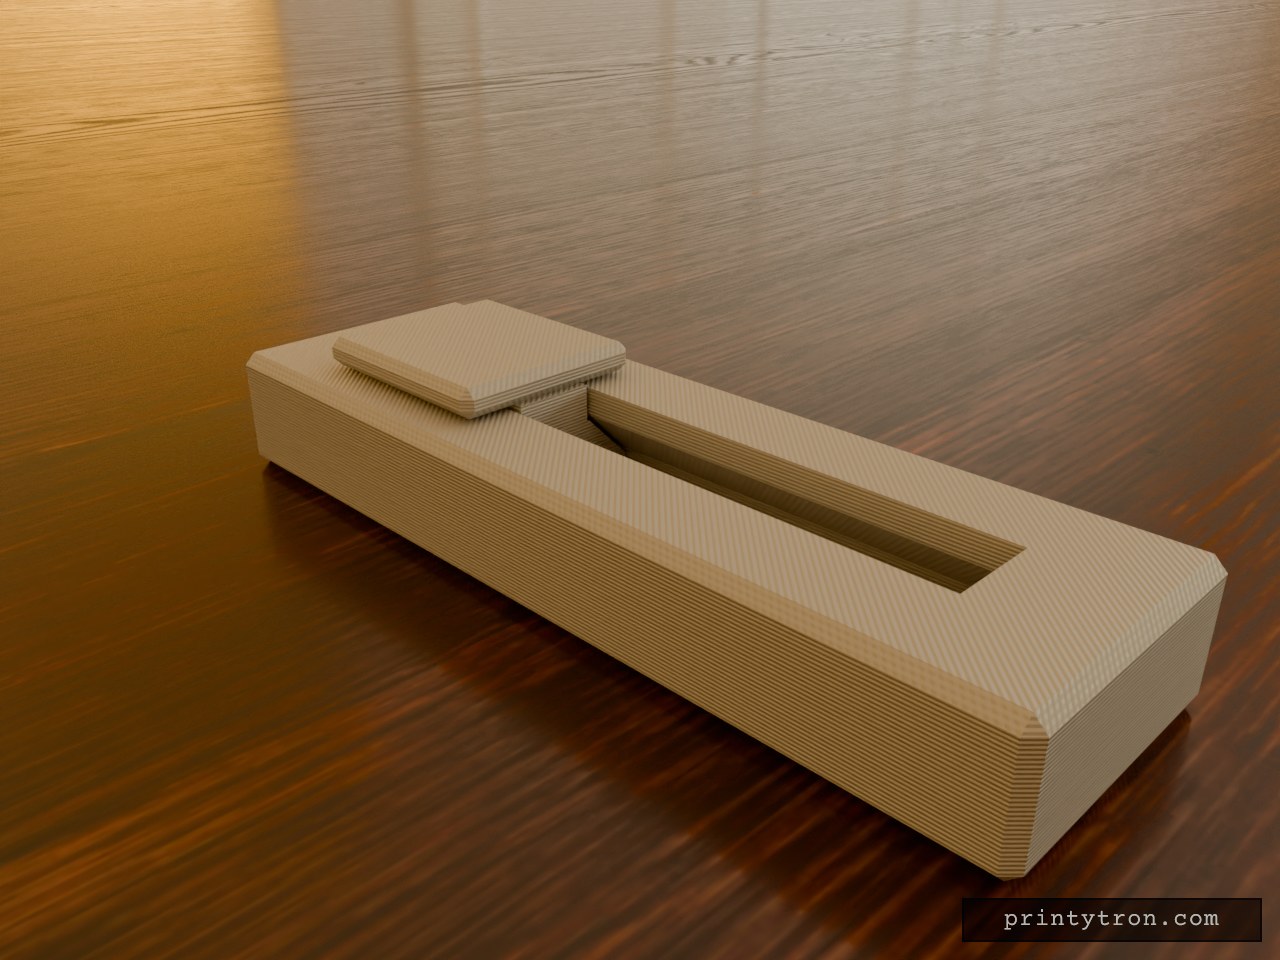
Fidget Slider Toy, Captive Print-in-Place
A fidget slider that prints already assembled, so there is no loose weight to lose and nothing to glue. The slider is captured in an enclosed dovetail track and cannot fall out. It runs 40 mm end to end and clicks at each stop instead of rolling freely. What it does Slides back and forth along a closed track in an 80 x 25 mm body. A small bump on the track floor at each end of travel drops into a dimple under the slider and gives the click. The dovetail profile holds the slider down, so it cannot lift out of the rails. Numbers that matter Body: 80 x 25 x 11 mm, with the slider top reaching 14 mm. Slider: 20 mm long, 18 mm wide cap. Travel: 40 mm. Clearance between slider and track: 0.4 mm per side. This is what lets it move after printing. Click bump: about 0.6 mm of interference against the 0.4 mm gap. Reduce the bump height if it feels too stiff. Printing Print flat, body base down, with no supports needed inside the track. Use a well-tuned printer. A 0.4 mm gap fuses easily if the flow is too high. After printing, work the slider back and forth a few times to break any thin bridging between the slider and the rails. Two colours show as separate parts in the preview, but the print is one job.
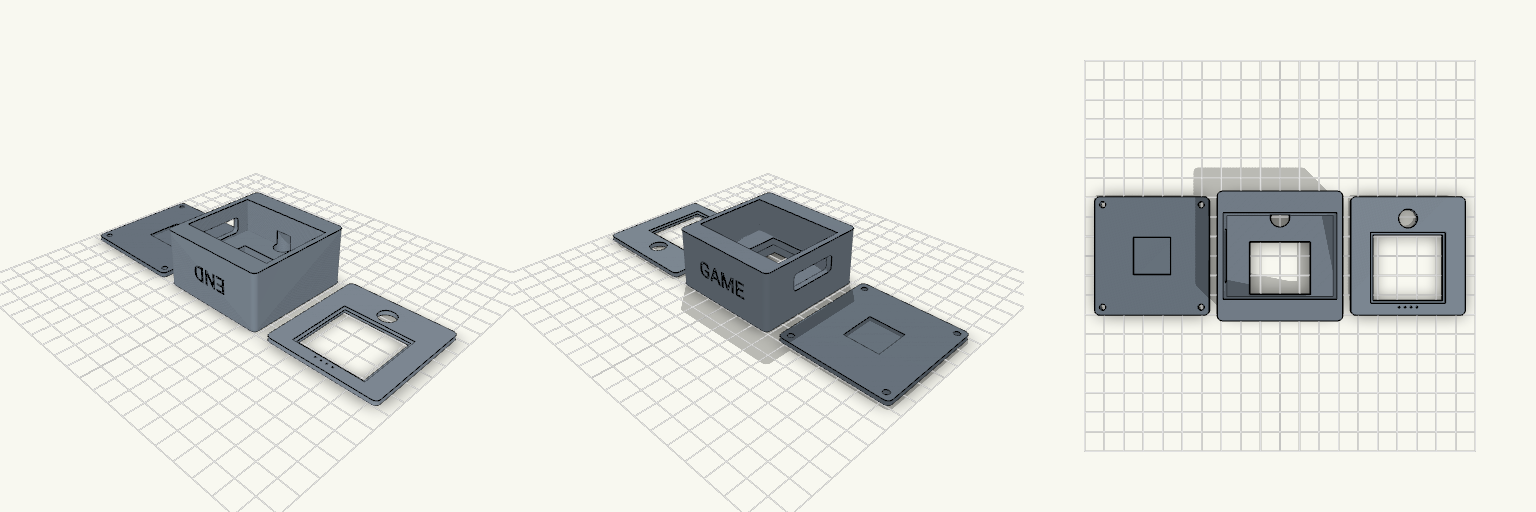
Lockdown — Dev Board Case With Camera Eye
Lockdown is a three-part enclosure for a Freenove ESP32-S3 WROOM CAM board with a 35.5 × 33.5 mm display. The front bezel turns the screen into a face, with a 9.6 mm camera eye above the window. The side wall carries one wide cable opening, so USB-C plugs and cables pass straight through the housing. Features 58 × 60 mm footprint across chassis, back cover and bezel Screen pocket with a support ledge and a flex-cable opening 9.6 mm camera bore lined up with the bezel eye Single 26 × 9 mm cable pass-through on the +X wall, raised for a high-mounted board Four M3 screws from the back Embossed-in END and GAME text on the end walls Print notes Print the three parts flat on their backs. PETG works well.