64mm Hose Holder Clamp
Created 1 months ago
Description
What it's for
A heavy-duty saddle clamp designed to securely mount a 64 mm outer-diameter hose. The clamping mechanism uses an M6 bolt and a captive nut on the right ear to tighten the split ring.
Dimensions
- Bore: 64 mm unobstructed passage.
- Base: 74 mm wide by 70 mm long, 6 mm thick.
- Mounting holes: Four 6.5 mm clearance holes at the corners.
- Clamp width: 25 mm thick on the Z-axis.
Print notes
Print this flat on its base. The hex recess is sized for a standard M6 nut and should bridge without supports on well-tuned printers, but a tiny dab of support inside the hex pocket won't hurt.
Images
More like this
Explore more in Home & Fixtures →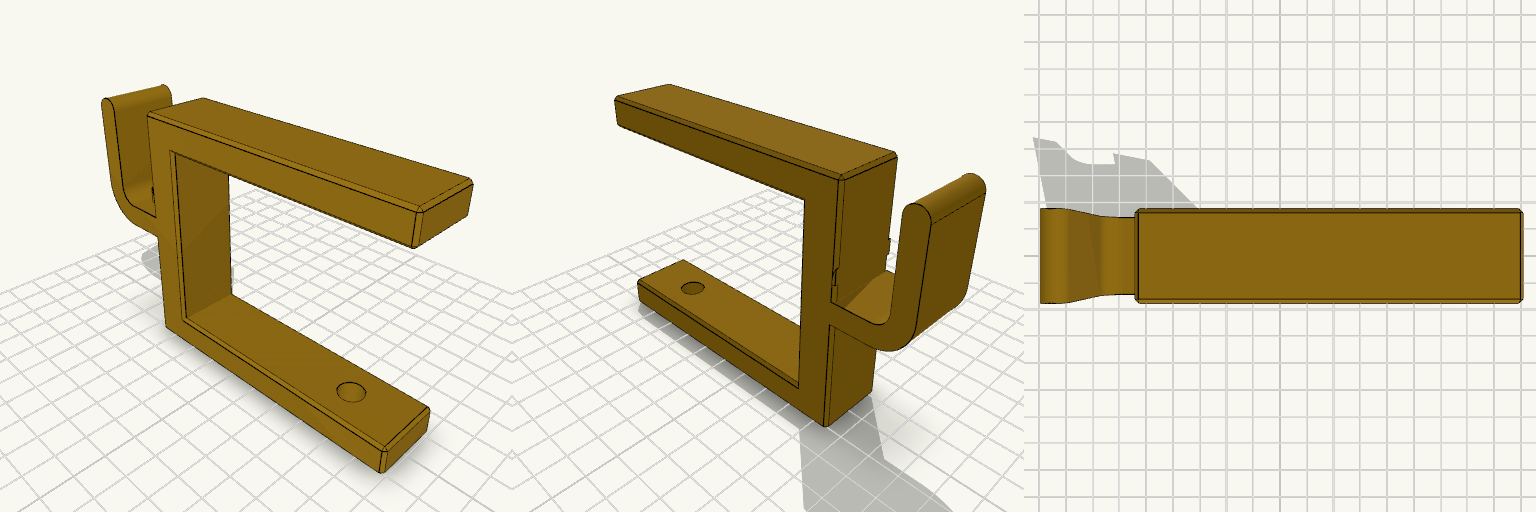
Mantel Clamp with Single Stocking Hook high no thread lenght lower
A clamp-on mantel bracket for hanging a stocking, garland or wreath without drilling. The gold C-shaped frame slips over the mantel edge, and a single rounded J-hook on the back carries the decoration. A standard M8 bolt passes through the lower arm and tightens up against the underside of the shelf to lock the clamp (hardware you supply — bolt and nut). The lower arm reaches back far enough to clear a decorative moulded edge, and the frame measures about 119 × 23 × 80 mm on the print plate. The hook is a compact rounded J — 23 mm wide, projecting about 24 mm, with a 5.5 mm inner cradle — raised so its round tip finishes level with the top of the frame at 80 mm; the cradle floor sits about 38 mm up the spine. The frame prints as one piece; the bolt and nut are separate hardware. Starting dimensions Clamp frame: 119 × 23 × 80 mm on the plate, one piece, no supports needed on the arms Opening between the arms: 60 mm (about 2.4 in) — suits a 2 in gap or a 1.5 in mantel with room to spare Arm reach back from the spine: 95 mm (about 3.75 in), sized to clear a decorative edge Hardware hole: plain 8.5 mm clearance for an M8 bolt, 75 mm back, through the 10 mm lower arm — a nut underneath does the clamping Hook: rounded J, 5.5 mm inner cradle, 23 mm wide, projecting about 24 mm, cradle floor about 38 mm up the spine, 26 mm lip with its tip level with the frame top Remix hooks The hardware hole is the first thing to tune: 8.5 mm suits a plain M8 bolt with a nut under the arm; drop it to about 7 mm and tap it if you want the bolt to bite the plastic, add a hex pocket to trap the nut, or resize for M6 if your mantel is light. The 60 mm opening and the 95 mm arm reach are a pair worth changing together — a shallow mantel with a chunky decorative edge wants more reach and less opening, a thin shelf the reverse. Hook geometry is the free variable: stretch the 24 mm projection for deep garland, widen the 5.5 mm throat for thick loops, tighten it for wire wreath frames, or slide the cradle down the spine if a stocking sits too high for your mantel. Frame depth (23 mm) sets how far the clamp stands off the mantel face — trim it for a slim profile, add to it for heavier loads. Duplicate the frame along the shelf for a full swag of garland, or scale it down for a miniature display mantel. Pairs well with a wreath hanger or a matching hook set in the same finish; print the frame in PETG or ASA if it will hang outdoors over the season, and in gold filament to match the finish shown.
Garden-Plumbing Workhorse: BSP to 3/4 Hose Barb
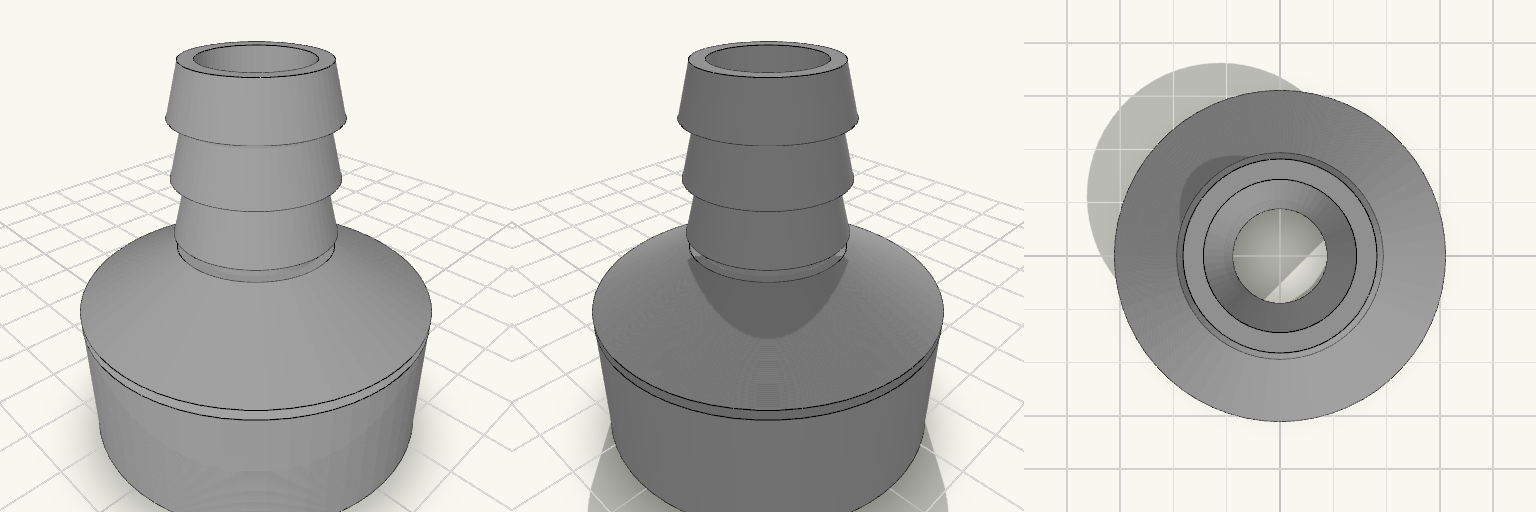
A straight-line adapter that bridges a 1-1/4" BSP female threaded socket to a 3/4" hose barb, with a tapered shoulder carrying the eye from the wide threaded end down to the narrow ridged nozzle. It reads like a piece of honest utility hardware: a ring of 11 TPI thread at one end, three crisp ridges at the other, and a 15 mm bore running clean through a compact 55 mm body — short enough to tuck into tight pump and tap arrangements without a loop of hose fighting for room. The barb's ridges ramp up gently from the tip and widen toward the body, then drop off in a sharp step — the hose slides on without a fight, and the step keeps it from backing off again. Design notes: 1-1/4" BSP female socket, 11 TPI, 41.91 mm major diameter, 18 mm deep Tapered transition from the socket down to the barb 19 mm barb with three retention ridges, 7 mm tall and spaced 8 mm apart, narrow at the tip and widening to a step at the body side, for 3/4" hose 15 mm bore through the full length; 55 mm overall Prints as a single piece, sitting upright at roughly 50 × 50 mm on the plate Fit and sealing: The thread is modelled at nominal size with no added clearance, so a first test fit against the male fitting is worth doing — if it binds, opening it out by 0.2–0.4 mm is the easy fix. For a watertight joint, wrap the thread with PTFE tape or seat a flat washer against the socket floor. The shortened barb leaves less hose length to grip; a hose clip just behind the final ridge makes up for it. Pairs naturally with garden hose, pump outlets and tank fittings.
T-Post Cap With 3-Inch Round Platform
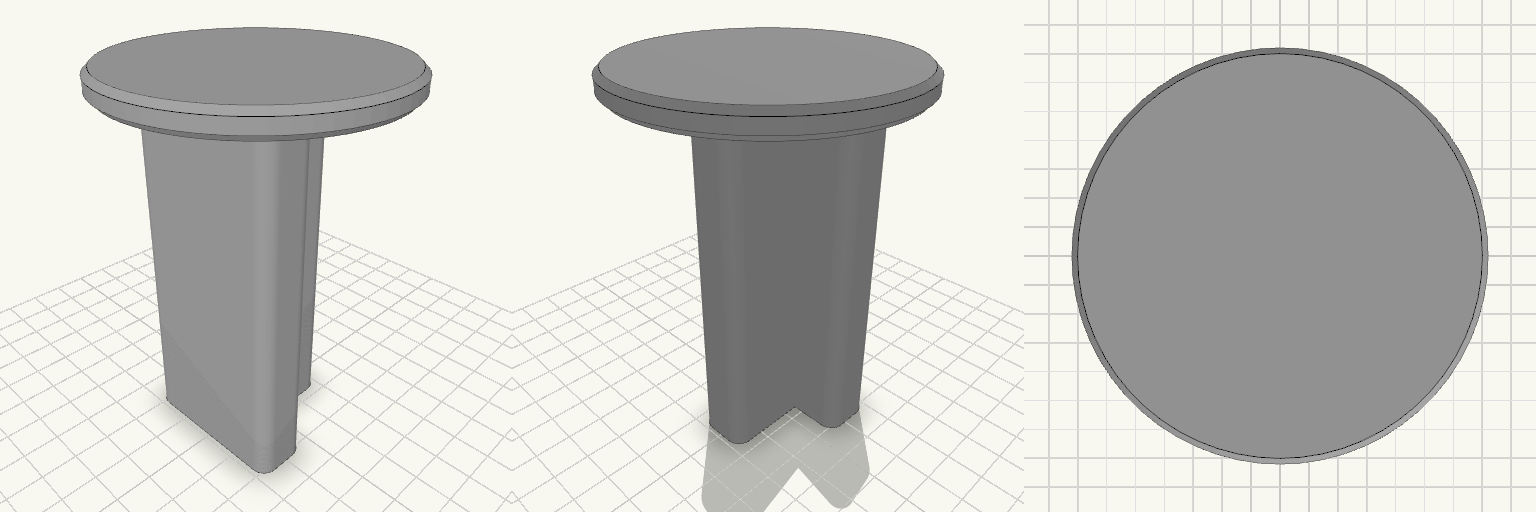
A slip-on cap for a steel T-post: 4 in tall, with a T-shaped socket that drops over the post and a 3 in round platform, 1/4 in thick, on top. Fits Steel T-posts, matched to the T-socket below. The socket is a T: a 36 mm crossbar, 7 mm wide at the stem entry, with a 7 × 30 mm stem running down, and a 4 mm wall following that T all the way around. Takes the place of a plain post cap and adds a flat, 3 in round surface on top of the post. Check before printing The socket is the whole fit, and its numbers are a starting size, not a standard — T-posts differ in flange width and web thickness between manufacturers and post weights. Measure the post you intend to use across the crossbar, across the stem, and across the full depth, then set the socket to those sizes plus a little clearance for paint and burrs before you commit filament. Nothing else on the part affects fitment. Does not fit Round posts, wooden 4x4 posts, or any post without a T cross-section. T-posts whose crossbar or stem is wider than the socket above — T-post profiles are not interchangeable, so do not assume a fit from the post name or the post weight alone. The cap prints as a single piece, 76 × 76 × 102 mm overall.
Barbed End Plug for 1-Inch PEX
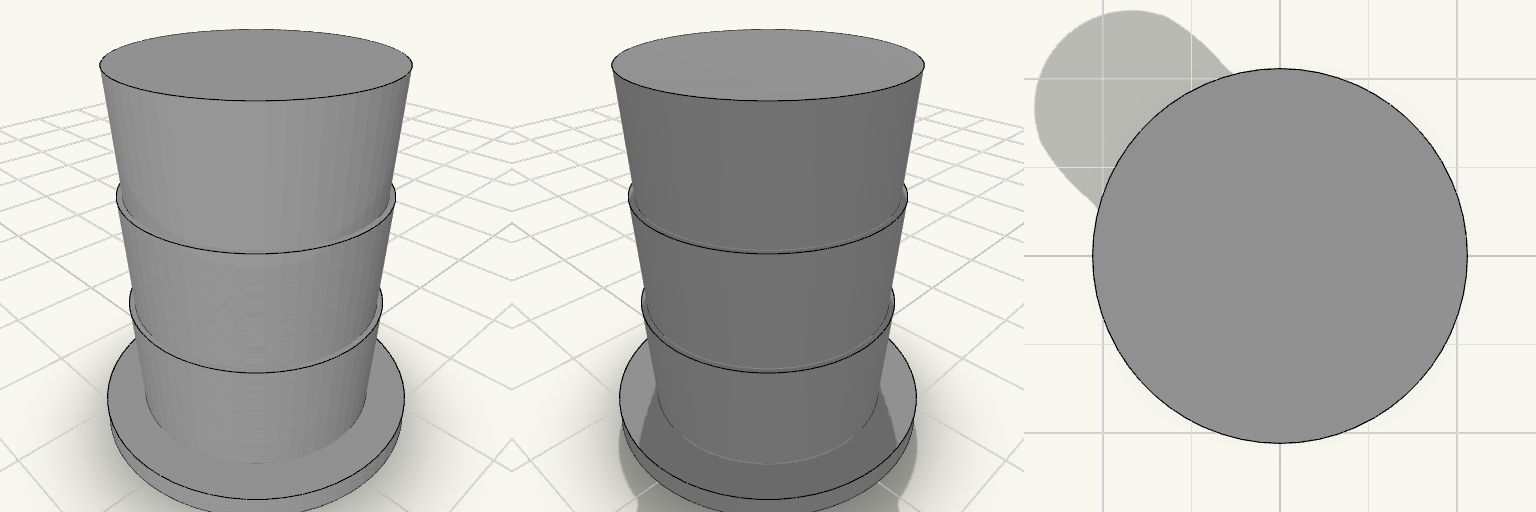
A barbed end plug that dead-ends a 1-inch PEX line. Three tapered barbs rise from a solid 28 mm collar cap, stacked directly on one another so each ring sits flush against the next with no gaps, and they taper from 21 mm to a 22 mm maximum diameter to suit pipe with roughly a 22 mm inner diameter. The collar is a 28 mm cylinder, 3 mm thick, with a 1 mm chamfer on the bottom outer edge, and it is the cap as well as the pipe stop — only about 3 mm of it shows past the barbs, so the stop is shallow. There is no bore: the plug is solid through, about 33 mm tall, sits flat on the plate, and prints as one piece as a 28 × 28 × 33 mm body. Because it seals rather than joins, check the barb fit against your actual pipe before committing to a full run. Remix hooks Barb profile: three tapered barbs stacked flush as one sawtooth suit roughly 22 mm inner diameter pipe. Change the count or soften the taper for harder or softer tubing, but keep the spacing equal to the barb height so the gaps between rings do not come back. Collar: 28 mm across and 3 mm thick, it is only just wider than the barbs. Widen or thicken it for a firmer insertion stop; the bottom outer edge carries a 1 mm chamfer, which can be enlarged or removed to change entry feel. Height: 33 mm overall is a compact cap; stretch the straight run above the barbs if you need more insertion room or a deeper seat. Barb diameter: 21–22 mm is the number to change first for other pipe sizes. The collar and barb spacing can stay put while only the taper moves. Ends: the solid cap is the safe baseline. Extending the same barbed profile out the other side turns it back into a straight coupling, and an elbow or tee is a body swap rather than a barb redesign. Fit check: barb dimensions are nominal, so test against your actual pipe before printing a full run. Pairs with: 1-inch PEX runs that need a temporary or permanent dead end, pressure testing, and capping a line before fixtures go on.
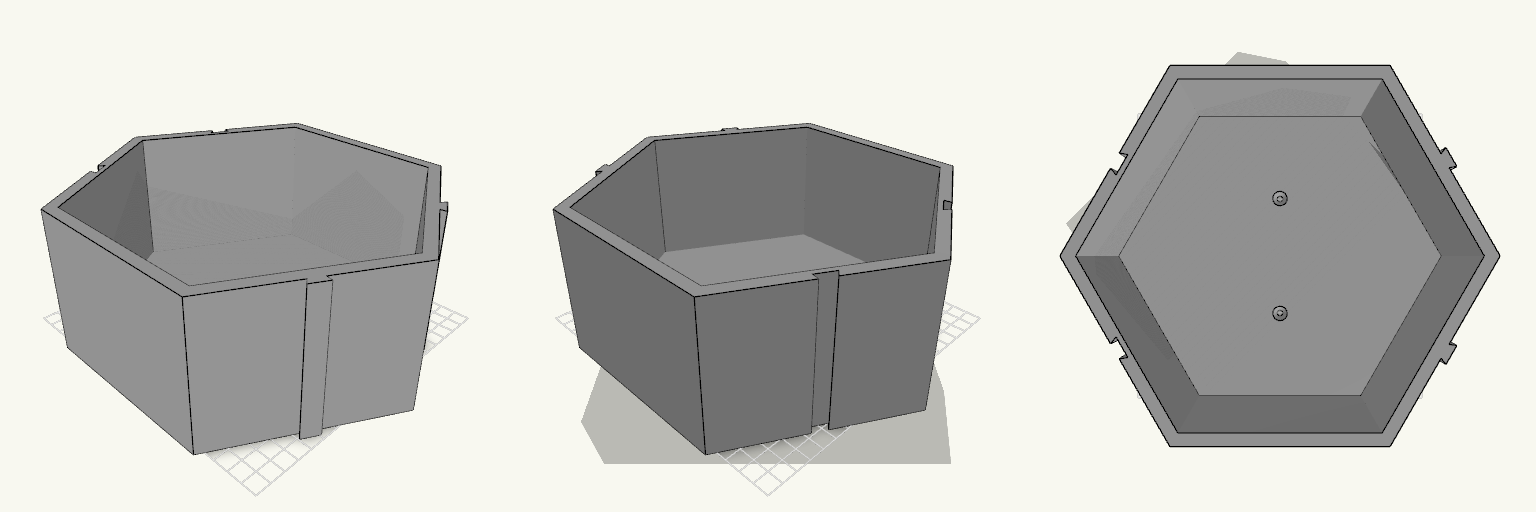
Flat-Printing Interlocking Hexagonal Wall Shelf
A hexagonal wall shelf that locks to matching units through dovetail keys and slots, so several can form a honeycomb. The back plate has two countersunk screw holes for wall mounting, and the front is open and flush. 170 mm flat-to-flat height, 95 mm deep 8 mm walls, 5 mm back plate Dovetail keys and slots with 0.5 mm clearance per side Printed lying on the back plate, fits a Creality K2 bed PETG recommended, with supports for the dovetails Test one pair of faces first to confirm the fit.
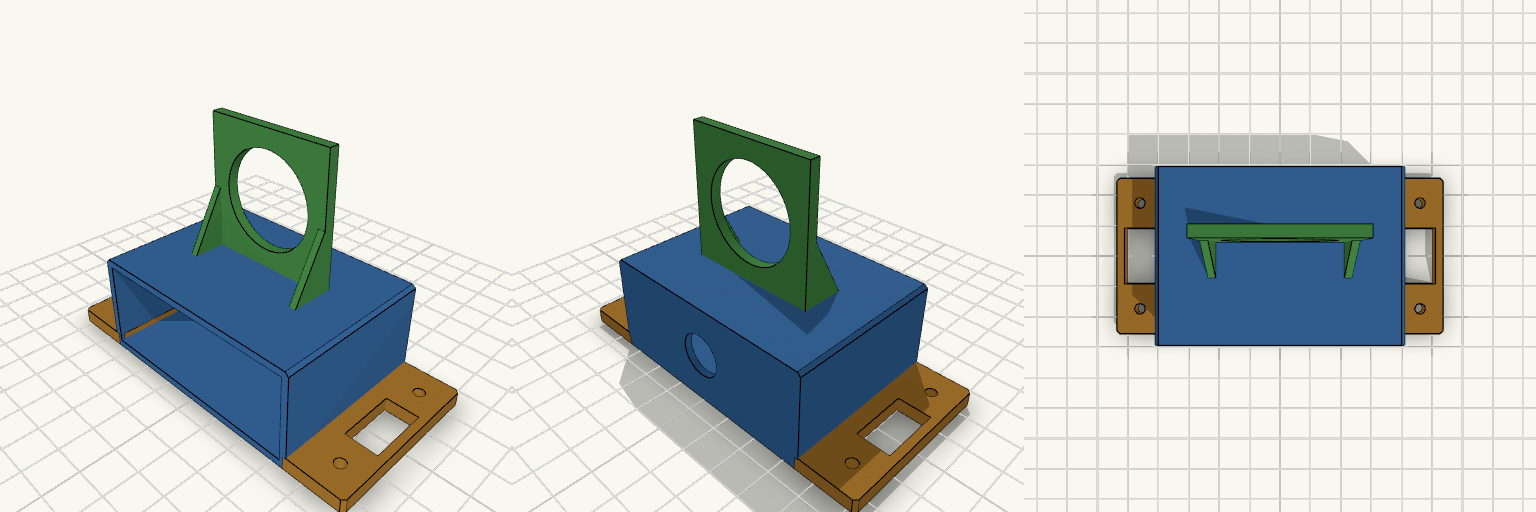
Scatola con porta voltmetro per montaggio laterale
Scatola rettangolare a fondo aperto da avvitare su un mobile, con un pannello verticale sul tetto per il voltmetro. Pensata per stamparsi senza supporti e con poco filamento. Corpo: 70×30×50 mm, pareti da 2 mm Foro da 13 mm sul tetto per i cavi, foro da 29 mm nel pannello voltmetro 40×40 mm Rinforzi triangolari ai lati del pannello, senza sporgenze da sostenere Due alette di fissaggio con fori da 3,4 mm (viti M3), alleggerite da una finestra centrale Stampa: alette appoggiate sul piano, nessun supporto necessario nei rinforzi