Minimal Plywood Headrest Clamp
Made by a Guest
Created 3 months ago
Description
A minimal, unibody headrest designed to clamp firmly onto plywood edges up to 25mm thick. The design relies on a sturdy built-in jaw and a heavy-duty M12 threaded knob to secure it without marking the board.
- Ergonomic curve: A wide, swooping recess gently cradles the head.
- Support-free geometry: The neck stalk flares out at a clean 35-degree angle, ensuring smooth printing without waste.
- Flared entry: The clamp throat features angled edges to easily slide over the plywood.
- Printed hardware: Includes a custom M12 thumbscrew for a tight, reliable grip.
Images
More like this
Explore more in Home & Fixtures →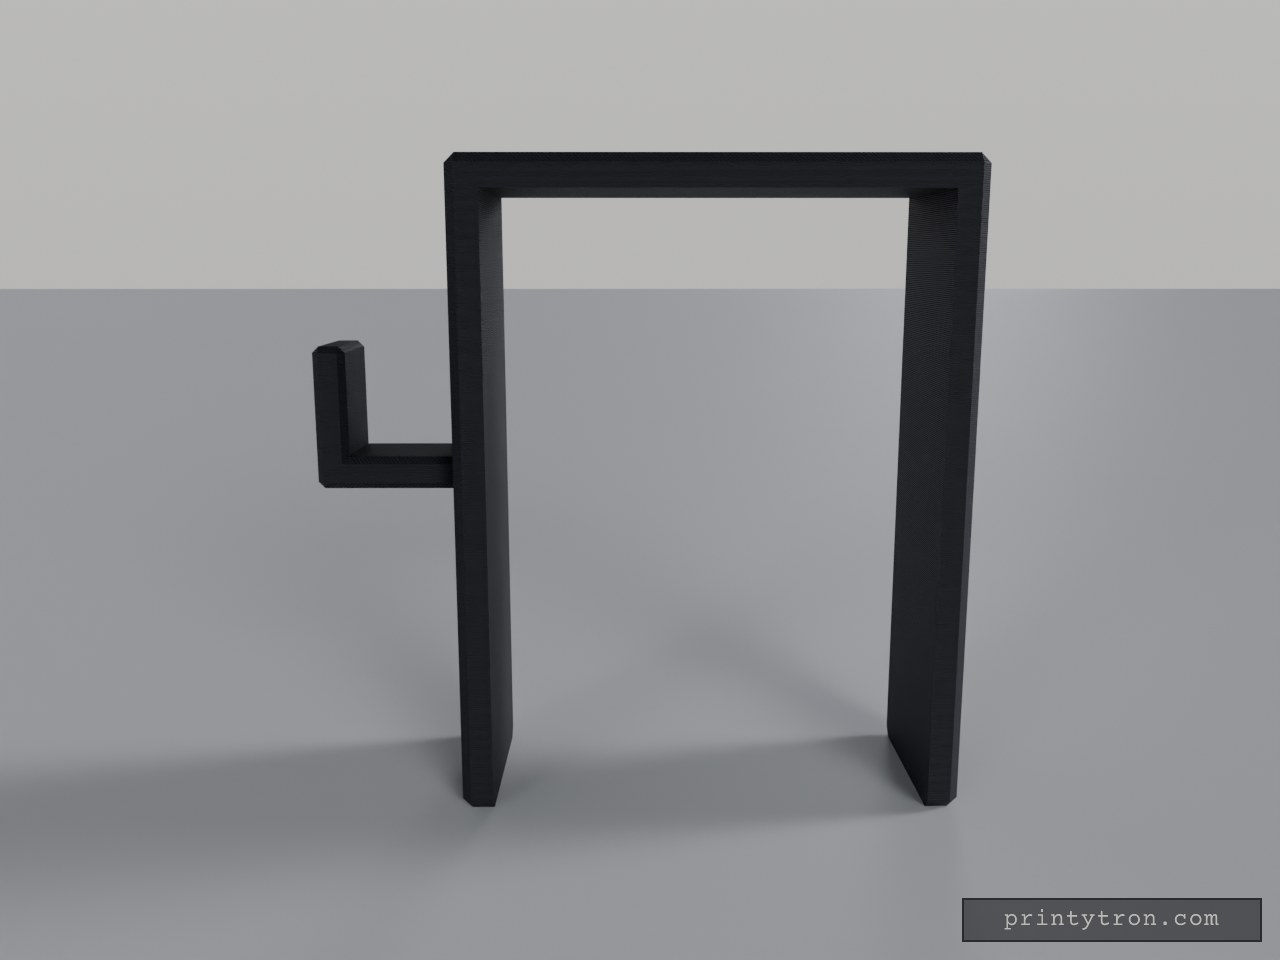
Beam Clamp Clothes Hanger with Side Hook
What it's for A saddle that drops over the top of a support beam and turns it into a place to hang clothes. The inverted U-shaped channel grips the beam from above, and a hook projects from one side with an upturned tip so hangers and garments stay put. Beam Saddle — the U-shaped body that slides down over the beam Hook — the side arm with an upward tip for hangers or coats, set at mid-height of the saddle Both areas print as a single piece; nothing needs assembling. Dimensions Saddle opening: 68 mm inner width, sized for a beam of that width Overall saddle: 78 × 30 mm footprint, 100 mm tall Channel: 95 mm deep, with 5 mm thick walls Hook: 22 × 15 × 22 mm, mounted at mid-height so its tip stays inside the 100 mm envelope The 95 mm channel is generous for a shallow beam — the saddle simply sits lower on it, and the hook rides down with it. Print notes Print the saddle opening facing up so the channel needs no supports A few extra perimeters on the hook help when it carries heavy coats Scale the opening slightly if your beam measures over 68 mm Remix ideas Lengthen the hook for bulky winter coats Shorten the legs for a shallower beam and keep the height with a taller top plate Add a second hook on the opposite side for more hanging room Add a small lip or screw hole at the bottom of the saddle to stop it shifting sideways
8.35 mm Fiberglass-Rod Joiner with Camera Arm
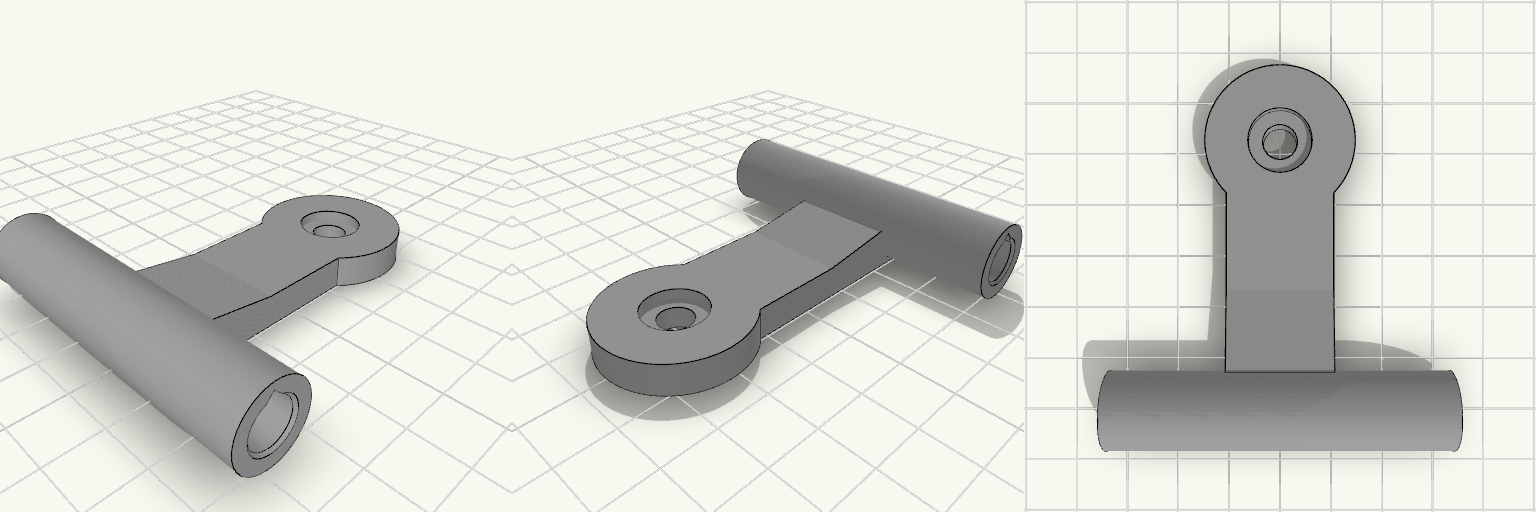
Replacement two-way joiner for the top-front-center of a fiberglass-rod printer enclosure. It splices two nominal 8.2 mm rods end-to-end and carries a flat-lying arm with a screw boss for a Sercomm RC8110 camera. Print it as one piece with the arm flat on the bed, then rotate the part about the rod axis during installation to aim the camera downward and toward the bed center. Specifications Rod sockets: 8.35 mm ID, 30 mm deep per side, 0.5 mm entry chamfers, separated by a 3 mm solid center stop; 63 mm overall sleeve length. Sleeve: approximately 14.35 mm OD with 3.0 mm wall thickness. Arm: 20 mm wide and 6 mm thick, extending 50 mm from the sleeve, with a root block and gusset blending it into the sleeve. Camera boss: 28 mm diameter and 6 mm thick, with a 6.6 mm through-hole and a 12 mm × 2 mm counterbore for a 1/4"-20 camera screw. Print footprint: 63 × 71.2 × 14.4 mm as oriented on the plate; the teardrop socket bores and flat arm are intended to print without support. Fit: press-fit for measured 8.19–8.20 mm rods; PETG wall thickness is sized to resist splitting and bending from the tensioned enclosure fabric.
LED Strip Corner Routing Bracket
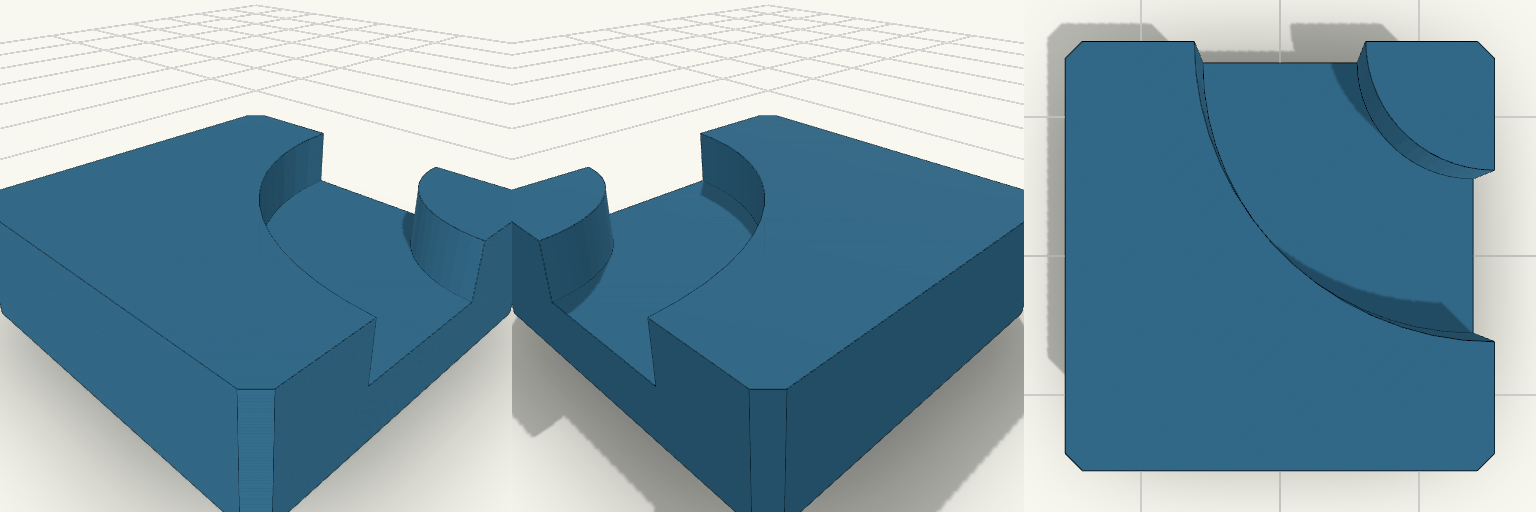
A 25 mm square corner block, 8 mm tall, with a quarter-circle channel on top that seats a 10 mm LED strip and turns it 90 degrees. Made for under-shelf lighting where the strip needs to follow an inside corner without kinking. The underside is flat, so it takes adhesive tape or double-sided foam. The channel is 10 mm wide and 4 mm deep, with a 12.5 mm centerline radius. It enters and exits through the two sides that meet at the far corner. Vertical corners carry a 1 mm chamfer. Remix hooks Block size (25 mm): the main lever. A 35 mm block with a 17.5 mm centerline radius gives a gentler bend for stiffer strips. Centerline radius (12.5 mm): keep it at half the block size so the channel meets the edges, or shrink it for a tighter turn. Channel width (10 mm): add 0.3 to 0.5 mm of clearance for strips with thick silicone sleeves, or narrow it for bare strips. Channel depth (4 mm): deepen it to sink the strip below the surface, or make it shallower and add a diffuser lip. Height (8 mm): can be lowered to about 6 mm and still keep the 4 mm channel with a solid floor. Pairs with Straight strip sections between corners, with one bracket per inside corner. A snap-in diffuser cover cut to the same 10 mm channel width. A mirrored variant for the opposite corner direction. Print notes Print flat on the back, with no supports needed. Use PETG or ABS if the bracket sits near warm drivers.
Gale-Proof Balcony Trash Bag Clamp
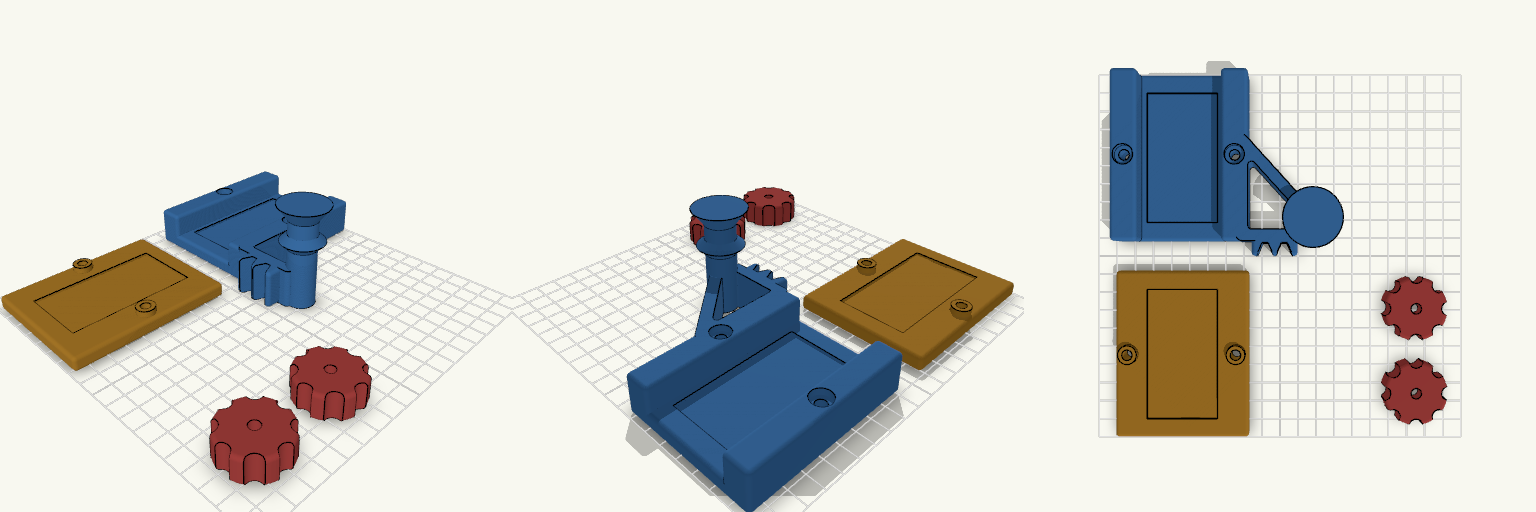
Wind is the whole problem with a balcony bin bag, and this clamp answers it at both ends: it grips a vertical rectangular railing post without drilling, and it gives a corded bag a rail plus a jam lock so the drawstring can't creep, lift, or sail away. The clamp installs sideways around the post — no access to the top rail needed — and comes off just as cleanly when the season turns. The bag's cord loops over a flanged rod at the end of the arm; a raised ridge and end flare keep it from sliding off the side, and two tapered slots on top of the arm let you wedge the cord down tight so wind can't lift it. Release the cord from its slot and the bag lifts free in one motion. Design notes Solid clamp block: a one-piece body with the post pocket and arm, closed by a back plate that sits flush against it. Bolt holes line up at X ±29 on both parts. Lightweight open-web arm: a lightening opening through the arm saves filament and lets rainwater drain instead of pooling. Cord rail and lock: a single 16 mm rod along the end of the arm with a raised ridge and end flare, plus a 24 mm block on top with two tapered jam slots — about 10 mm at the opening and pinching to 3.2 mm — that wedge a typical 3–4 mm drawstring tight. Grip pads: 2 mm recesses in the block and the plate take rubber or EPDM pads so the metal post isn't marked. Captive hardware: M5 bolt holes and hex nut pockets are built in, with four large scalloped knobs for tool-free tightening. Print orientation: every piece lies flat on the bed — the body about 21 mm deep — so the load runs across the arm instead of splitting along its layers. Two walls and 10–15% gyroid infill keep the filament count down. The set prints as separate pieces — main body and arm, back plate, and the knobs — and assembles with M5 bolts and nuts. ASA is the material to reach for on an outdoor balcony. Test-fit the post pocket (44 × 13.6 mm plus pad recess) against the railing before printing the full set, and treat any load figure as unverified until it's been tried with a real bag.
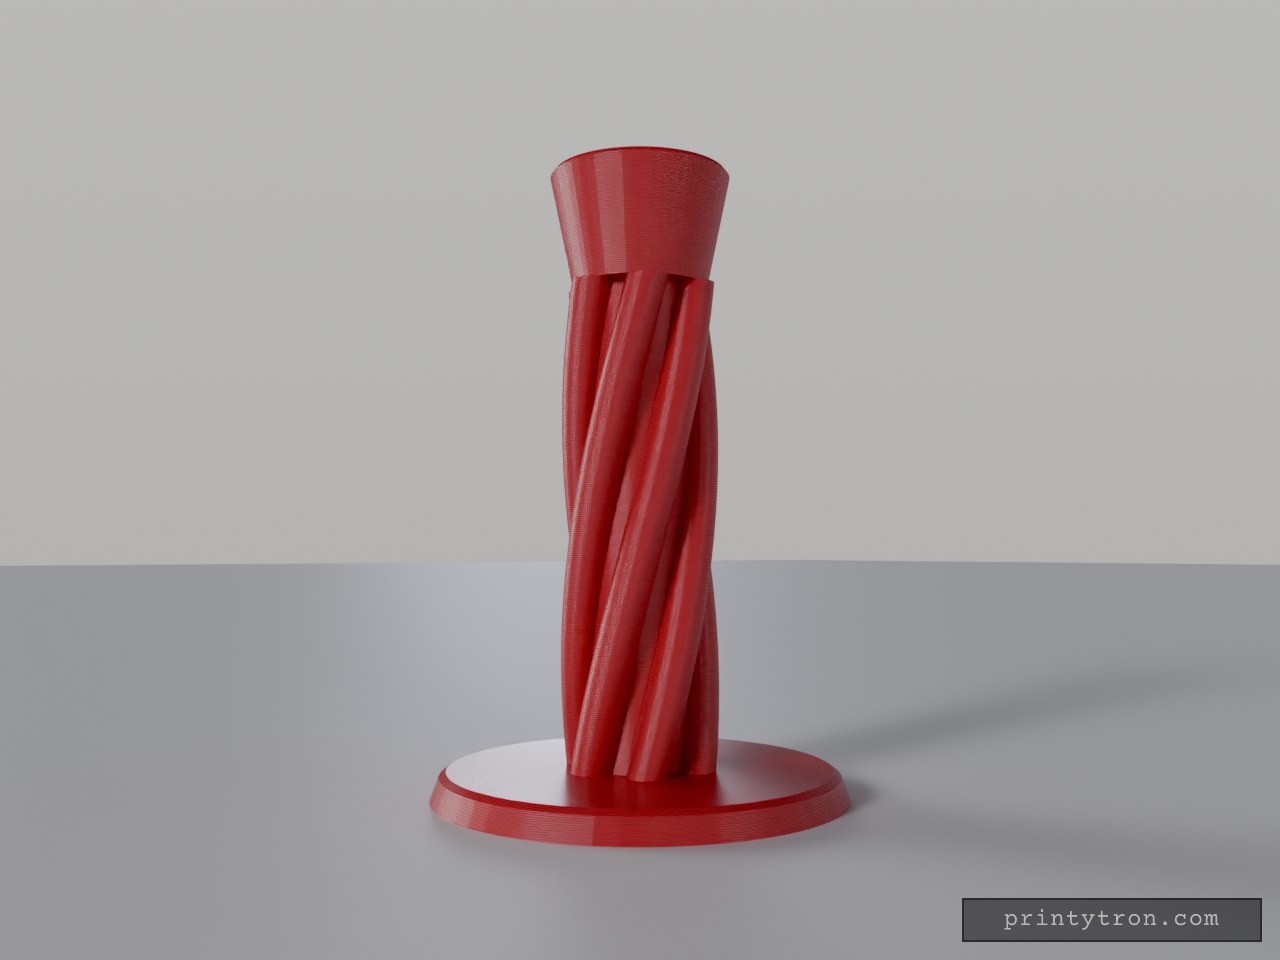
Twisted Column E27 Lamp Stand
A table lamp stand with a twisted six-lobe column rising from a round base to a cup that holds a standard E27 lamp socket. A 12 mm bore runs down the centre and a 7 mm channel carries the cable out the back of the base, so the wiring stays hidden. Remix hooks Socket pocket: 40.6 mm diameter, 26 mm deep. Measure your socket body and adjust socket_d before printing; many holders vary by a millimetre or two. Twist and lobes: 120° twist, 6 lobes. Change the twist angle for a gentler or more dramatic spiral, or the lobe count for a different silhouette. Height: the column is 140 mm; total height is about 182 mm. Taller columns suit larger shades. Base: 120 mm diameter, 8 mm thick. Widen it or add weight (coins, steel washers) for large shades. Set-screw hole: a 3.2 mm cross hole near the cup top is there for an M3 grub screw to lock the socket. Pairs with: an E27 socket with threaded nipple or clip-in body, a fabric cord with inline switch, and any E27 drum or cone shade. Print upright without supports. Use mains-rated, certified electrical parts, and a low-heat LED bulb rather than incandescent.
arbejde varme
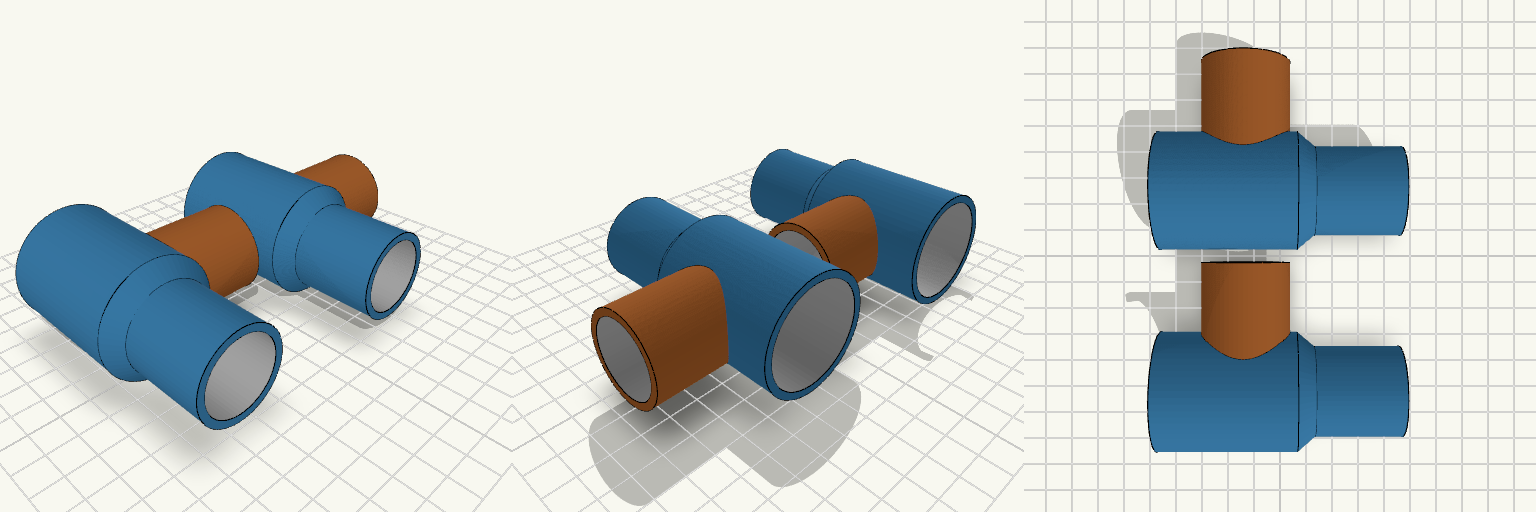
This T pipe inlet joins a 31 mm line to a 41 mm line instead of stacking adapters that leak at every joint. The main run holds its 41 mm outside diameter all the way past the side branch, then necks down through a short taper to a 31 mm spigot long enough to grip a hose or slide into a coupling. The plate carries two identical copies side by side, 70 mm apart along Y, so one print gives you a pair; each copy is a separate hollow part with nothing to assemble. Fit and print notes Two identical pipes laid out side by side, 70 mm apart across Y Main run: 84 mm long overall per pipe — the 41 mm OD section carries on past the branch to within a few millimetres of its edge before reducing 41 mm centre section: 48 mm long Taper: 6 mm, from 41 mm OD down to 31 mm OD Reduced end: 30 mm of straight 31 mm OD spigot Other end: stays at the full 41 mm OD, no reduction Side branch: 31 mm OD, 45 mm out from the centreline Bores: 26 mm through the 31 mm spigot and the branch, 36 mm through the 41 mm section Wall thickness: 2.5 mm throughout Sits flat on the plate, no supports needed Only one end reduces, so orientation matters when you install it. The 84 mm length is what keeps the branch on the full-size section — check the gap before you commit, and dry-fit the 41 mm end first if it has to butt against something.