FlowLink Threaded Extension Pipe
Created 1 months ago
Remixed once
Description
A fully 3D-printable, 12-inch extension pipe designed for infinite stacking. The standard slip-fit ends have been replaced with integrated 3mm-pitch metric threads, allowing multiple segments to be screwed together securely without glue.
- Threaded joints: 21mm male thread with a matching 21.6mm female thread cut into the base, providing 0.6mm of clearance.
- Support-free design: Internal transitions use 45-degree tapers, eliminating the need for internal supports.
- Slim profile: Maintains a 25mm outer diameter with a robust 3mm wall.
Images
More like this
Explore more in Home & Fixtures →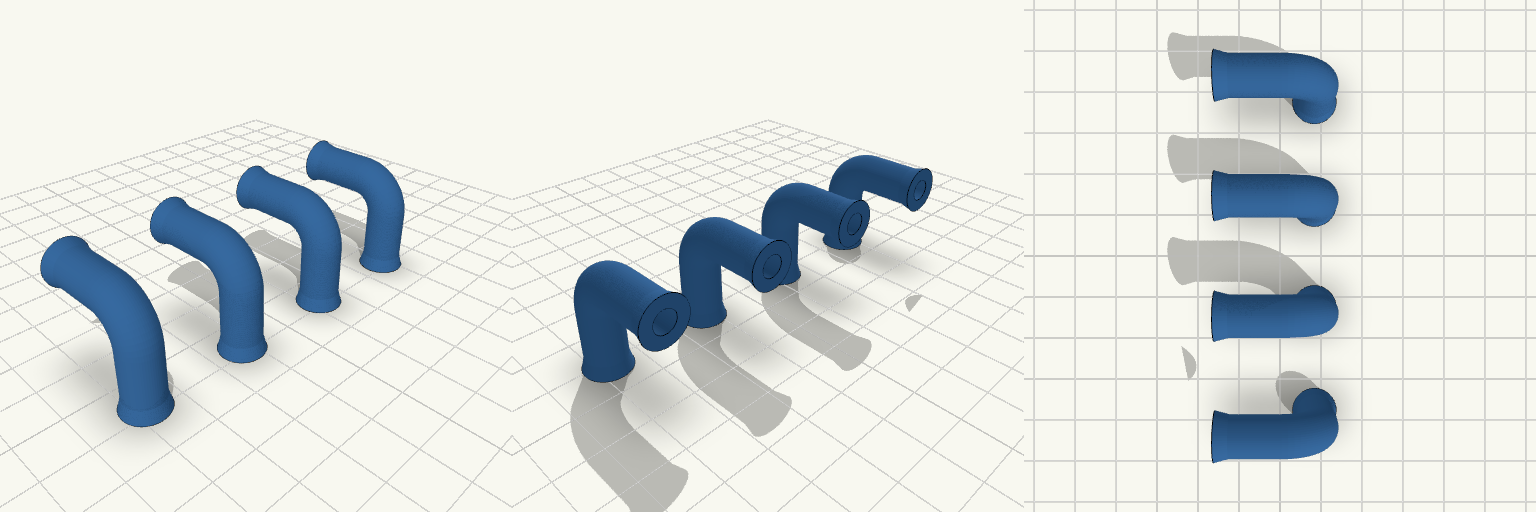
90 Degree Water Elbow, 5 mm Bore
A set of four identical 90 degree elbow fittings for water lines, each with a 5 mm inside diameter and a 2 mm wall. Each elbow has a smooth curved bend and two straight 14 mm legs. A small ridge at each leg end helps hold a tube in place. Inside diameter: 5 mm Outside diameter: 9 mm (2 mm wall) Leg length: 14 mm each Bend radius: 8 mm at the centreline Quantity: 4 identical elbows, spaced 25 mm apart
Barbed End Plug for 1-Inch PEX
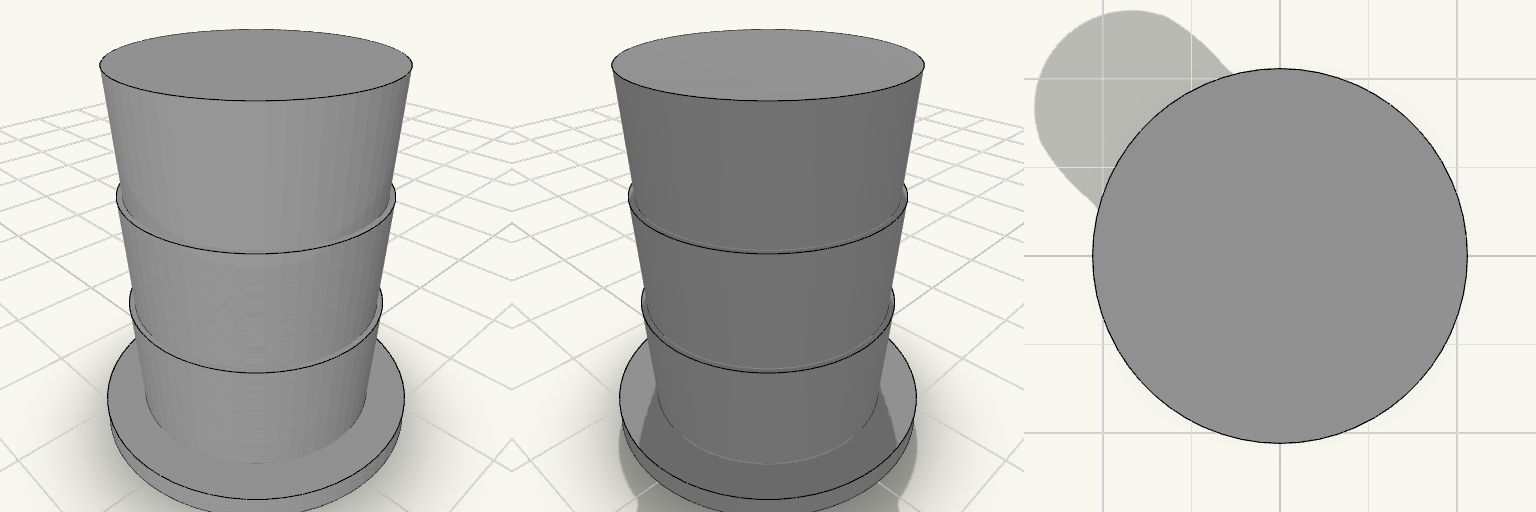
A barbed end plug that dead-ends a 1-inch PEX line. Three tapered barbs rise from a solid 28 mm collar cap, stacked directly on one another so each ring sits flush against the next with no gaps, and they taper from 21 mm to a 22 mm maximum diameter to suit pipe with roughly a 22 mm inner diameter. The collar is a 28 mm cylinder, 3 mm thick, with a 1 mm chamfer on the bottom outer edge, and it is the cap as well as the pipe stop — only about 3 mm of it shows past the barbs, so the stop is shallow. There is no bore: the plug is solid through, about 33 mm tall, sits flat on the plate, and prints as one piece as a 28 × 28 × 33 mm body. Because it seals rather than joins, check the barb fit against your actual pipe before committing to a full run. Remix hooks Barb profile: three tapered barbs stacked flush as one sawtooth suit roughly 22 mm inner diameter pipe. Change the count or soften the taper for harder or softer tubing, but keep the spacing equal to the barb height so the gaps between rings do not come back. Collar: 28 mm across and 3 mm thick, it is only just wider than the barbs. Widen or thicken it for a firmer insertion stop; the bottom outer edge carries a 1 mm chamfer, which can be enlarged or removed to change entry feel. Height: 33 mm overall is a compact cap; stretch the straight run above the barbs if you need more insertion room or a deeper seat. Barb diameter: 21–22 mm is the number to change first for other pipe sizes. The collar and barb spacing can stay put while only the taper moves. Ends: the solid cap is the safe baseline. Extending the same barbed profile out the other side turns it back into a straight coupling, and an elbow or tee is a body swap rather than a barb redesign. Fit check: barb dimensions are nominal, so test against your actual pipe before printing a full run. Pairs with: 1-inch PEX runs that need a temporary or permanent dead end, pressure testing, and capping a line before fixtures go on.
Charging Station Marker Nail
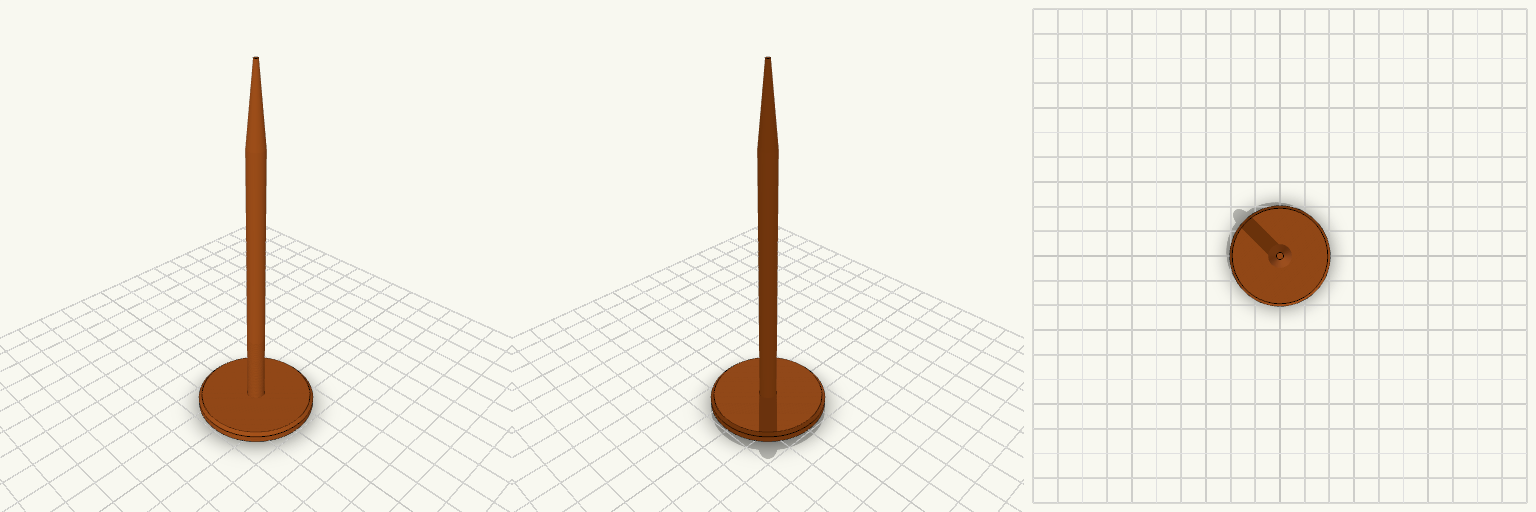
A ground marker nail for holding the position of a robot mower charging station while the charger is stored for the season. It is pushed into the soil where the charger's screw sits in summer. The nail has a wide, flat 40 mm head that stays visible at ground level, a slim 6 mm round shaft, and a tapered point for easy insertion. It prints head-down, so no supports are needed. Head: 40 mm diameter, 4 mm thick, chamfered edge Shaft: 6 mm diameter, about 90 mm long Tip: tapers to a point over 25 mm Overall length: about 119 mm Prints without supports
Perilla de estufa de repuesto con vástago reforzado
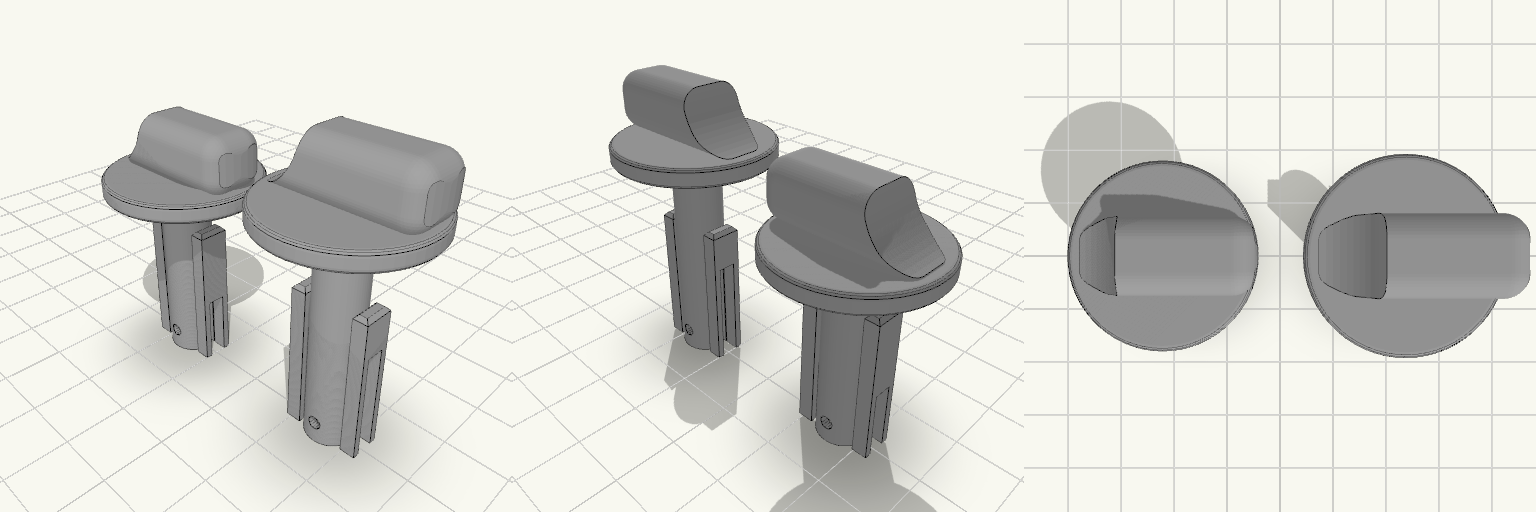
La perilla de la estufa que gira en falso o se parte deja el fuego sin control; esta perilla de repuesto se calza sobre el caño de gas y se traba con pasador, con el pulgar recortado al contorno del collar y todos los bordes del agarre redondeados para girar sin engancharse. La placa trae dos perillas: la original y una copia con vástago de 35 mm para cambiar el largo según la estufa. Cotas que deciden el calce Dos perillas en la misma placa: la original mide 41,5 mm de alto total (12 mm de cabeza + 29,5 mm de vástago); la copia mide 47 mm de alto total (12 mm de cabeza + 35 mm de vástago). En la placa ocupan 58 × 26 × 47 mm. Vástago: 8 mm de diámetro exterior, con dos aletas planas de refuerzo de 24 mm a los lados; en la copia, las aletas quedan en la zona de la punta. Vástago hueco: orificio de 5,5 mm de diámetro, abierto en la punta. En la original llega a 26 mm de profundidad y queda ciego en los últimos 3,5 mm hacia la cabeza, con paredes de aproximadamente 1,25 mm; la copia mantiene el mismo orificio de 5,5 mm. Agujero pasante: 2,2 mm de diámetro, horizontal, con el centro a 3,5 mm del extremo inferior; cruza la cavidad del vástago, así que la chaveta atraviesa el caño de gas. Endija: 3 mm de ancho, abierta en la punta; va a 90° del agujero del pasador, atraviesa el vástago y corta también las aletas laterales, dejando el extremo dividido en dos mitades flexibles. En la original llega a 11 mm; en la copia llega a 17,5 mm, la mitad de su vástago. Cabeza: collar de 26 mm de diámetro por 3 mm de alto; el pulgar mide 26 mm de ancho, 10 mm de grosor y 9 mm de alto sobre el collar, ya no pasa el contorno del collar, es plano de un lado y baja curvo del otro. Todas las aristas del pulgar tienen 3 mm de radio; los bordes del collar tienen 0,8 mm. Cada perilla se imprime de una sola pieza; la endija no separa el modelo, solo deja flexibles las dos mitades del extremo. El acabado negro mate sale del filamento que elijas, no de la geometría. Antes de imprimir, mide el diámetro del caño de gas y el del pasador: el hueco del vástago y el agujero pasante son las dos cotas que no perdonan, y si no coinciden es mejor ajustarlas antes de gastar material.
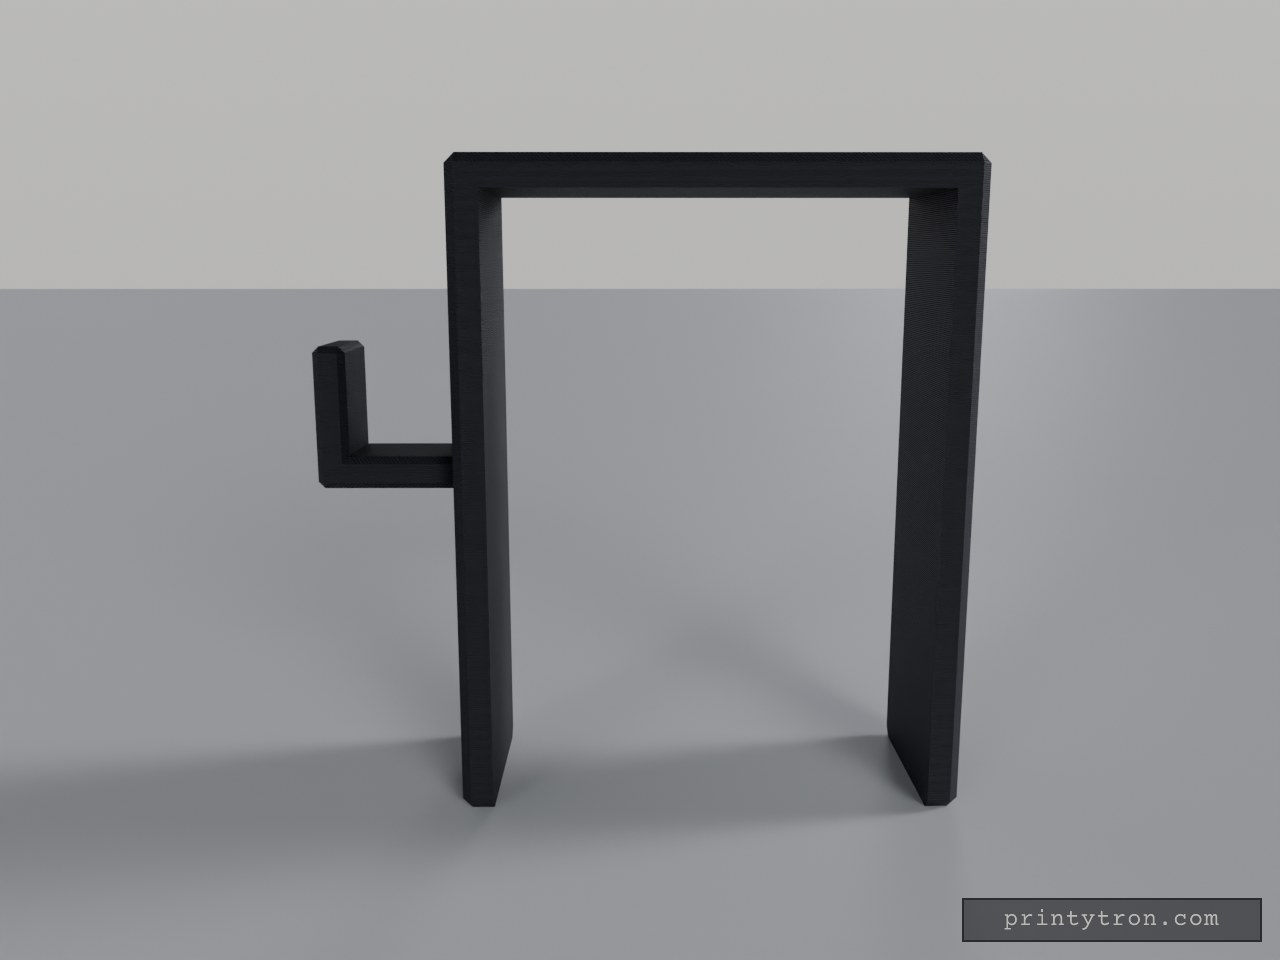
Beam Clamp Clothes Hanger with Side Hook
What it's for A saddle that drops over the top of a support beam and turns it into a place to hang clothes. The inverted U-shaped channel grips the beam from above, and a hook projects from one side with an upturned tip so hangers and garments stay put. Beam Saddle — the U-shaped body that slides down over the beam Hook — the side arm with an upward tip for hangers or coats, set at mid-height of the saddle Both areas print as a single piece; nothing needs assembling. Dimensions Saddle opening: 68 mm inner width, sized for a beam of that width Overall saddle: 78 × 30 mm footprint, 100 mm tall Channel: 95 mm deep, with 5 mm thick walls Hook: 22 × 15 × 22 mm, mounted at mid-height so its tip stays inside the 100 mm envelope The 95 mm channel is generous for a shallow beam — the saddle simply sits lower on it, and the hook rides down with it. Print notes Print the saddle opening facing up so the channel needs no supports A few extra perimeters on the hook help when it carries heavy coats Scale the opening slightly if your beam measures over 68 mm Remix ideas Lengthen the hook for bulky winter coats Shorten the legs for a shallower beam and keep the height with a taller top plate Add a second hook on the opposite side for more hanging room Add a small lip or screw hole at the bottom of the saddle to stop it shifting sideways
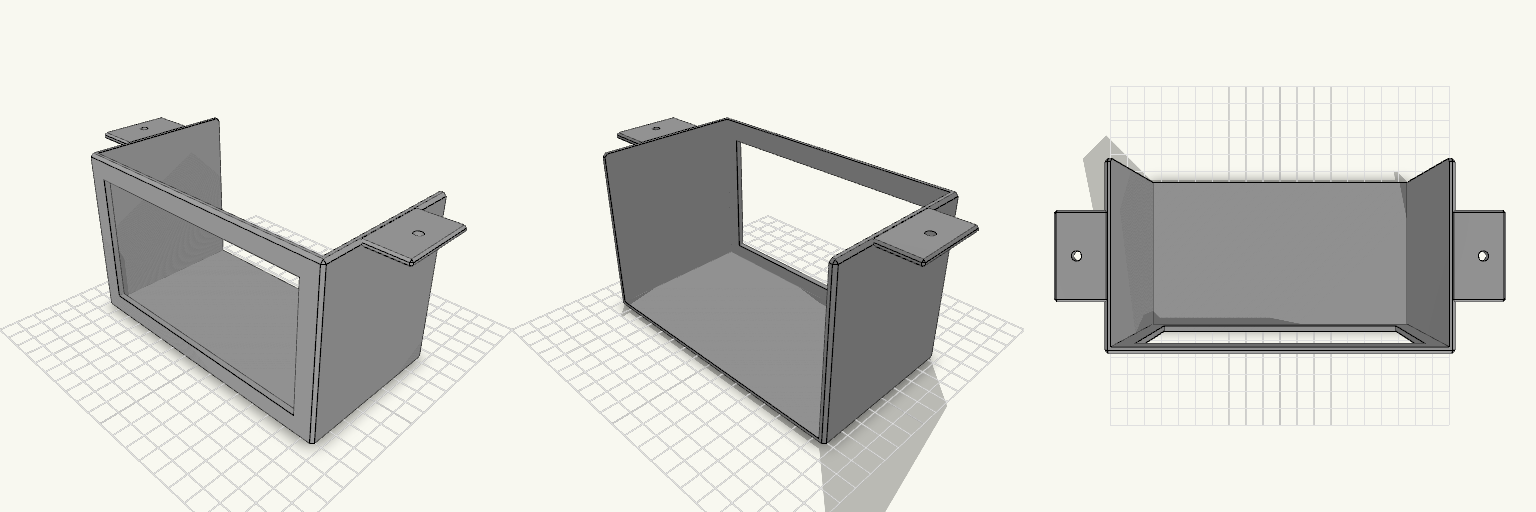
Unterbauhalterung für Echo Show 5 mit offener Rückseite
Die Halterung ist eine Schale für den Echo Show 5, die unter einen Schrank geschraubt wird. Die Rückseite bleibt offen, sodass das Kabel austreten kann; vorn sitzt ein Ausschnitt für das Display. Zwei seitliche Laschen mit je einem 4,5-mm-Loch nehmen die Befestigungsschrauben auf. Die Innenmaße liegen bei 148,6 mm Breite und 90 mm Höhe – bei 148 mm Gerätebreite bleibt so rund 0,3 mm Spiel je Seite. Im Ganzen misst die Halterung 198,6 × 86 × 93 mm, wobei die 86 mm Tiefe den Platzbedarf unter dem Schrank bestimmen. Der Rahmen um das Display ist oben und unten gleich breit: Der obere Rand misst 11 mm (3 mm Boden plus 8 mm Steg), genau wie der untere; der Display-Ausschnitt ist entsprechend oben 5 mm niedriger gehalten. Die Maße sind am Gerät nicht nachgemessen – vor dem Druck die Innenmaße am eigenen Echo Show 5 prüfen. Remix-Hooks Innenbreite: 148,6 mm bei 148 mm Gerätebreite ist bewusst eng gewählt; wer mehr Luft zum Einlegen will, geht auf 150 mm zurück und erhält etwa 1 mm Spiel je Seite. Innenhöhe: 90 mm sind der zweite echte Freiheitsgrad – mehr Höhe schützt das Gerät besser, weniger macht die Schale flacher unter dem Schrank. Tiefe: Die 86 mm Gesamttiefe (rund 80 mm innen) sind die knappste Stelle; eine flachere Schale passt unter niedrige Schrankböden. Displayausschnitt: Der obere Rand ist auf 11 mm gesetzt und entspricht dem unteren; wer mehr Sichtfläche will, kann den oberen Rand schmaler machen, muss dann aber die Rahmenstabilität prüfen. Schraublaschen: Die 4,5-mm-Löcher und ihr Abstand passen sich vorhandenen Schrauben oder einer Bohrschablone an; sie wandern mit der Höhe nach oben mit. Kabelauslass: Die offene Rückseite kann breiter werden oder eine zusätzliche Kabelklemme bekommen. Befestigung: Statt der Laschen ist eine Variante mit Klebefläche oder Klemme denkbar. Als Basis passt die Halterung unter Küchen- oder Regalschränke; Kabelclips und passende Holzschrauben ergänzen sie.