3D-printable decor & display pieces
Lithophane shades, planters, trophies, wall art and display models. Browse what makers built, or describe the exact piece you want and Printy makes it.
Need one that fits your exact measurements? Start building →
Newest
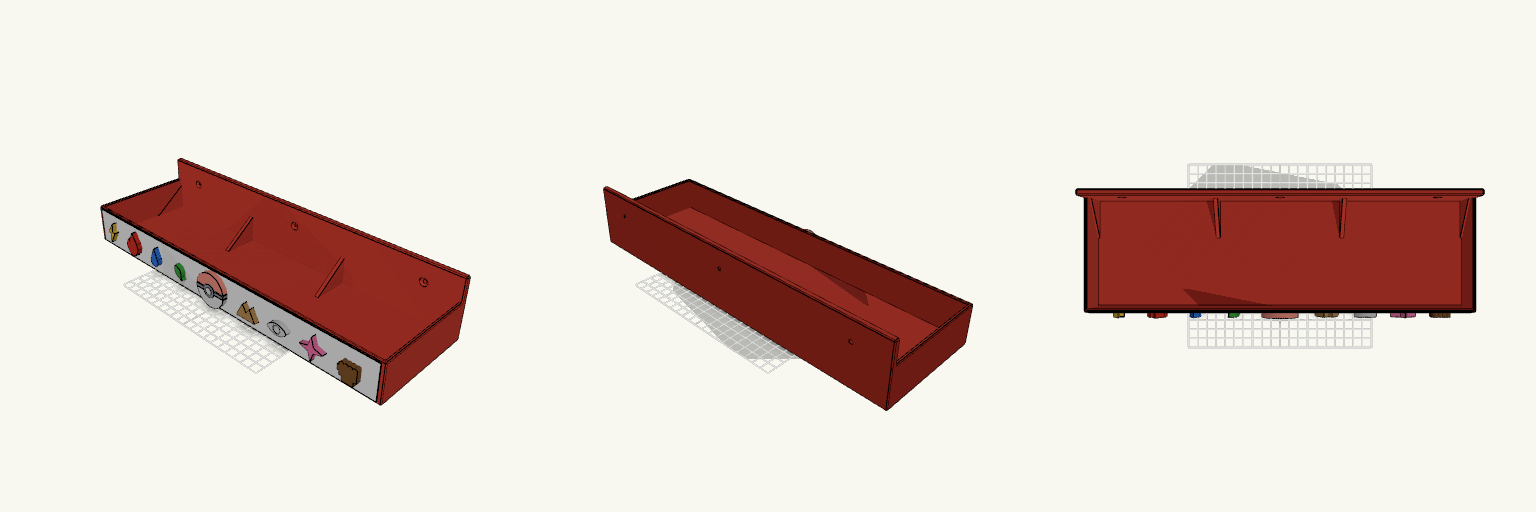
400 mm Wall-Screw Poké Ball Shelf, Eight Types
A 400 mm wide, 120 mm deep wall shelf with a 70 mm back plate and a 44 mm front lip. It hangs on three countersunk 4.5 mm holes, which suit No. 8 or M4 screws. Fit and checks Fits: standard No. 8 / M4 countersunk-head screws, with a stud or wall anchor for heavy loads. Check before printing: the 400 mm width must fit your bed. This is a one-piece print. Does not fit: printers under 400 mm without scaling the width. Front lip Raised Poké Ball in the centre. Eight type symbols: electric, fire, water, grass, ground, psychic, fairy and fighting.
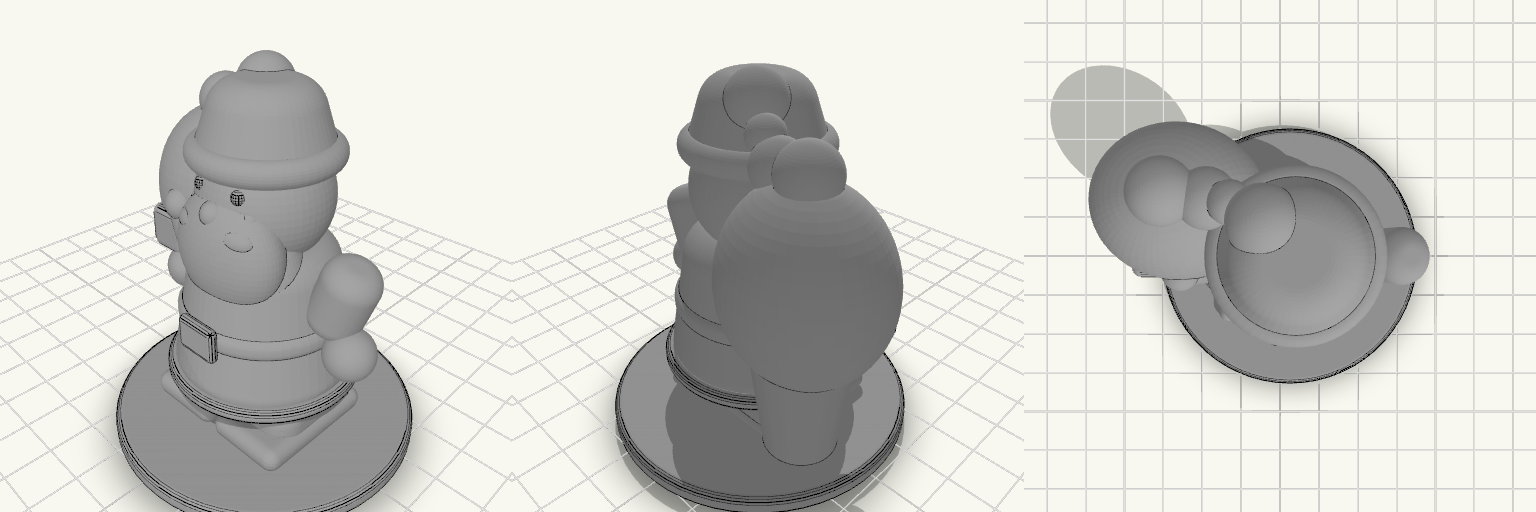
Weihnachtsmann-Figur mit Geschenkesack
Eine Weihnachtsmann-Figur, die nicht umkippt: Sie steht auf einer runden Platte mit 64 mm Durchmesser und hat keine losen Teile. Der Sack hängt an der Schulter und ist unten gestützt, damit beim Druck nichts in der Luft hängt. Maße und Druck Standplatte: Ø 64 mm, 4 mm hoch Höhe: ca. 72 mm Ein zusammenhängender Körper, kein Support nötig bei den meisten Bereichen Empfohlen: 0,2 mm Schichthöhe, 15 % Infill, PLA Details: Bart, Schnurrbart, Mütze mit Bommel, Gürtel mit Schnalle, Stiefel
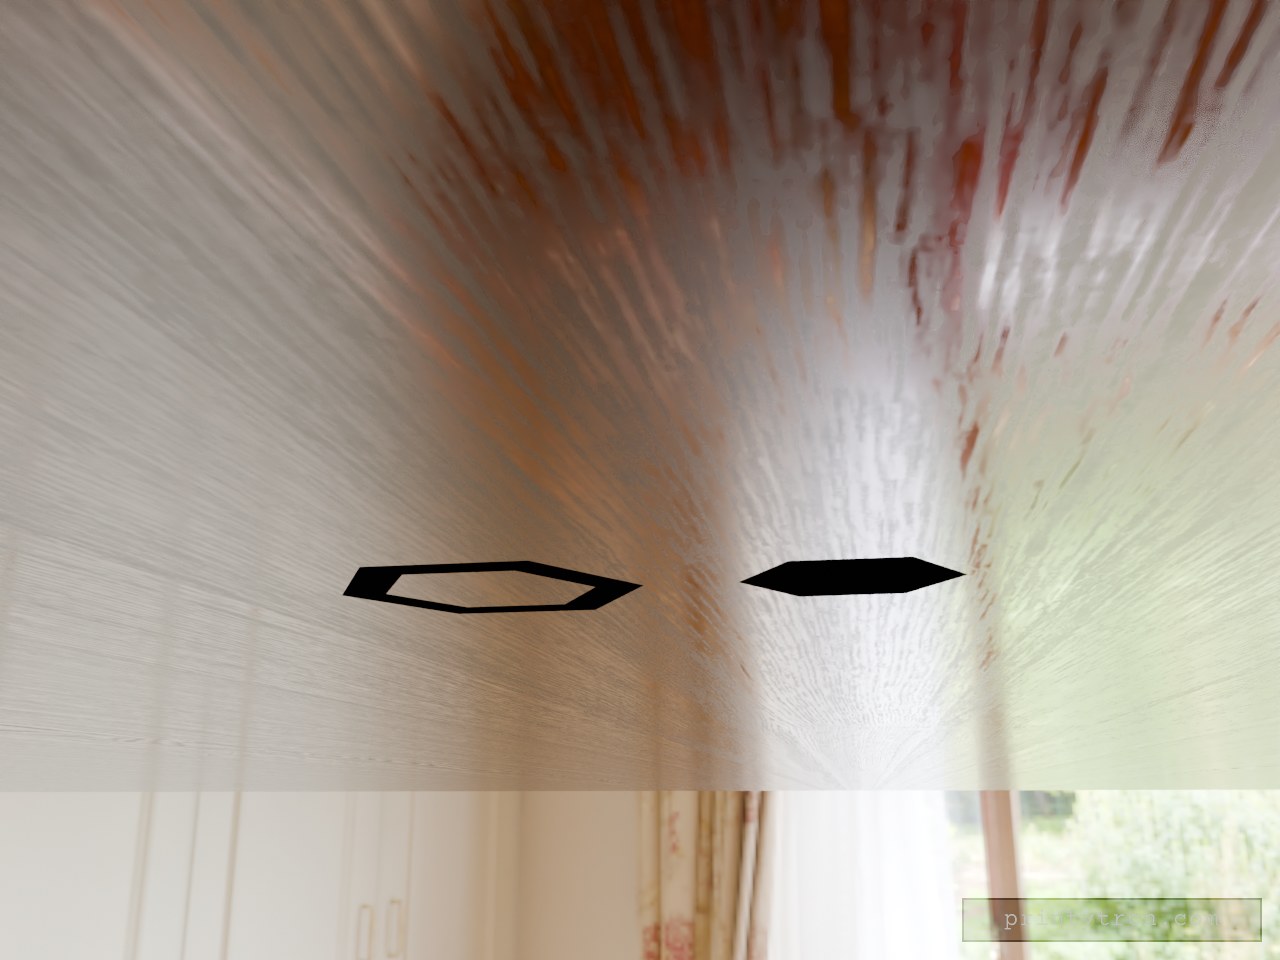
Hexagonal Base Twist Puzzle Block and Bar
Two-piece twist puzzle: a truncated hexagonal-pyramid block with a spiral slot and a twisted bar that threads through it. The block has a 44 mm across-corners hexagonal base tapering to 28 mm at the top, 30 mm tall. The bar has a matching hexagonal head and an 8 × 18 mm twisted section. Both parts are 30 mm tall when assembled and finish flush. Clearance: 0.3 mm between bar and spiral slot Print both parts base-down, no supports expected Suggested material: PLA or PETG Twist rate: 3° per mm
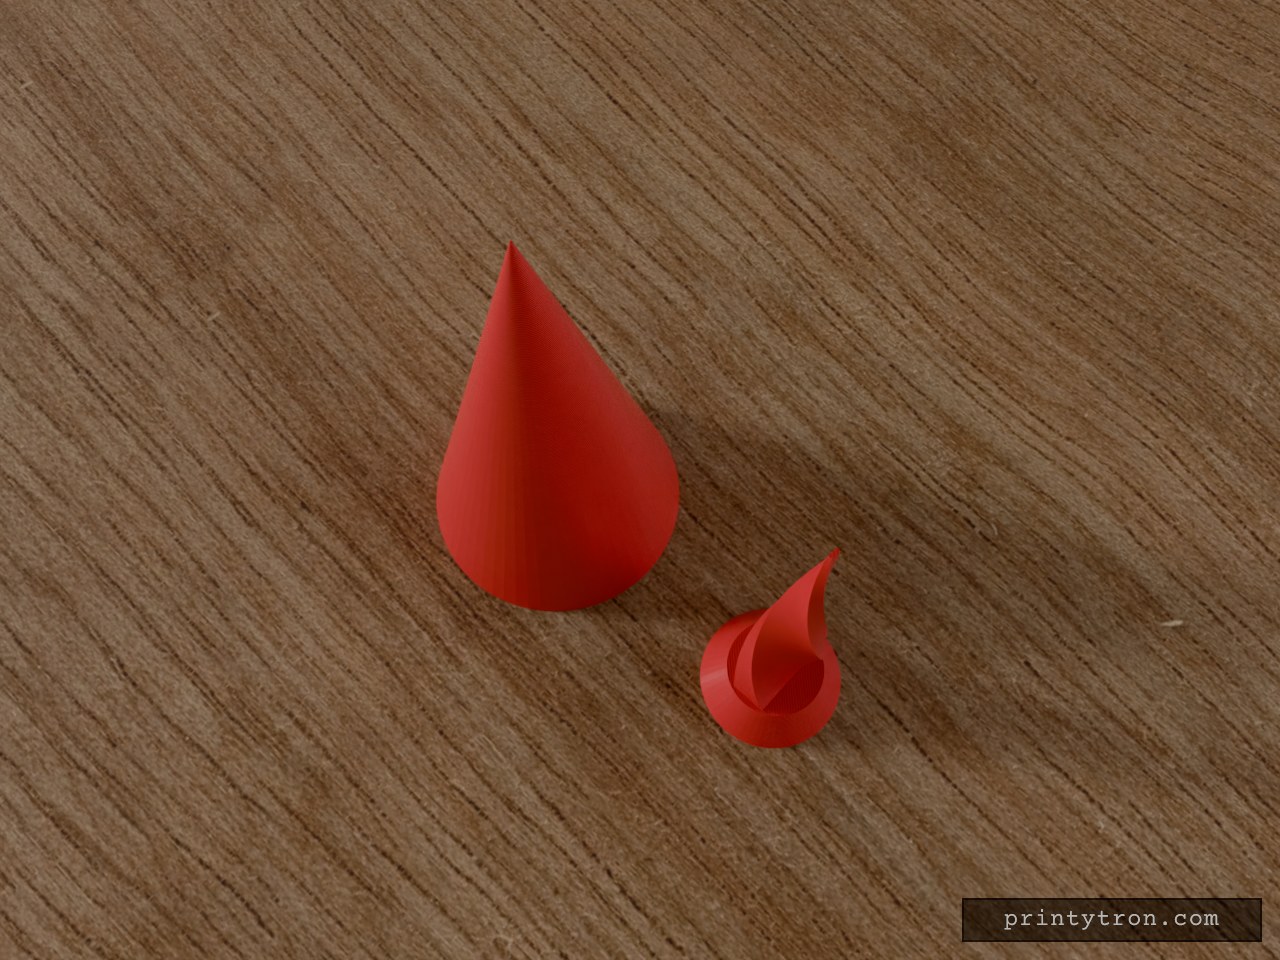
Round Pyramid Twist Puzzle
A round-based pyramid block with a tapering spiral channel, plus a matching twisted bar that screws into it. Both parts narrow to a point and the twist runs the full height, so the bar's tip follows the spiral all the way up. Remix hooks Twist rate: 3° per mm. Lower it for a gentler spiral, raise it for a tighter one. Bar section: 6 × 14 mm. Thicker bars need a wider block base (44 mm) to keep the walls solid. Clearance: 0.3 mm per side. Tune it to your printer. Tip taper: the bar narrows to 10% of its section over 62 mm. A sharper or blunter point is a one-number change. Pairs with: print both parts base-down; a plain round tray makes a nice display stand.
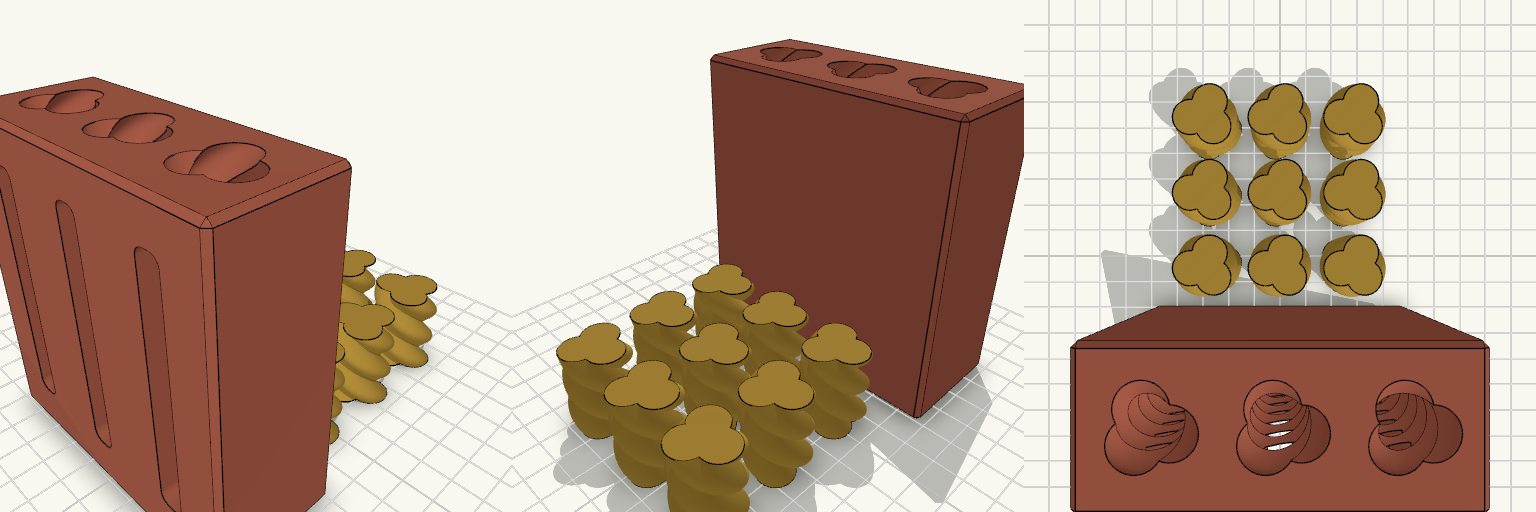
Three-Channel Fusilli Pass-Through Box without door
A 96 × 40 × 100 mm box with three full-height twisted channels. Each channel holds three stacked 28 mm fusilli pieces that screw down the spiral and drop out through a sliding door in the base. Narrow 8 mm viewing slits on the front show the pasta riding the spiral without letting it out. Remix hooks Pieces per channel: three at 28 mm with 1 mm gaps. Change the piece length or count to fill the channel differently. Twist rate: 10.8° per mm. Lower is a lazier spiral, higher is tighter. Pasta and channel must share it. Clearance: 0.5 mm around the pasta. Adjust to suit your printer. Slit width: 8 mm. Widen it for a better view, but keep it narrower than the pasta. Pairs with: a crank or knob on the pasta tops, or a stop on the door.
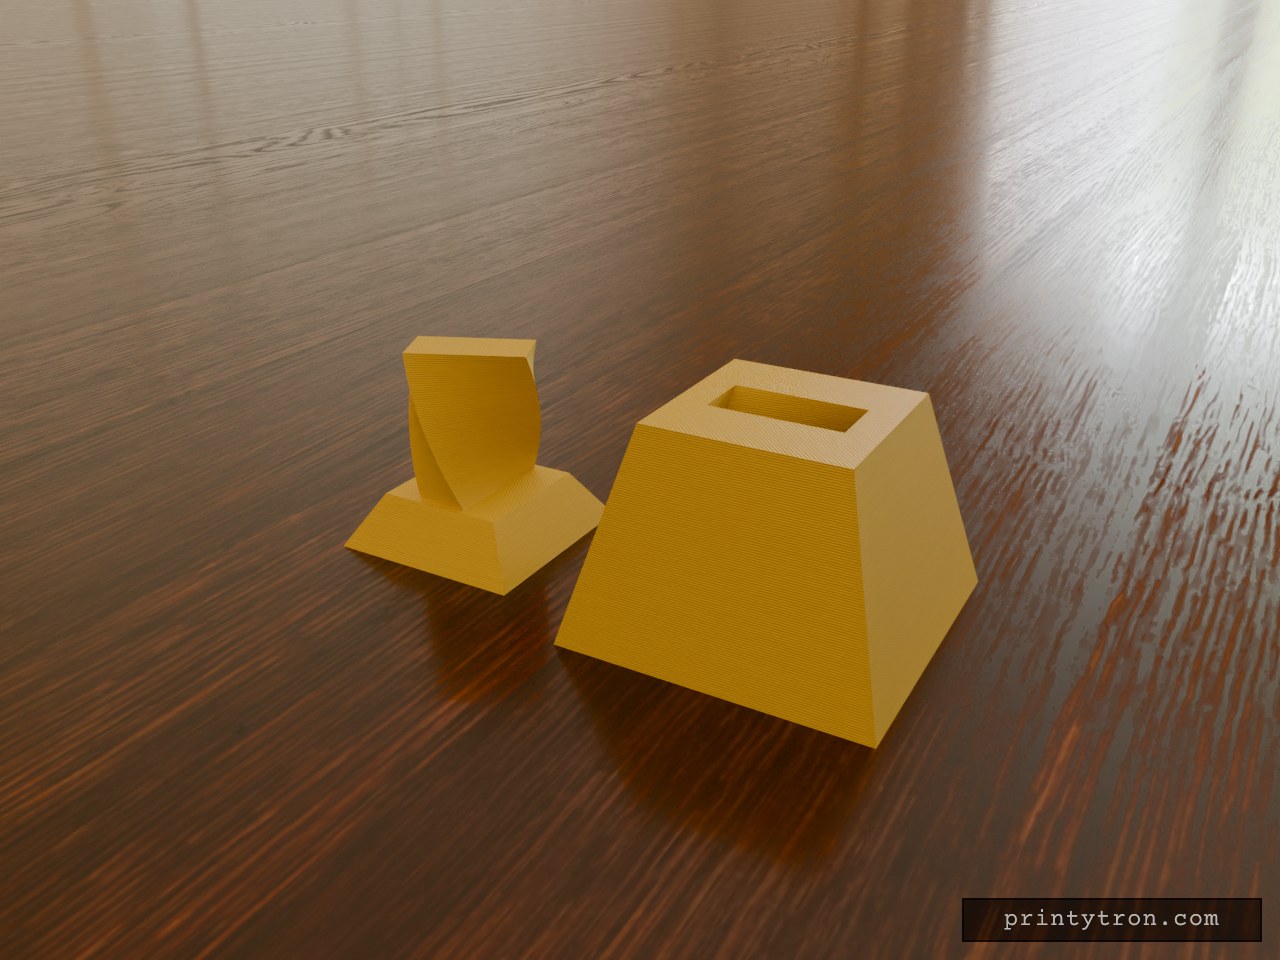
Piramide Twist, puzzle a spirale incastrato
Un piccolo faraone dei puzzle: un blocco a piramide troncata con un foro a spirale e una barra twistata che vi scivola dentro. La barra si infila dal basso, la testa a piramide si adagia nell'incavo e, ruotandola, la spirale la guida fino all'altra estremità. Entrambi i pezzi sono alti 30 mm, così a incastro completato restano a filo. Blocco: base 44 mm, cima 28 mm, altezza 30 mm Barra: sezione 8 × 18 mm, altezza totale 30 mm Gioco 0,3 mm Stampa entrambi con la base sul piano
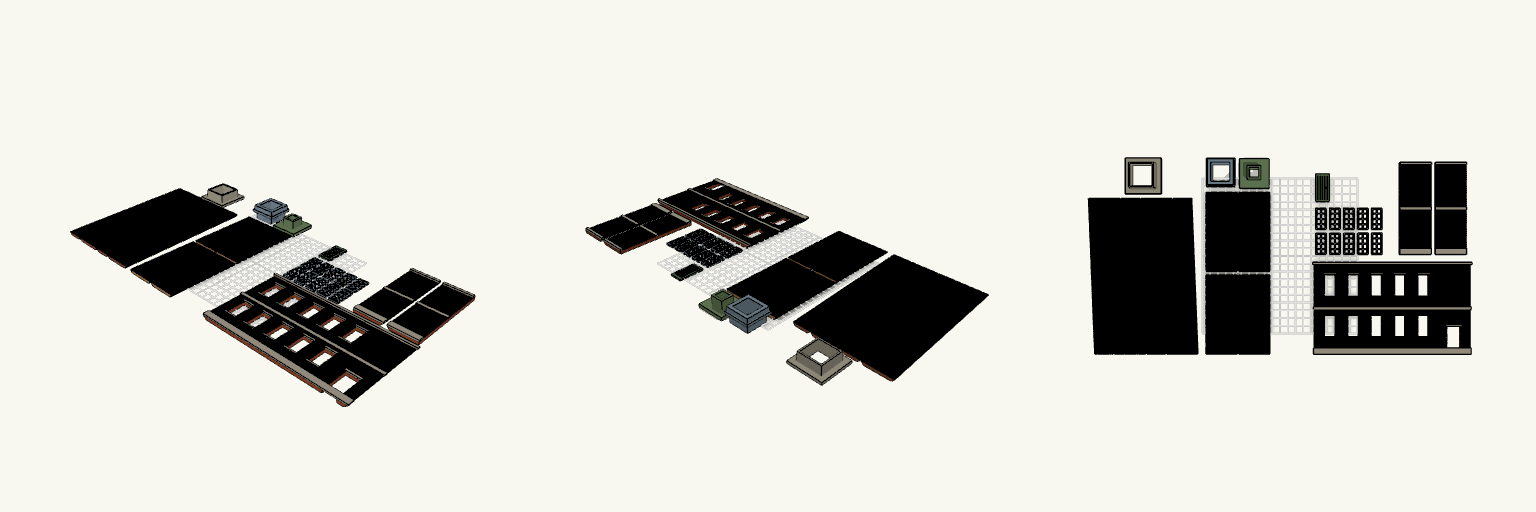
Millstack — Chimney and Mill Front Set
Millstack is a four-panel tapered chimney with a straight brick base, paired with a half-relief two-storey mill front in OO scale. The wall prints flat with open window and door apertures, while the window frames and plank door print as separate flat pieces that drop into the openings. Features Four tapered chimney panels, four straight base sides, plinth, top plate and cap, laid out for a Bambu A1 plate Mill front with ten high windows and a right-hand door opening Ten separate glazed-bar window frames and one plank door Stone trim, string course and coping on the wall Print notes Wall, windows and door all print flat The wall is 200 mm long, so it needs a separate print from the chimney set
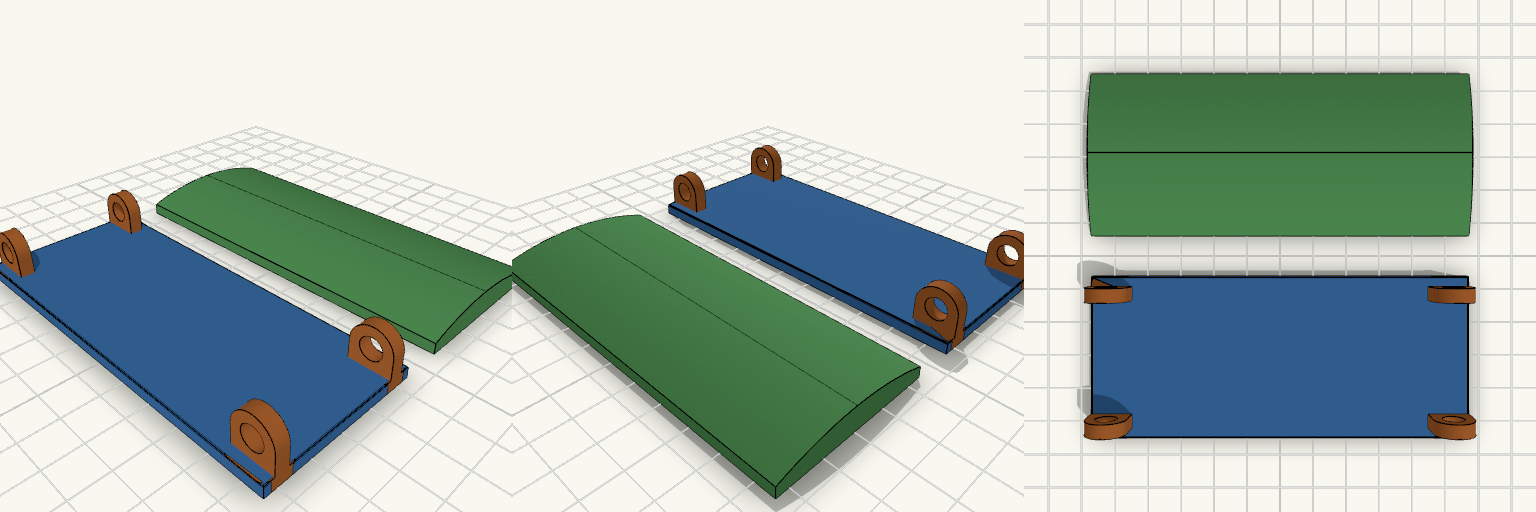
LEGO 14x6 Tile and Curved Roof
A 14x6 LEGO-style smooth tile with four upright corner lifting eyes, plus a matching curved roof panel of the same footprint. The roof arches across the short direction, like a train carriage roof. It is hollow underneath with tubes that match the tile's grid. Footprint (tile and roof): 111.8 x 47.8 mm Tile height: 3.2 mm; eyes stand 15 mm above the bed Roof: 3.2 mm at the long edges, rising 4 mm at the centre line Roof wall: 1.5 mm, printed flat side down Eye hole: 6.5 mm, axis along Y
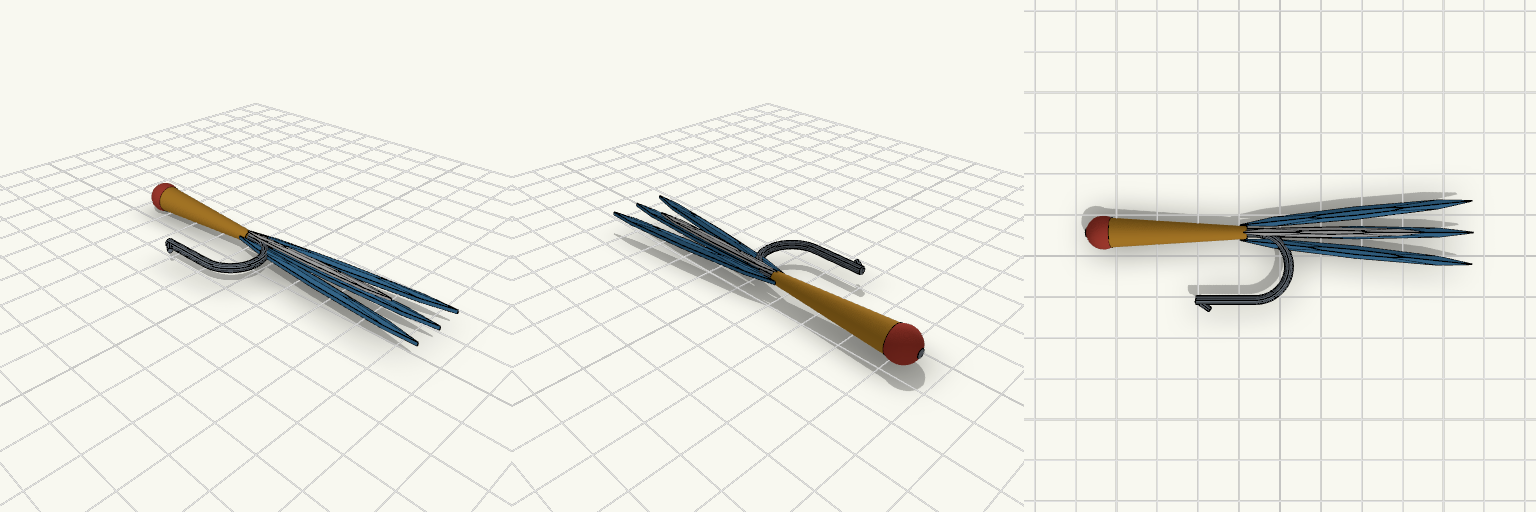
Klassische Streamerfliege im Lachs-Design
Eine Streamerfliege im klassischen Lachsfliegen-Stil: roter Kopf, sich verjüngender gelber Körper und ein langer blauer Flügel mit weißem Streifen. Die Fliege liegt flach auf dem Druckbett und eignet sich als Deko für die Angelwand oder als Köder-Attrappe. Mit knapp neun Zentimetern Länge wirkt sie wie ein echter Streamer, bleibt aber ein reines Zierstück – ein Blickfang für Fliegenfischer und Angelfreunde. Das Hakenende läuft glatt aus, ohne Öhr-Ring. Design-Details Benannte Bereiche: Hook, Body, Head und Wing – im Viewer farblich getrennt. Flach liegend und einteilig, ohne Stützen druckbar. Klassische Farbfolge: roter Kopf, gelber Körper, blauer Flügel mit weißem Streifen. Glattes Hakenende ohne Öhr – als Deko gedacht, nicht zum Einhängen an einem Ring. Knapp 9 cm lang – passt auf jede Deko-Leiste und in jede Sammlung. Ein Geschenk für Fliegenfischer oder ein Blickfang im Hobbyraum.
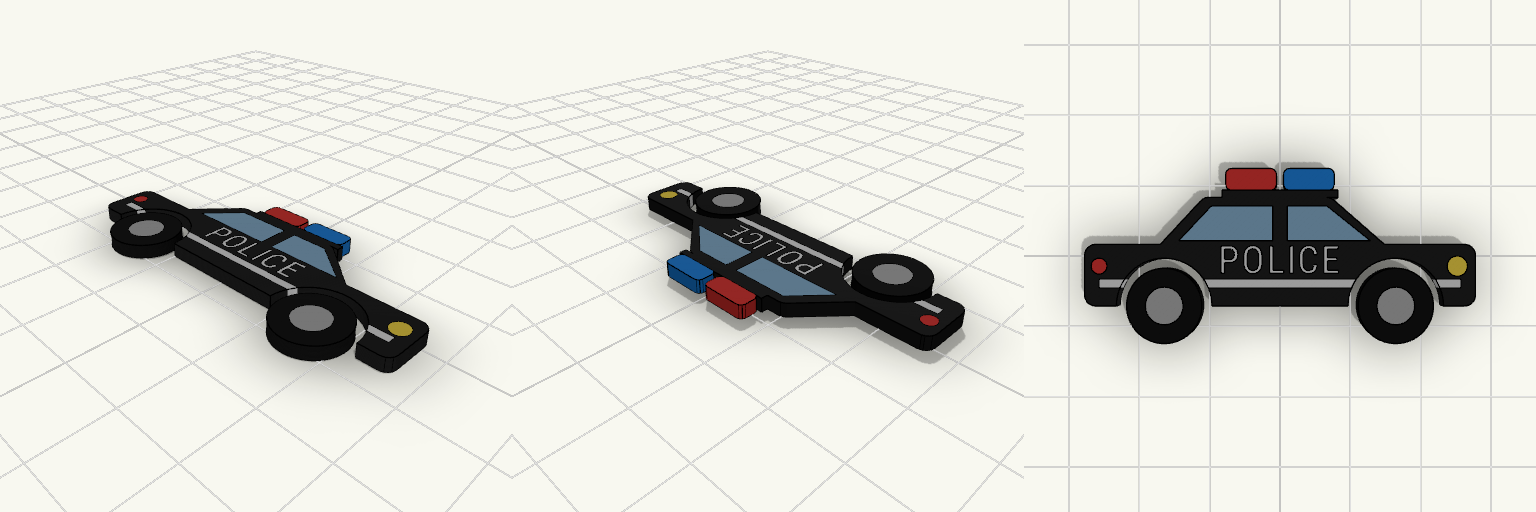
Düz Kutu Yüzeyi için Polis Arabası Stickerı
Düz kutu yüzeyine yapıştırmak için tasarlanmış, tamamen düz yüzeyli bir polis arabası stickerı. Gövde siyah, lastikler siyah, jantlar gri; kapı boyunca ince beyaz bir şerit, önde far, arkada stop lambası ve çatıda yan yana iki lamba var: biri kırmızı, biri mavi. Kapı bölümünün ortasında beyaz "POLICE" yazısı vardır; yazı gövdeye oyulmuş ve beyaz şeritle aynı renk alanına dahildir, yüzeyden çıkıntı yapmaz. Altında ayrı bir taşıyıcı plaka yoktur; arka yüzü tamamen düzdür ve baskıdan çıktığı gibi tek parçadır. Tüm detaylar aynı 2 mm kalınlıktadır; camlar, şerit, far, lambalar, lastikler ve yazı gövdenin içine yan yana oturur, hiçbir bölüm çıkıntı yapmaz. Renk bölgeleri gövde, camlar, lastikler, jantlar, kırmızı lamba (arka stop lambası dahil), mavi lamba, far, beyaz şerit ve beyaz POLICE yazısı olarak ayrılmıştır; bunlar ayrı parçalar değildir, tek parça içindeki renk alanlarıdır. POLICE yazısı beyaz şeritle aynı renk bölgesindedir; çok renkli bir baskı istiyorsan baskı sırasında filamenti değiştirmen gerekir. Kendinden yapışkanlı değildir: baskı bittikten sonra arkasına çift taraflı bant ya da uygun bir yapıştırıcı uygulaman gerekir. Düz arka yüzü sayesinde bant iyi tutar. Baskı öncesi kontrol Gövde 54 mm genişliğindedir; yapıştıracağın yüzeyde en az bu kadar düz alan olmalı. Parça tamamen 2 mm kalınlığındadır; lambalar, camlar, tekerlekler ve yazı dahil hiçbir bölüm daha yüksek değildir. Kutu kapağı dar bir yuvaya giriyorsa bu 2 mm'yi hesaba kat. Destek malzemesi gerekmez; figür doğrudan yatak üzerine oturur, ilk katmanı iyi tutan bir yüzeyde bas. 60 mm genişliğe göre hazırlanmış eski bir boşluk ya da şablon varsa, figür artık 54 mm'dir; o ölçüye göre kesilmiş alanlara tam oturmaz. Uymadığı yerler Eğri, bombeli veya sık dokulu yüzeylerde kenarlar kalkar; bu figür düz ve sert zeminler içindir. Kumaş kaplı, yumuşak ya da sürekli esneyen yüzeylere yapıştırılmaz. Kendinden yapışkanlı vinil sticker yerine geçmez; sökülüp tekrar yapıştırılmak üzere tasarlanmamıştır.
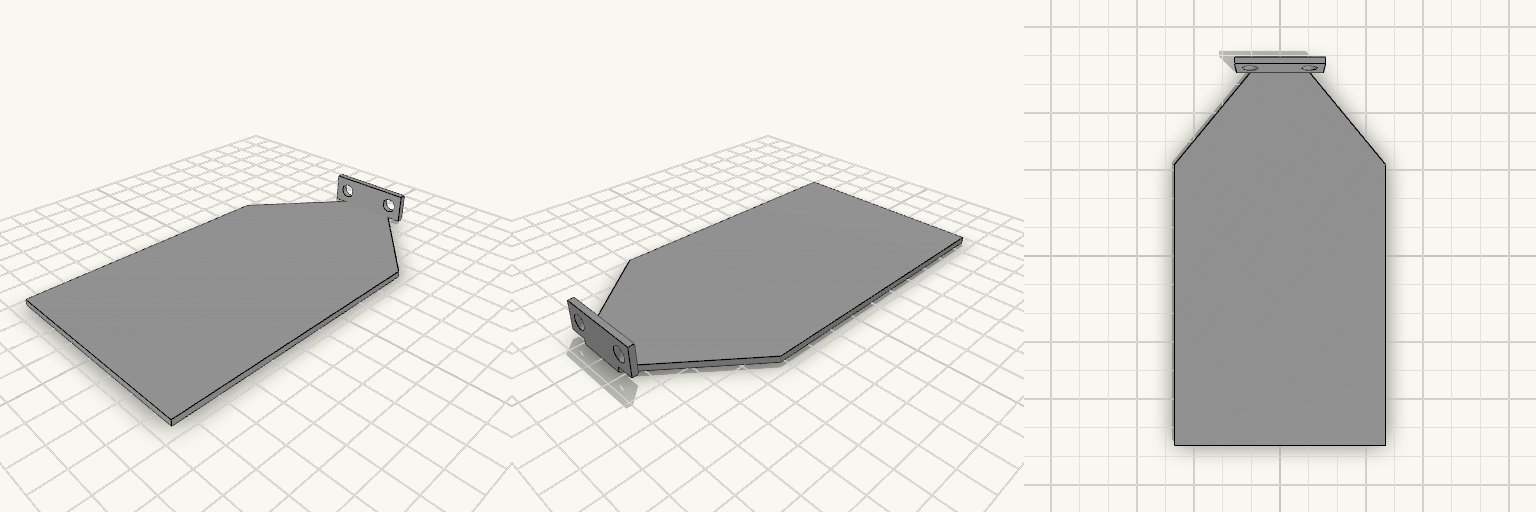
plate protection + bracket lumiere araignee
Le sommet plat de 17 mm est trop court pour une équerre de 30 mm : cette plaque en forme de maison reçoit une équerre à 90° collée au bord du sommet, posée sur la plaque, avec deux trous de 5,2 mm pour la fixer. Les extrémités de l'équerre dépassent d'environ 6 mm de chaque côté du sommet et restent dans le vide ; elles ne tiennent que par la partie centrale. Dimensions Base : 73 mm Murs verticaux : 97 mm Pans de toit : 44 mm chacun Sommet plat : 17 mm Équerre : 30 mm de large, 10 mm de haut au-dessus de la plaque, 2 mm d'épaisseur, à 90° Trous : 5,2 mm de diamètre, un de chaque côté de l'équerre, à 10 mm du centre et à mi-hauteur, traversant les 2 mm Alignement : arrière de l'équerre au bord du sommet Dépassement : environ 6 mm de chaque côté Longueur du profil : environ 131 mm Encombrement posé à plat : environ 73 × 131 mm, 12 mm de haut au total Épaisseur de la plaque : 2 mm Impression Une seule pièce, posée à plat sur le plateau L'équerre est verticale et collée au bord du sommet ; ses extrémités dépassent et ne sont pas appuyées sur la plaque Le sommet plat supprime la pointe fine : moins de zone fine à surveiller au refroidissement Contour symétrique, sommet plat centré sur la base
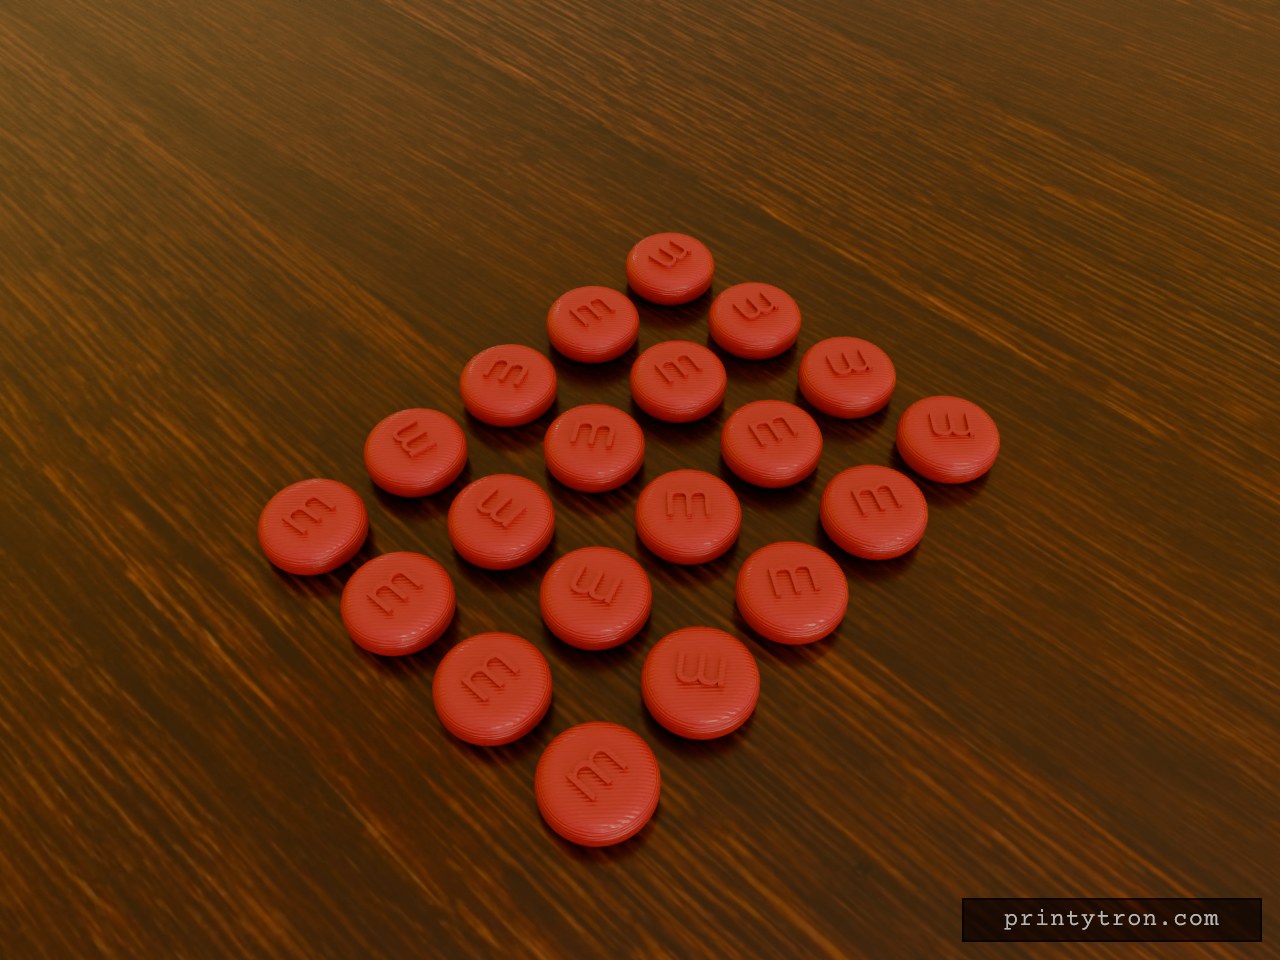
13 mm M&M-Style Candy Discs, 20 Pieces
Twenty M&M-style candy discs for fake-sprinkle piles and display work: 13 mm across, 5 mm thick, rounded at the edge and topped with a raised white "m". There is no host part, thread or bore to match here, so the number that decides whether a batch works is the disc diameter — 13 mm — measured against the surface, bowl or tray it is going onto. Sizes (viewer labels: Red Candies, Yellow Candies, Green Candies, Blue Candies, Orange Candies, White m Letters) Disc diameter: 13 mm on every piece. Thickness: 5 mm at the body; the raised "m" adds 0.5 mm. Raised "m": 0.5 mm tall, white, and its own colour region. Quantity: 20 pieces in a 5 × 4 grid. Spacing: about 16 mm centre to centre, so no two pieces touch. Whole batch footprint on the plate is roughly 77 × 61 mm. Colours: five candy regions — red, yellow, green, blue and orange — plus white "m" lettering. Each candy is a separate loose piece sitting flat on its base, so the batch prints with no supports. The candy colours and the white lettering are separate regions of the print, which means a colour print needs filament changes for the candy colours and another for the white "m"; a single-colour batch will lose the M&M look entirely. What to check before printing The "m" is only 0.5 mm tall and is white as its own colour region. For a clean white letter, switch filament at the layer where the "m" starts, about 5 mm up; at that height it prints as a thin top layer. Without that swap, the lettering prints in the loaded colour and loses contrast. At 13 mm across and 16 mm spacing the first layer has plenty of room, but 20 small loose pieces still reward a brim or a slow first layer so nothing gets knocked loose. What these are not: decoration only — not edible, not real candy, and not a substitute for real sweets on food. They are also not a match for anything with a fixed 14 mm or 15 mm recess; at 13 mm they will sit loose in it.
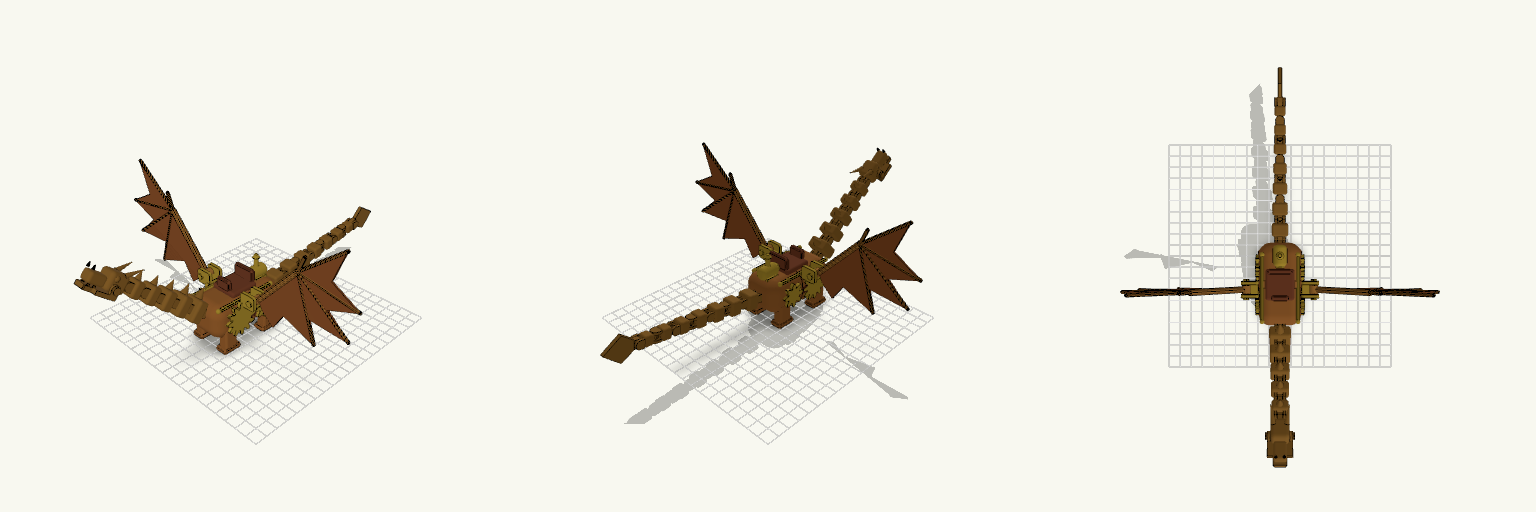
Steampunk Articulated Dragon with Saddle
A print-in-place articulated steampunk dragon with a saddle on its back, a hinged neck, a segmented tail and an opening jaw. It is a standalone figure, so the critical dimension is the hinge clearance. What it has Five-segment neck on pin hinges, tilted up from the chest Seven-segment tail with alternating hinge directions, so it swings both up-down and side-to-side, ending in a blade tip Head with a pinned lower jaw that swings open Saddle with pommel, cantle and girth band Brass-style gears on both flanks, side steam pipes and a boiler with a stack Check before printing Hinges use a 0.4 mm gap per side and 3.8 mm holes on 3 mm pins. Printer tolerance has to hold that, or the joints fuse. Print as-is with no rotation. Supports are needed under the jaw, neck and tail hinges. Break each joint free after printing. Does not fit or do The legs are fixed and the figure has no wings. It is not a scale model of any commercial figure.
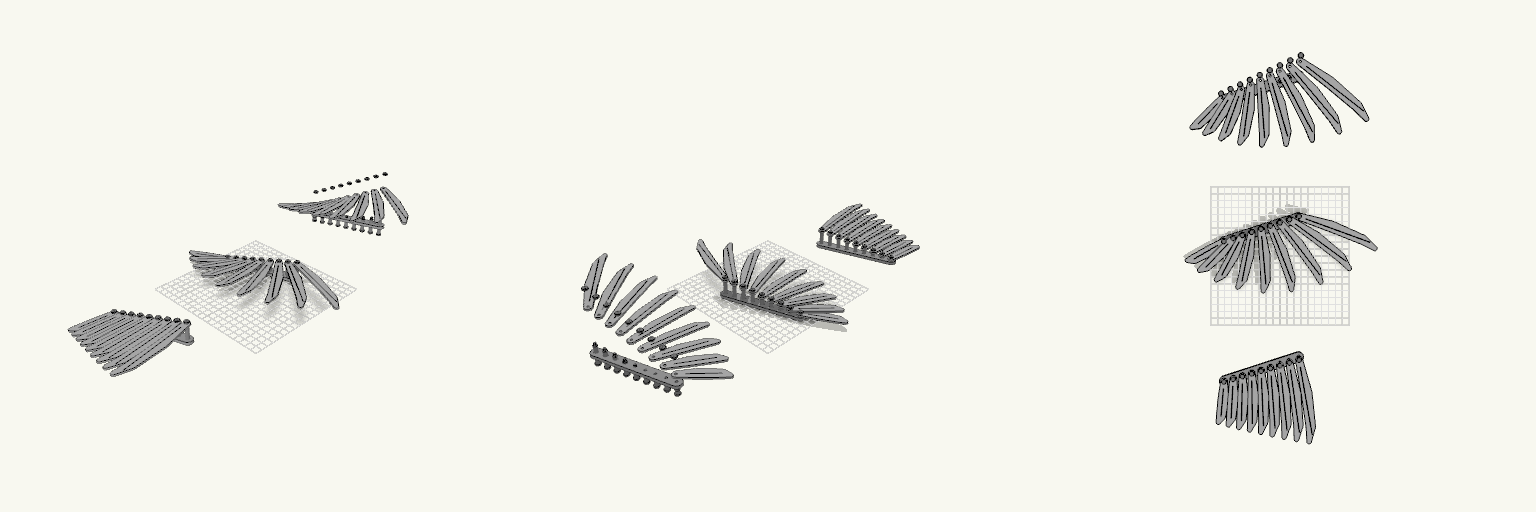
Paper Fan Wing: Pinned Feather Assembly
A paper-prototype fan wing translated into printable parts: nine flat, separate feathers, each pinned to its own pivot hole along an angled upper support. The feathers get longer toward the outer end, and their rounded tips overlap to form the curved lower edge of the wing. Each feather has a faint centerline groove. Parts Upper support: one angled bar with nine pivot holes. Feathers (9): flat, 2 mm thick, with a pivot hole at the narrow end. Pins (9): a flat head under the support, then a collar that sets each feather's layer height. Caps (9): push-on retainers that hold the feathers on. Views Open fan, folded stack and exploded layout, all on one plate. Notes Pivots are 0.25 mm clear per side. Feathers are fanned by hand. No linkage is included yet.
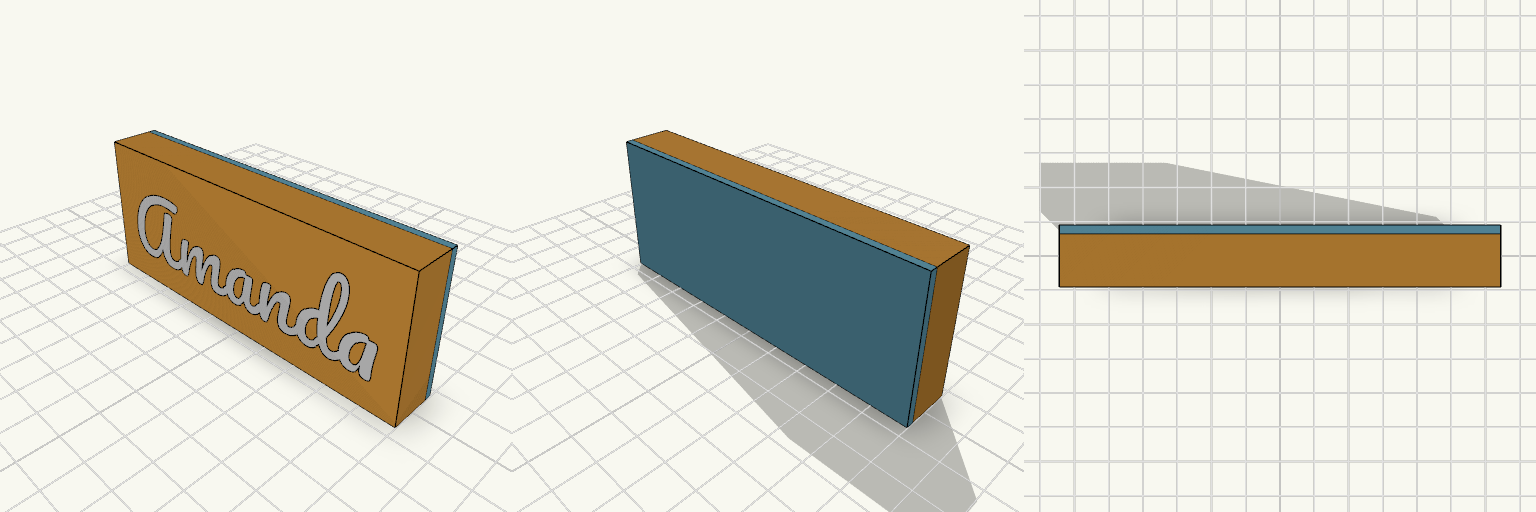
Amanda LED Strip Light Sign
A 100 × 40 mm lighted sign reading "Amanda" in Pacifico, built as three pieces: an opaque body, a thin white translucent letter layer, and a snap-in back cover. Run an LED strip inside the 12 mm deep cavity and the light shows only through the letters. Remix hooks Diffuser thickness (dif, 0.8 mm): thicker glows more evenly and hides LED dots; thinner is brighter. Print in white or natural PLA/PETG. Front wall (face, 1.6 mm): sets how deep the letters are inset. Print the body in a dark or opaque filament so light stays in the letters. Depth (D, 12 mm): increase for a wider strip or a double row of LEDs. Cover fit (clr, 0.2 mm): loosen or tighten for your printer; the 3 mm lip locates the cover. Cord notch: 8 mm wide at the bottom rear; move or widen for a USB lead or barrel jack. Pairs with a USB 5 V LED strip, or a small stand or wall-hanger remix. The counters of the "A" and "d" are separate islands in the body, so glue them to the diffuser sheet.
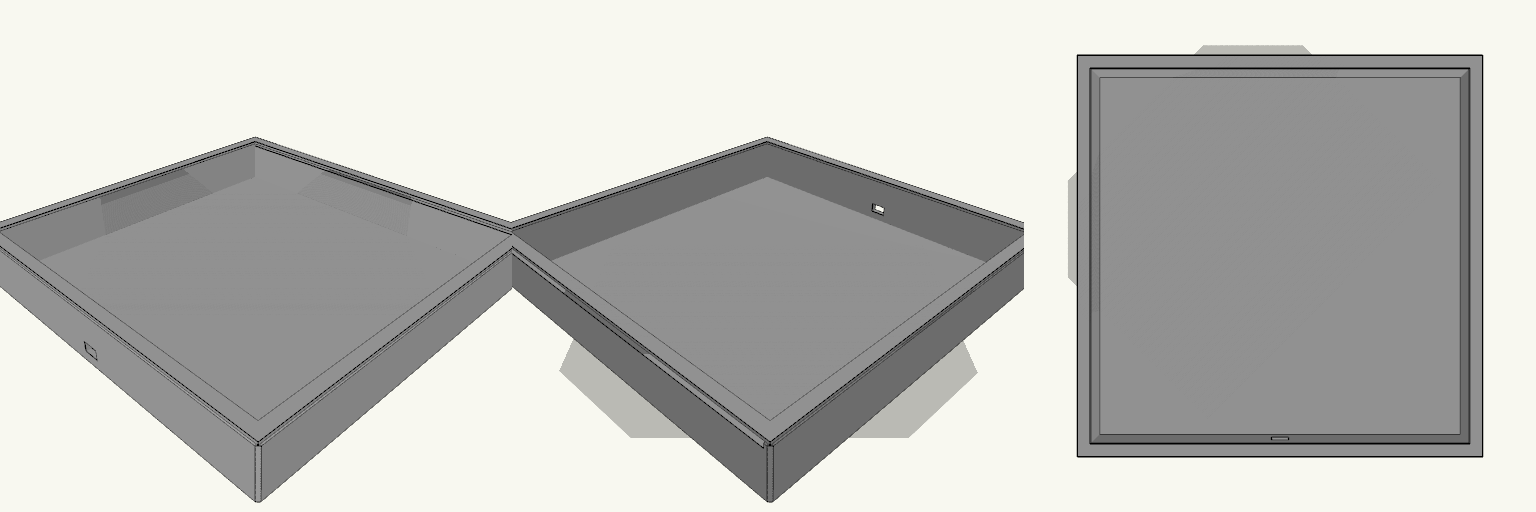
Light Box Picture Frame with Top Loading Slot
A lit picture needs a frame that holds the print flat, leaves room for the LEDs behind it, and gets the power lead out without pinching it. This is that frame: a single printed box with a pocket sized to the picture, a deep cavity behind it for the light source, and a slot along the top edge so the picture slides in without dismantling anything. Fit and build Outside: 223 × 220.9 × 33.5 mm. Picture pocket: 216.5 × 214.4 mm — 0.25 mm clearance per side on a 216 × 213.9 × 3 mm print. Front window: 208 × 205.9 mm, with a 4 mm retaining lip, 1.5 mm thick, around the opening. Lip overlap: it covers 4 mm of the picture's edge on every side, so the picture cannot slide out the front. Light cavity behind the picture: 30 mm deep, enough for an LED strip or panel. Loading: slide the picture in through the slot in the top edge. Cable: 10 mm notch in the bottom edge for a USB or power lead. The picture drops in from the top, the lip holds it at the edges while the rest stays lit, the wire leaves through the bottom where it should, and the whole thing prints as one piece.
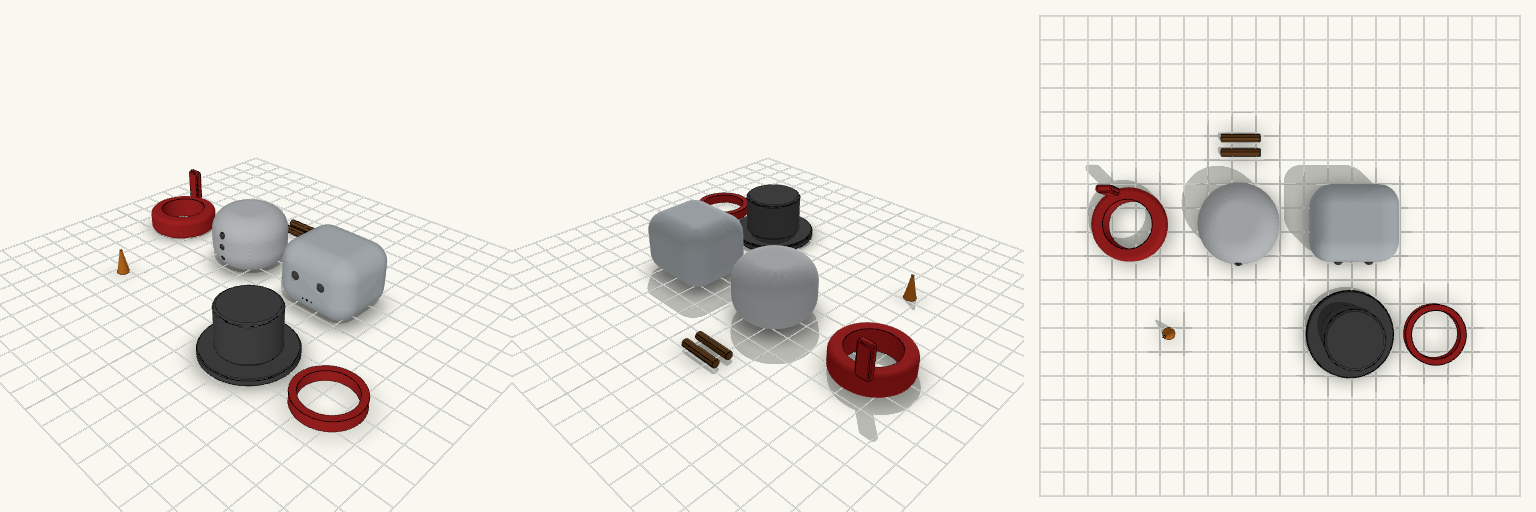
Santa
A Funko-style snowman built as separate pieces: body, square head, top hat and two stick arms. The head has a 17.49 × 17.49 mm square pocket, 9.92 mm deep, in its flat underside. Fit notes Pocket: 17.49 × 17.49 × 9.92 mm in the head underside. Measure your mating part before printing. Head top: flat. The threaded post has been removed. Hat: still carries its threaded socket, so it does not screw onto this head as built. Not fitted: the body has no matching peg for the pocket.
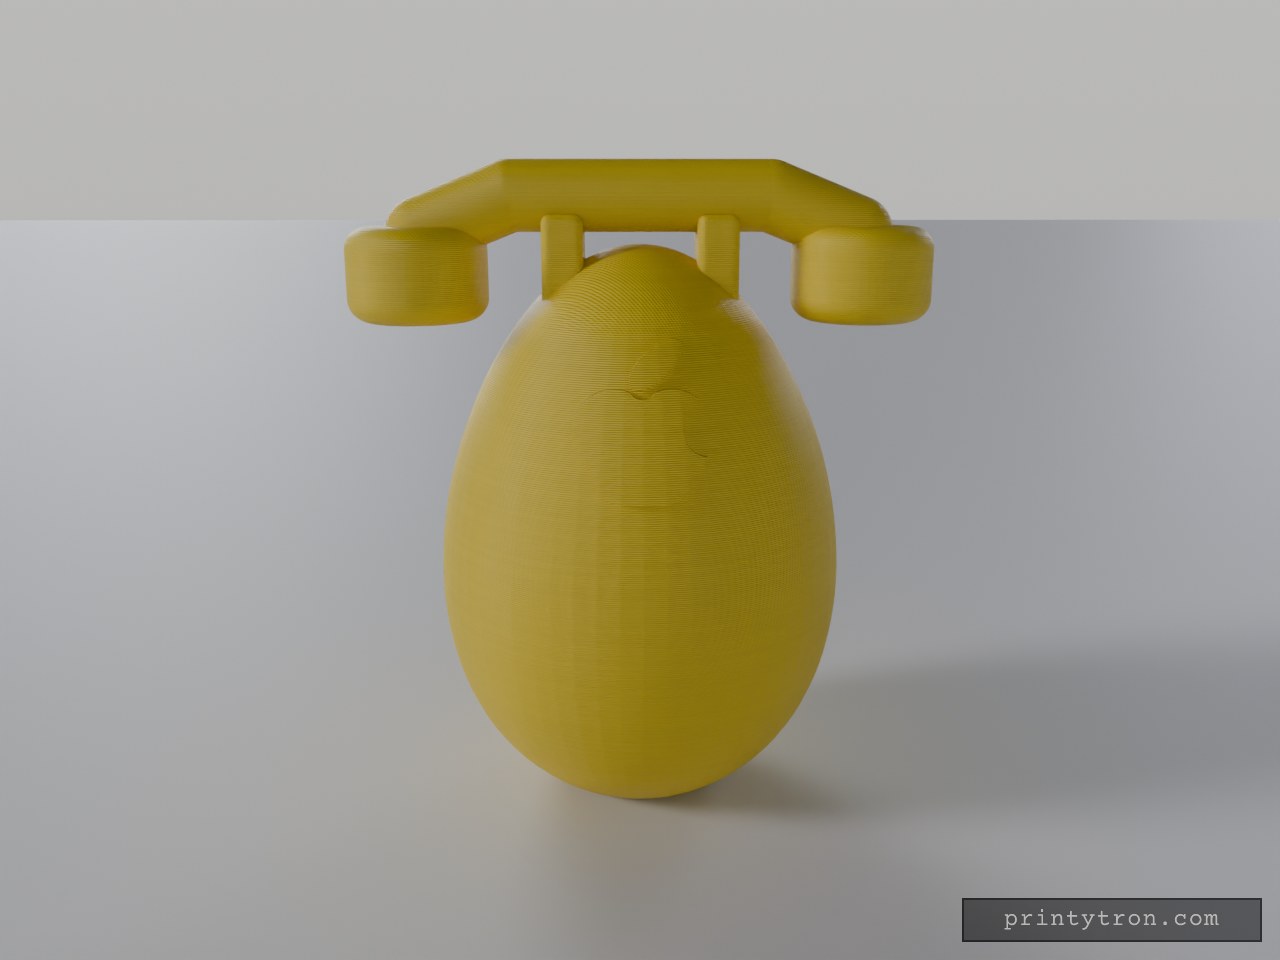
Hollow Two-Piece Egg with Retro Phone
Hollow egg-shaped container that splits horizontally into two shells, with a flat base for standing and a 1970s–80s style telephone handset on top. An embossed apple-style logo sits on the front of the top shell. Wall thickness: 2.5 mm Split at 50 mm height, with a locating lip on the bottom shell Flat base for stable standing Handset: curved grip, two cups, two cradle posts Logo: about 2 cm tall, raised 0.8 mm from the front surface Use: hidden storage, gift box, desk decor
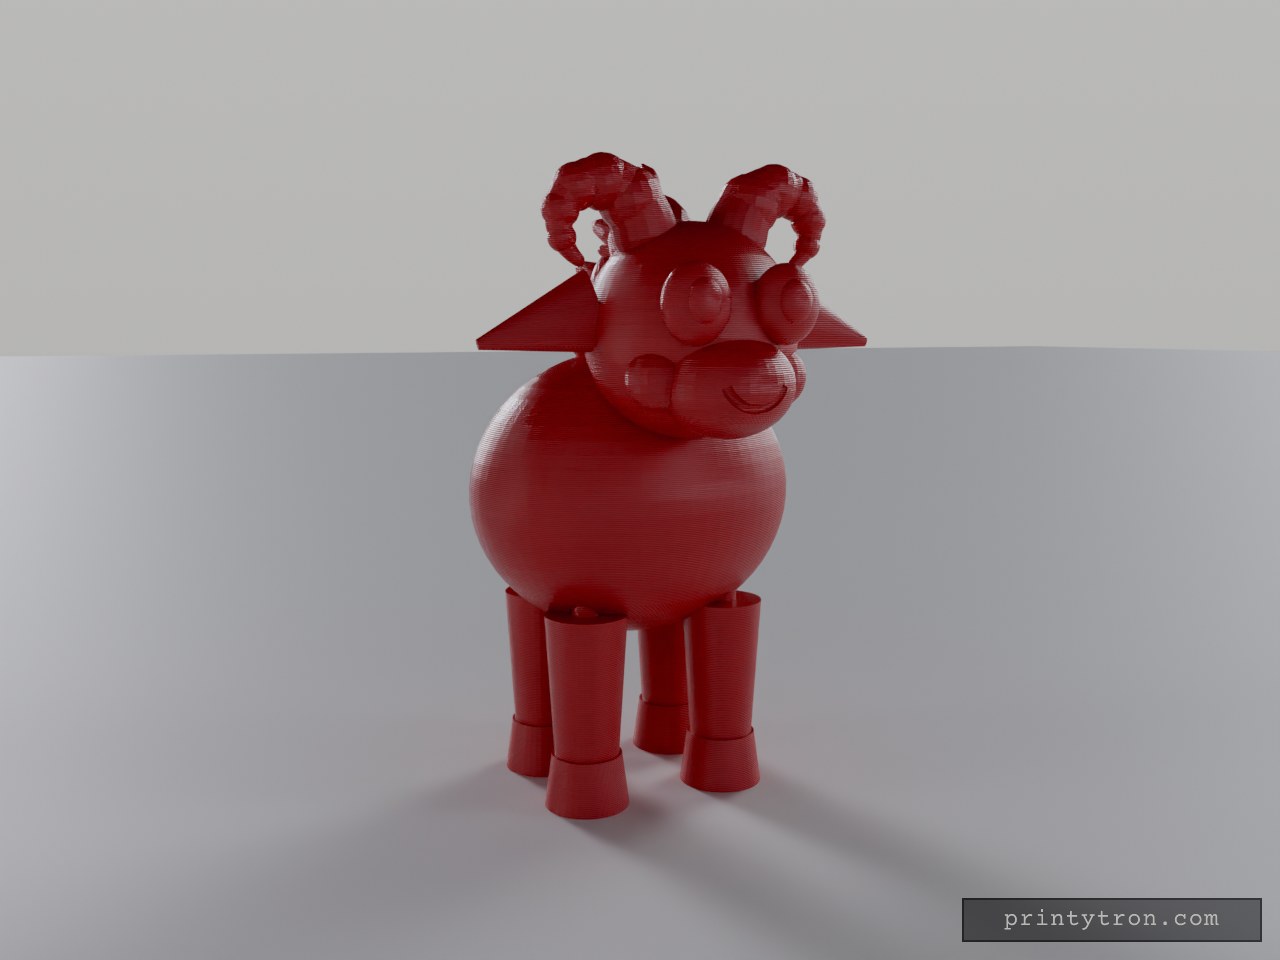
Red Fire Goat Ornament, 120 mm
Multi-part Christmas tree ornament of a cartoon red goat with curled golden horns, amber eyes, a smiling muzzle, a flame-shaped mane and a curled tail. The body carries an integrated hanging loop on top. Head, horns, ears, eyes, pupils, legs, hooves, mane, mane flame tips and tail are separate pieces that join with round pegs and sockets. Height: about 120 mm assembled Joints: round pegs in sockets, 0.2 mm clearance per side Pieces: body, head, horns, ears, eyes, pupils, four legs, four hooves, mane, mane flame tips, tail Colours: red body, gold horns, amber eyes, orange and yellow mane, orange tail Printer: FDM, suited to a Bambu Lab P1S in PLA or PETG Export: a part selector at the top of the file switches between the assembly and each single piece for STL export Supports: horns, tail and mane may need light supports or a tilted orientation
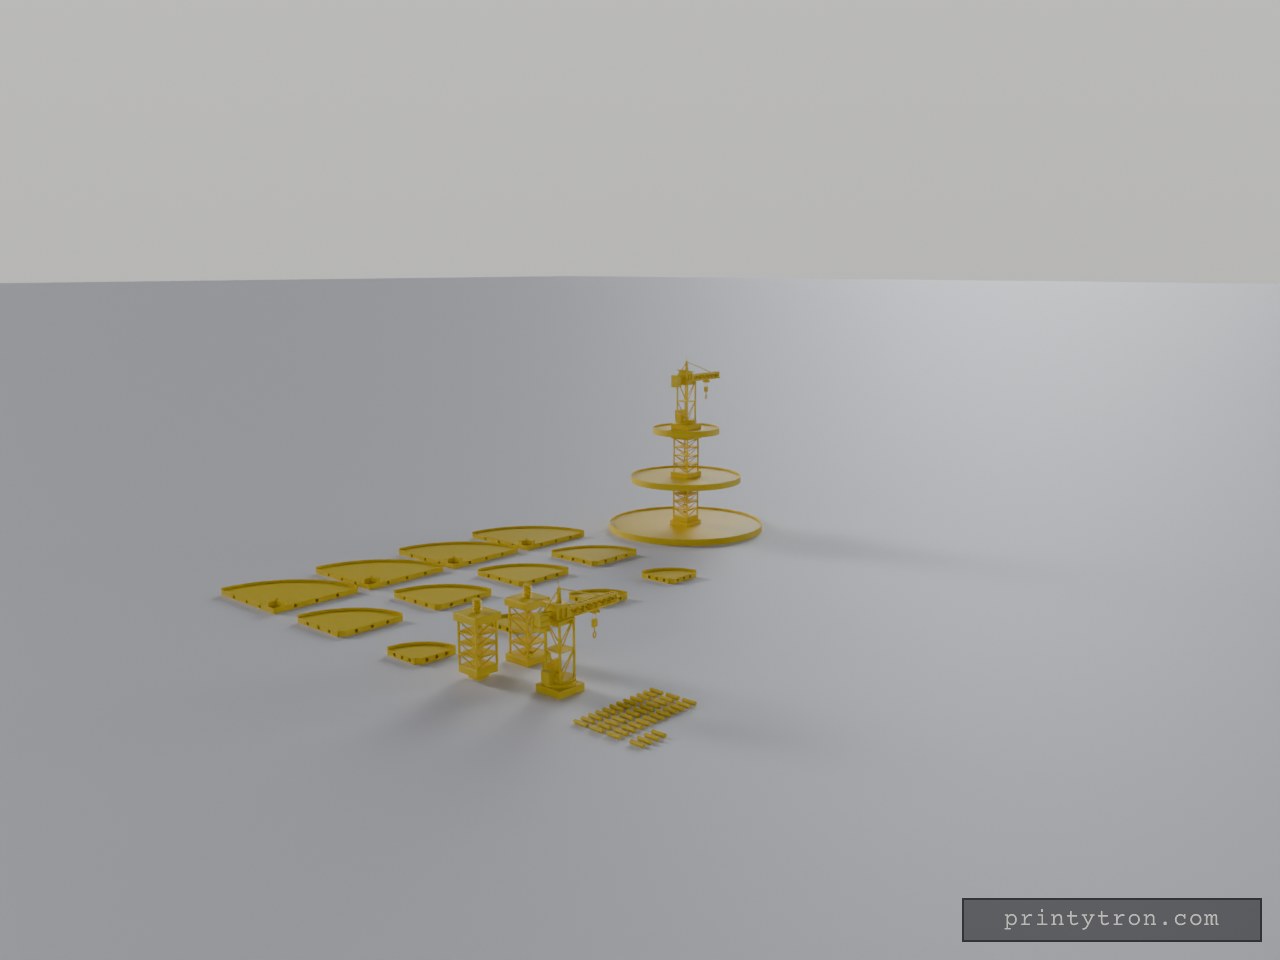
kraancakehouder 35/25/15 totaal volledig af.
Caketoren met drie schijven en een vakwerkkraan met vierkante voet van 50 mm. Wat past waar Onderste plaat (Ø350 mm): vier kwarten met een opstaand vierkant middenblok. Samen vormen ze een zitting van 30,6 mm vierkant, 8,6 mm diep. Kraanmast 1: heeft een vierkante voet van 30 mm met vier klikbolletjes. Die klikt in de zitting. Middelste en bovenste plaat (Ø250 en Ø150 mm): een rond centrumgat van Ø16 mm voor de kraan. Platen: kwarten verbonden met losse pennen Ø6 mm. Controleer voor het printen Meet de voet van mast 1 na. Die moet 30 mm zijn, tegenover een zitting van 30,6 mm. Past niet op een bed kleiner dan 300×300 mm.
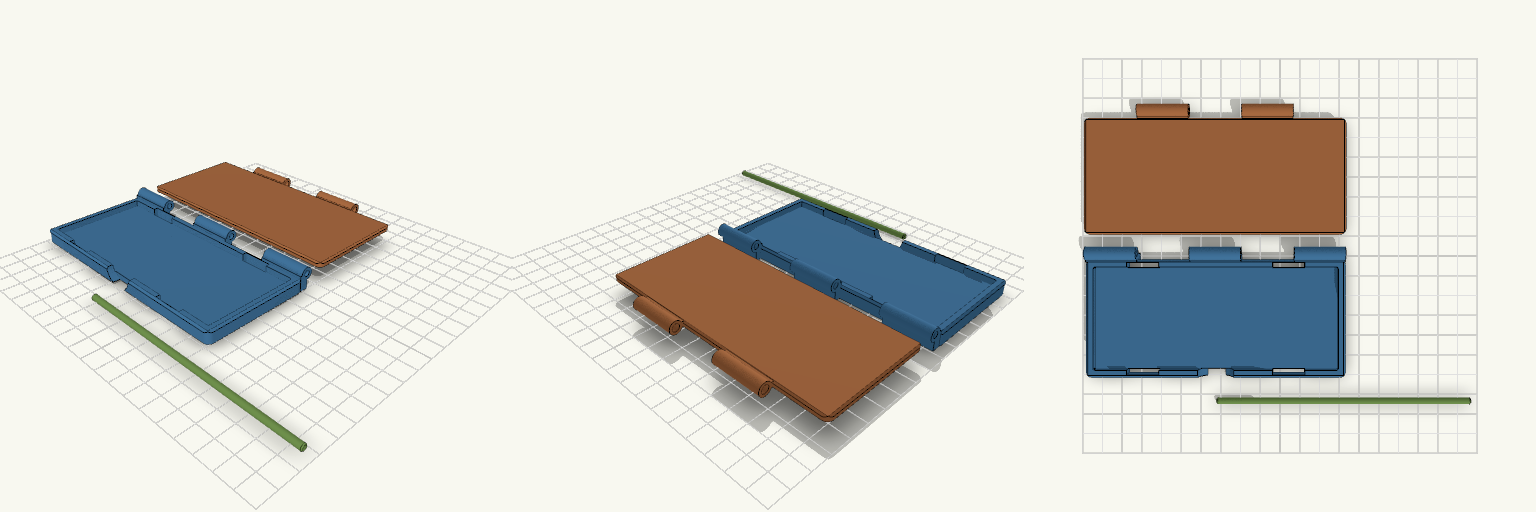
Visor Mirror Housing, Cover and Pin Set
What it's for A slim visor vanity mirror housing with a flip-up cover, split into three separate printed pieces: housing, cover and hinge pin. Glass is supplied by the user. Dimensions Housing: 128 × 58 × 6.5 mm, 1 mm chamfered top edges, 3 mm corners Glass pocket: 121 × 51 × 3.4 mm, for 120 × 50 mm glass Cover: 2.4 mm plate with a 0.4 mm locating lip Hinge pin: 3.2 mm diameter, 127.4 mm long, printed separately Print notes Print all three pieces as laid out on the plate, with no assembly needed before slicing. Slide the pin through the housing knuckles and the cover knuckles after printing. The cover plate sits about 2 mm above the bed at its hinge side, so use supports under it. PETG is recommended for the pin. Remix ideas Add a snap-shut detent. Change the pocket size for different glass. Add a thumb tab on the cover.
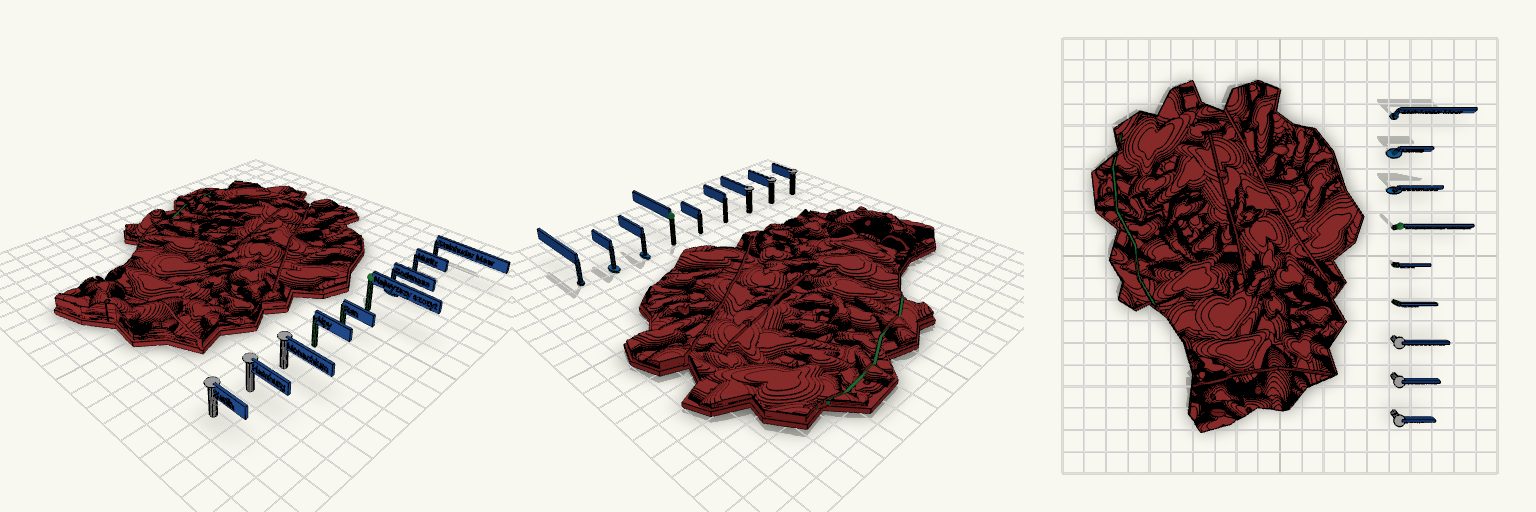
Germania Relief — Wypukła Mapa Niemiec
Germania Relief to wypukła mapa Niemiec z rzeźbą terenu: cała powierzchnia jest lekko falista, także na nizinach, a góry wybijają się ponad nią. Wzniesienia mają gładkie, wielowarstwowe zbocza i nieregularne, powyginane obrysy zamiast regularnych owali. Cztery wyżłobione rzeki przecinają teren, a Ren jest wyróżniony zielonym wypełnieniem koryta, przyciętym do zarysu mapy, oraz tabliczką „Ren”. Znaczniki — trzy miasta, szczyt, Alpy, Ren i jeziora — są osobnymi elementami: leżą płasko obok mapy, bez dodatkowej podstawy, i pasują do gniazd w mapie. Całość czyta się jak dekoracyjna mapa reliefowa, a nie płaski plan. Najważniejsze cechy Ukształtowanie terenu w gładkich, wielowarstwowych zboczach, z Alpami wybijającymi się ponad resztę mapy i zieloną tabliczką „Alpy” Cztery rzeki, w tym Ren z zielonym wypełnieniem koryta przyciętym do zarysu mapy i podpisem; wypełnienie leży w korycie na mapie Trzy największe miasta — Berlin, Hamburg i Monachium — oznaczone wyjmowanymi słupkami z pionową tabliczką z wypukłym napisem Najwyższy szczyt Alp oznaczony wyjmowanym znacznikiem z kulką, kołkiem i tabliczką „Najwyzszy szczyt” Jeziora: Muritz, Bodensee i Steinhuder Meer — niebieskie wkładki w wycięciach, podpisane małymi tabliczkami Wyjmowane znaczniki leżą luzem obok mapy, bez podstawy; po przełożeniu wciska się je w gniazda mapy W zestawie Mapa Niemiec ok. 124 × 160 mm z gniazdami na znaczniki Wyjmowane znaczniki miast, szczytu, Alp, Renu i jezior, leżące płasko obok mapy Znaczniki nie mają osobnej podstawy Druk i montaż Model składa się z mapy i osobnych znaczników. Znaczniki są wciskane w gniazda mapy; pasowanie jest ciasne, więc luzy warto sprawdzić na wydruku. Najdrobniejsze elementy, jak kołek szczytu, są delikatne.
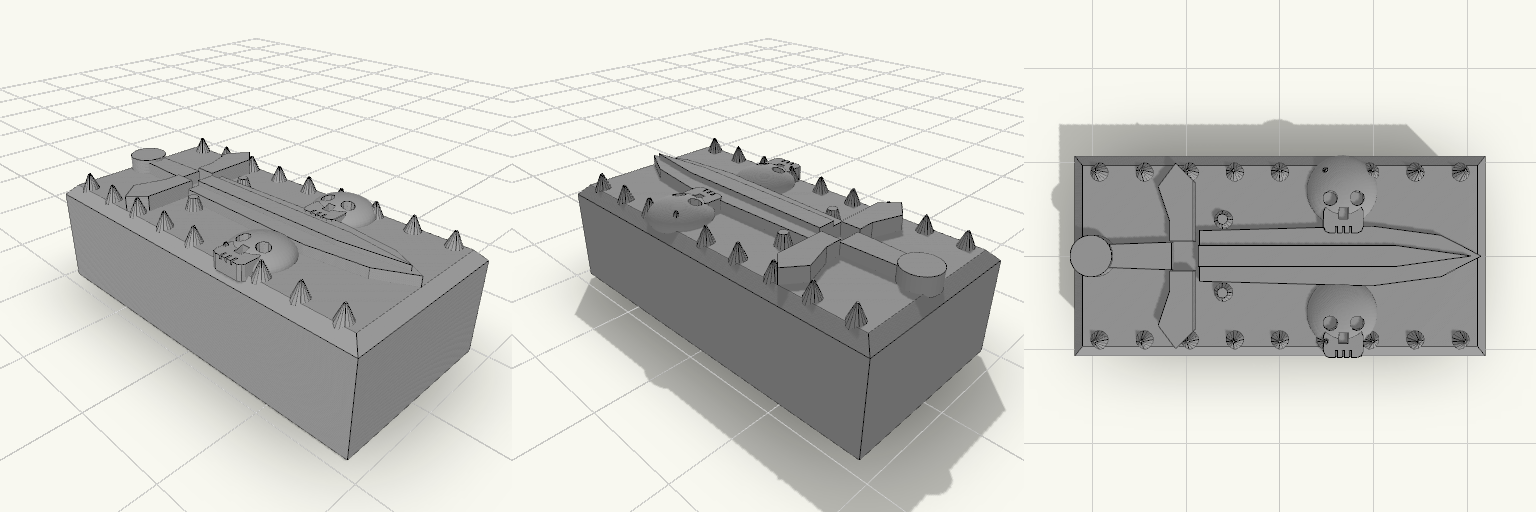
Frostmourne 2U Backspace Keycap
A 37 × 18 × 12 mm hollow 2U keycap with a raised Frostmourne sword running lengthwise across the top, flanked by two relief skulls and a row of small icy spikes along both long edges. It has a Cherry MX cross socket at center and two stabilizer sockets at ±11.9 mm. Remix hooks Wall and top thickness: walls are 1.8 mm and the top plate is 2 mm (cavity ends at z = 8.5). Thicken for strength or thin for less plastic. Relief height: all relief rises about 1.5 mm above the 10.5 mm top surface. Raise it only if the 12 mm height limit isn't a constraint. Skull placement: skulls sit at x = +5.5, y = ±5.4. Move or mirror them to the hilt side, or swap in other emblems. Socket fit: the cross slot is 4.2 × 1.35 mm. Adjust ±0.1 mm to tune for your printer's tolerance. Pairs with: Cherry MX switches and a standard 2U plate-mount or PCB-mount stabilizer. Print upside down, or with the top facing up using a fine layer height such as 0.12 mm. Variants: swap the sword for another motif, or recolor the spikes with a filament change.
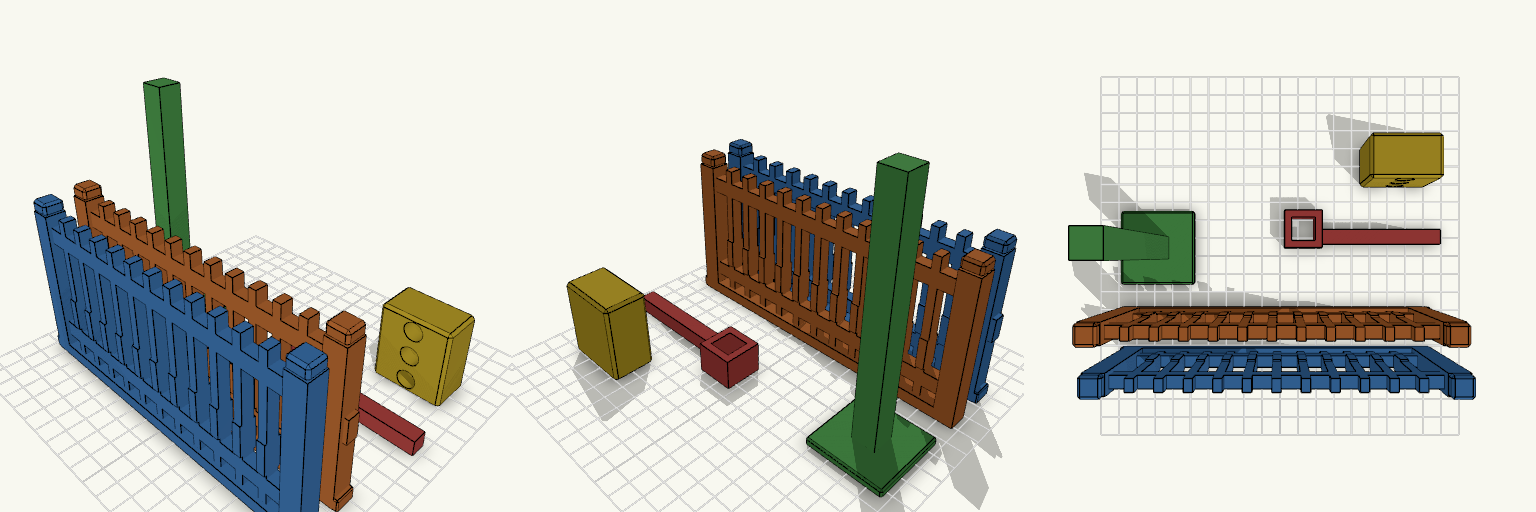
道路围栏和交通灯杆
What it's for A miniature municipal road isolation set in the style of a city traffic median fence: a matched pair of guardrail sections plus a centre traffic-light assembly. All five pieces are independent parts with no merged or intersecting geometry, so each prints and finishes on its own and is glued together afterwards. The full set fits inside a 225 × 145 × 140 mm print envelope. LeftMunicipalFence and RightMunicipalFence — mirrored guardrail sections that flank the scene TrafficLightPoleMain — the centre pole the signal assembly stands on TrafficLightArm — the cantilever that carries the signal head out over the road TrafficLightHousing — the three-lamp signal head at the end of the arm Dimensions LeftMunicipalFence and RightMunicipalFence: 170 × 10 × 85 mm each. Two 10 × 10 mm end posts with chamfered caps, a top rail, a bottom rail and 11 vertical slats, each slat carrying a raised marking block on its lower half. A small reflector tab on the outer face of the end post is included in the 170 mm width. The right fence is a mirror of the left. TrafficLightPoleMain: a 12 × 12 mm square pole, 130 mm tall, on a 40 × 40 × 4 mm base plate. TrafficLightArm: an 8 × 8 × 75 mm arm with a 20 × 20 × 16 mm slip-on socket; the socket opening is 12.6 mm, leaving about 0.3 mm clearance per side on the pole. TrafficLightHousing: 36 × 22 × 42 mm, with three 10 mm lamp recesses and a closed back. Nothing is thinner than 2.4 mm, and the whole set is set up for a 0.4 mm nozzle. Assembly Print all five parts separately. Set the left fence on one side and the right fence on the other, with the pole standing in the gap between them. The arm slips over the pole, and the housing mounts at the end of the arm. Join the parts with glue after printing — no pre-joined geometry is included. Print notes Every piece is built from simple prismatic shapes with flat starting surfaces: the fence base feet and the pole base plate sit directly on the bed, and no part needs support. Orient the fences upright and stand the pole on its base plate. Colours Each part prints as a single colour, so the dark post bases, the marking blocks on the slats and the reflector tab are all part of the fence's own body. Paint them after printing, or change filament mid-print, to pick them out. Remix ideas Repeat or scale the fence sections to build a longer median run. Swap the three-lamp housing for a different signal head or a blank cap. Use the pole and arm as a mount for street signs, lamps or other scene accessories. Print the fences in a contrasting colour to the pole and housing for a clearer model-road look.
Need a part that doesn't exist yet?
Start building →